
Operation Manual
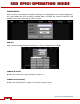

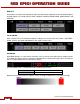
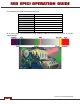


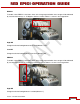
Table Of Contents
- RED EPIC® OPERATION GUIDE
- TABLE OF CONTENTS
- DISCLAIMER
- COMPLIANCE
- BEFORE YOU START
- THEORY OF OPERATION
- CAMERA OPERATIONAL CONTROLS
- BASIC OPERATION
- FIRST TIME USE – SETTING UP YOUR RED EPIC
- MENU CONTROLS
- MAIN MENU
- SECONDARY MENUS
- APPENDIX A: UPGRADING CAMERA FIRMWARE
- APPENDIX B: MANAGING DIGITAL MEDIA
- APPENDIX C: CHARGING BATTERIES
- APPENDIX D: INPUT / OUTPUT CONNECTORS
- APPENDIX E: REDMOTE OPERATION
- APPENDIX F: 3D SETUP / OPERATION
- APPENDIX G: EXPOSURE – USING FALSE COLOR AND ISO
- APPENDIX H: POST PRODUCTION
- APPENDIX I: TROUBLESHOOTING
- APPENDIX J: MAINTENANCE
- APPENDIX K: TECHNICAL DATA
- APPENDIX L: MENU MAPS
Version 1.4.0 SVN 29352 BETA
APRIL 19, 2011 ©2011 RED.COM INC.
77
ZEBRA 1
To enable, select ZEBRA 1 check box. Areas of the image exposed within these ranges will be indicated
by crosshatched overlays at - 45 degrees relative to vertical. Zebra 1 is shown in the image below.
High IRE
Change the desired setting between 93 and 109 (default is 108).
Low IRE
Change the desired setting between 75 and 107 (default is 99).
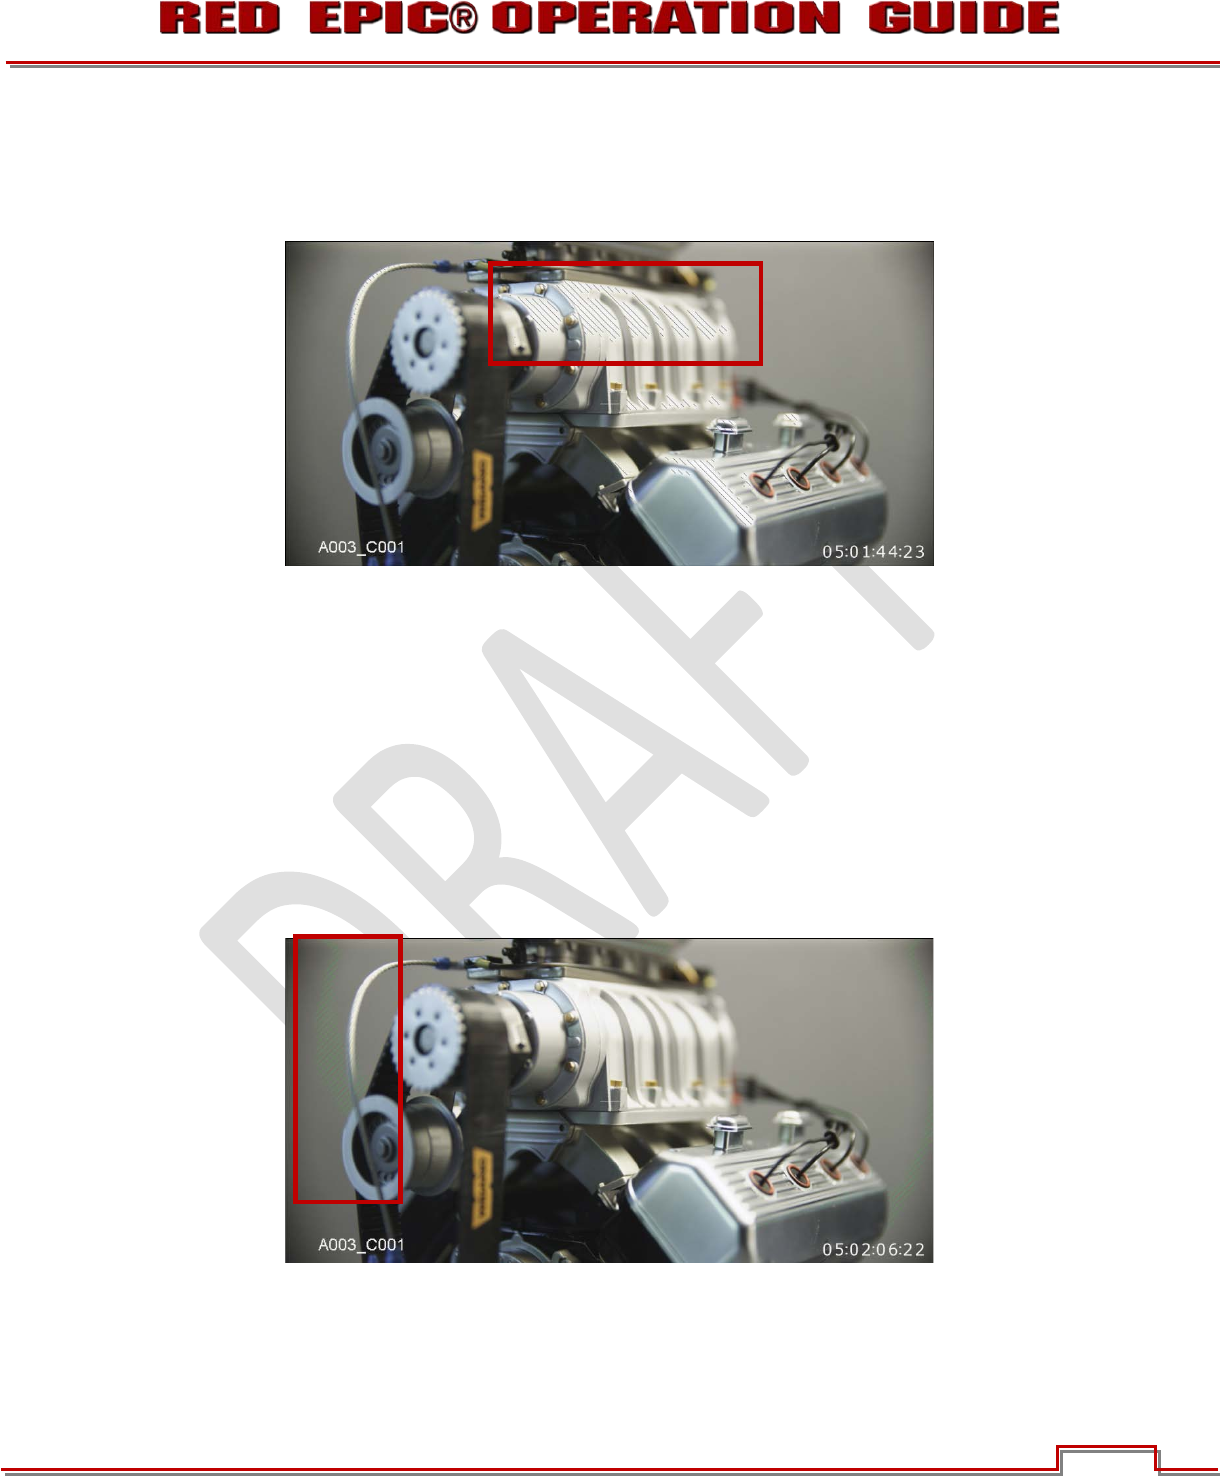
ZEBRA 2
To enable, select ZEBRA 2 check box. Areas of the image exposed within these ranges will be indicated
by crosshatched overlays at + 45 degrees relative to vertical. Zebra 2 is shown in the image below.
High IRE
Change the desired setting between 1 and 99 (default is 1).