
Operation Manual


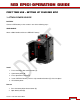
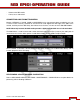
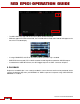
Table Of Contents
- RED EPIC® OPERATION GUIDE
- TABLE OF CONTENTS
- DISCLAIMER
- COMPLIANCE
- BEFORE YOU START
- THEORY OF OPERATION
- CAMERA OPERATIONAL CONTROLS
- BASIC OPERATION
- FIRST TIME USE – SETTING UP YOUR RED EPIC
- MENU CONTROLS
- MAIN MENU
- SECONDARY MENUS
- APPENDIX A: UPGRADING CAMERA FIRMWARE
- APPENDIX B: MANAGING DIGITAL MEDIA
- APPENDIX C: CHARGING BATTERIES
- APPENDIX D: INPUT / OUTPUT CONNECTORS
- APPENDIX E: REDMOTE OPERATION
- APPENDIX F: 3D SETUP / OPERATION
- APPENDIX G: EXPOSURE – USING FALSE COLOR AND ISO
- APPENDIX H: POST PRODUCTION
- APPENDIX I: TROUBLESHOOTING
- APPENDIX J: MAINTENANCE
- APPENDIX K: TECHNICAL DATA
- APPENDIX L: MENU MAPS
Version 1.4.0 SVN 29352 BETA
APRIL 19, 2011 ©2011 RED.COM INC.
45
- Reformat the SSD media.
- Frame, focus and record.
CONNECTING AND FORMATTING MEDIA
Identify a REDMAG 1.8” 64GB, 128GB or 256GB SSD that has not previously been recorded to, or is not
a camera master and may therefore be erased and re-used. Aligned the RED logo of the SSD to the
outside, and then push the SSD firmly, but without excessive force, into the slot in the Side SSD Module.
NOTE: When fully inserted, the SSD media protrudes slightly from the SSD slot as indicated above.
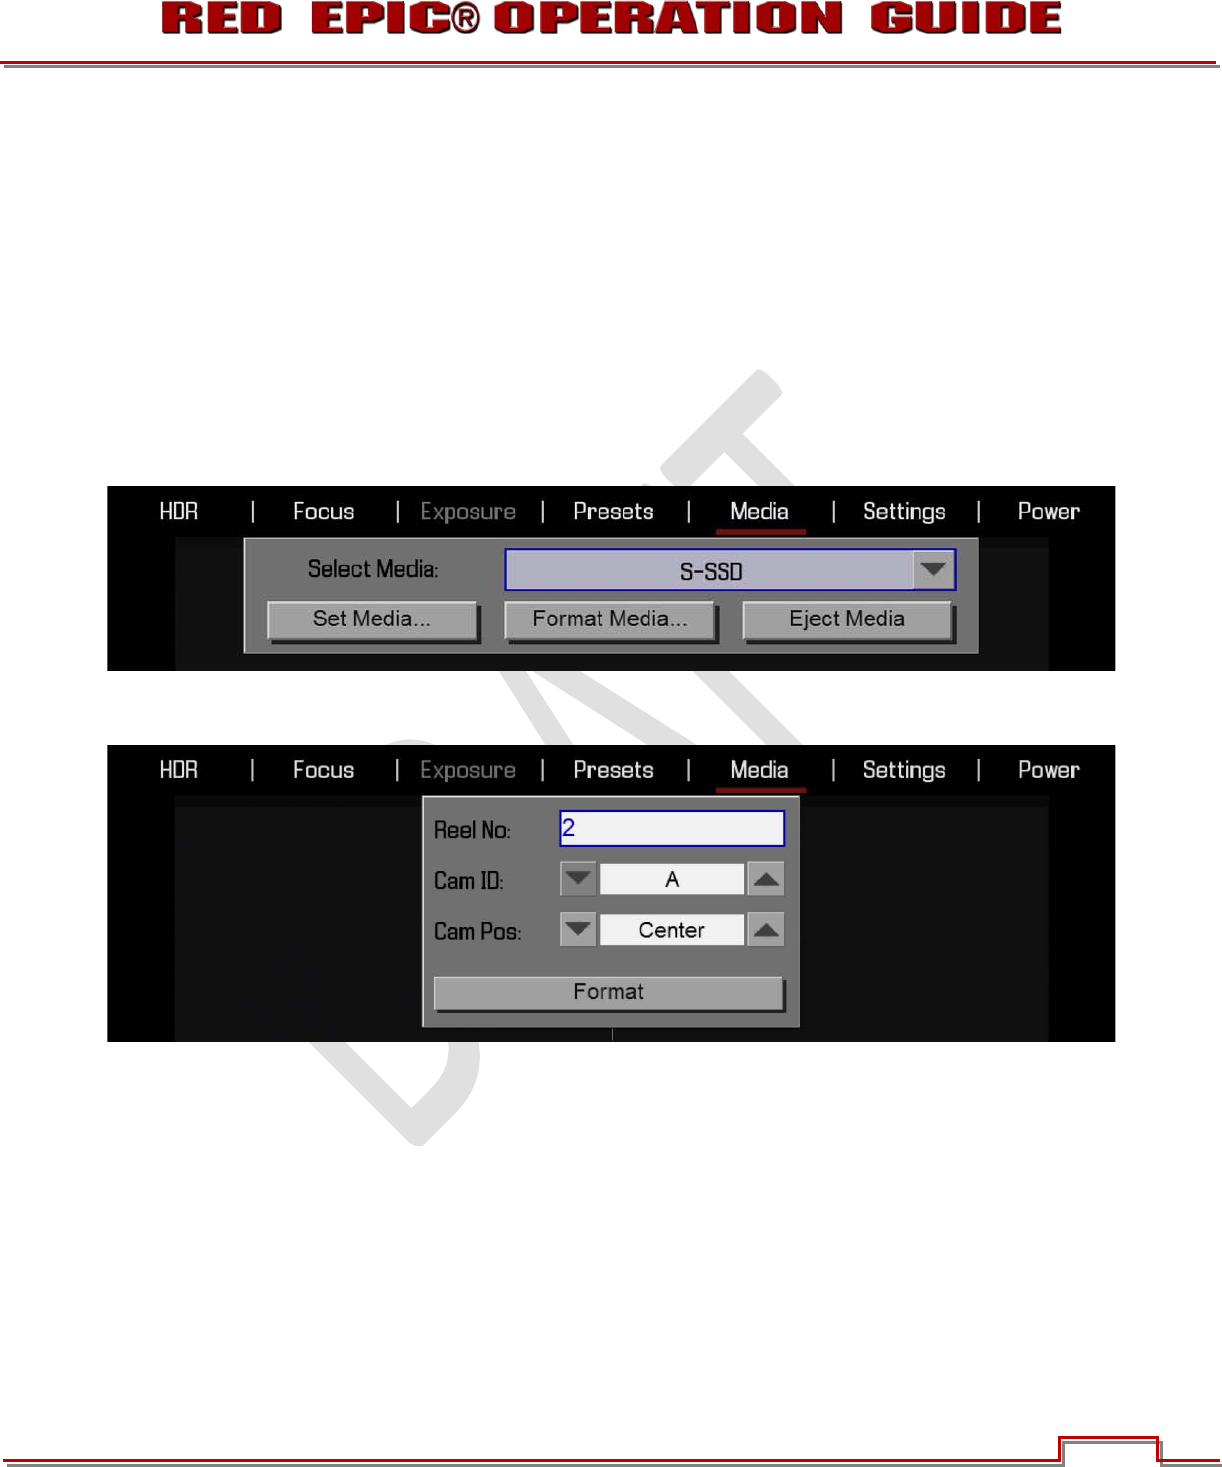
The Media Menu is used to format and number attached media and to Eject (unmount) the media prior to
removal from the camera. Menu options include Select Media, Format Media and Eject Media.
When FORMAT is selected, a SLATE dialog box will appear allowing you to add Camera Identity and 3D
Position properties when formatting.
PERFORMING A BLACK SHADING CALIBRATION
Refer to SECONDARY MENUS > SETTINGS > MAINTENANCE > CALIBRATION for complete details for
performing a Black Shading Calibration.