
Operation Manual
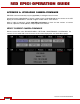

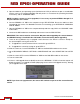
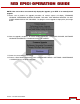

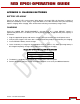
Table Of Contents
- RED EPIC® OPERATION GUIDE
- TABLE OF CONTENTS
- DISCLAIMER
- COMPLIANCE
- BEFORE YOU START
- THEORY OF OPERATION
- CAMERA OPERATIONAL CONTROLS
- BASIC OPERATION
- FIRST TIME USE – SETTING UP YOUR RED EPIC
- MENU CONTROLS
- MAIN MENU
- SECONDARY MENUS
- APPENDIX A: UPGRADING CAMERA FIRMWARE
- APPENDIX B: MANAGING DIGITAL MEDIA
- APPENDIX C: CHARGING BATTERIES
- APPENDIX D: INPUT / OUTPUT CONNECTORS
- APPENDIX E: REDMOTE OPERATION
- APPENDIX F: 3D SETUP / OPERATION
- APPENDIX G: EXPOSURE – USING FALSE COLOR AND ISO
- APPENDIX H: POST PRODUCTION
- APPENDIX I: TROUBLESHOOTING
- APPENDIX J: MAINTENANCE
- APPENDIX K: TECHNICAL DATA
- APPENDIX L: MENU MAPS

Version 1.4.0 SVN 29352 BETA
APRIL 19, 2011 ©2011 RED.COM INC.
119
APPENDIX C: CHARGING BATTERIES
BATTERY LED ARRAY
Consists of three (3) LED’s and a button. When button is pressed, LEDs will illuminate in relation to
battery life available (in 33.3% steps). If single LED blinks or no LEDs illuminate when pressed, battery
requires charging. When charging, LEDs will illuminate indicating current battery charge status.
CHARGING
Using the supplied RED TRAVELCHARGER™, recharge time for a single REDVOLT battery is
approximately 90 minutes. The battery can also be partially charged, to approximately 80% capacity, in
60 minutes.
1. Plug the supplied AC power cord into the charger’s AC input and then into the AC power source.
2. Verify that the charger’s LED status bar is solid Red (indicating ready to receive battery for charging).
3. Insert a REDVOLT battery into the charger.
4. Leave the battery to charge for the appropriate time as shown in the table (assuming battery is
discharged completely). Charger status LED flashes Orange while charging.
Charging RED-BRICK 140Wh using RED TRAVELCHARGER
Charge Amount% (Minutes)
80 (60)
100 (90)
5. The battery is completely charged when the charger status LED turns green.
6. Remove the battery from the charger and repeat operation as necessary for additional batteries.