
Operation Manual


Table Of Contents
- RED EPIC® OPERATION GUIDE
- TABLE OF CONTENTS
- DISCLAIMER
- COMPLIANCE
- BEFORE YOU START
- THEORY OF OPERATION
- CAMERA OPERATIONAL CONTROLS
- BASIC OPERATION
- FIRST TIME USE – SETTING UP YOUR RED EPIC
- MENU CONTROLS
- MAIN MENU
- SECONDARY MENUS
- APPENDIX A: UPGRADING CAMERA FIRMWARE
- APPENDIX B: MANAGING DIGITAL MEDIA
- APPENDIX C: CHARGING BATTERIES
- APPENDIX D: INPUT / OUTPUT CONNECTORS
- APPENDIX E: REDMOTE OPERATION
- APPENDIX F: 3D SETUP / OPERATION
- APPENDIX G: EXPOSURE – USING FALSE COLOR AND ISO
- APPENDIX H: POST PRODUCTION
- APPENDIX I: TROUBLESHOOTING
- APPENDIX J: MAINTENANCE
- APPENDIX K: TECHNICAL DATA
- APPENDIX L: MENU MAPS
Version 1.4.0 SVN 29352 BETA
APRIL 19, 2011 ©2011 RED.COM INC.
113
NOTE: If the camera does not automatically display the upgrade, go to STEP 11 to manually install
upgrade.
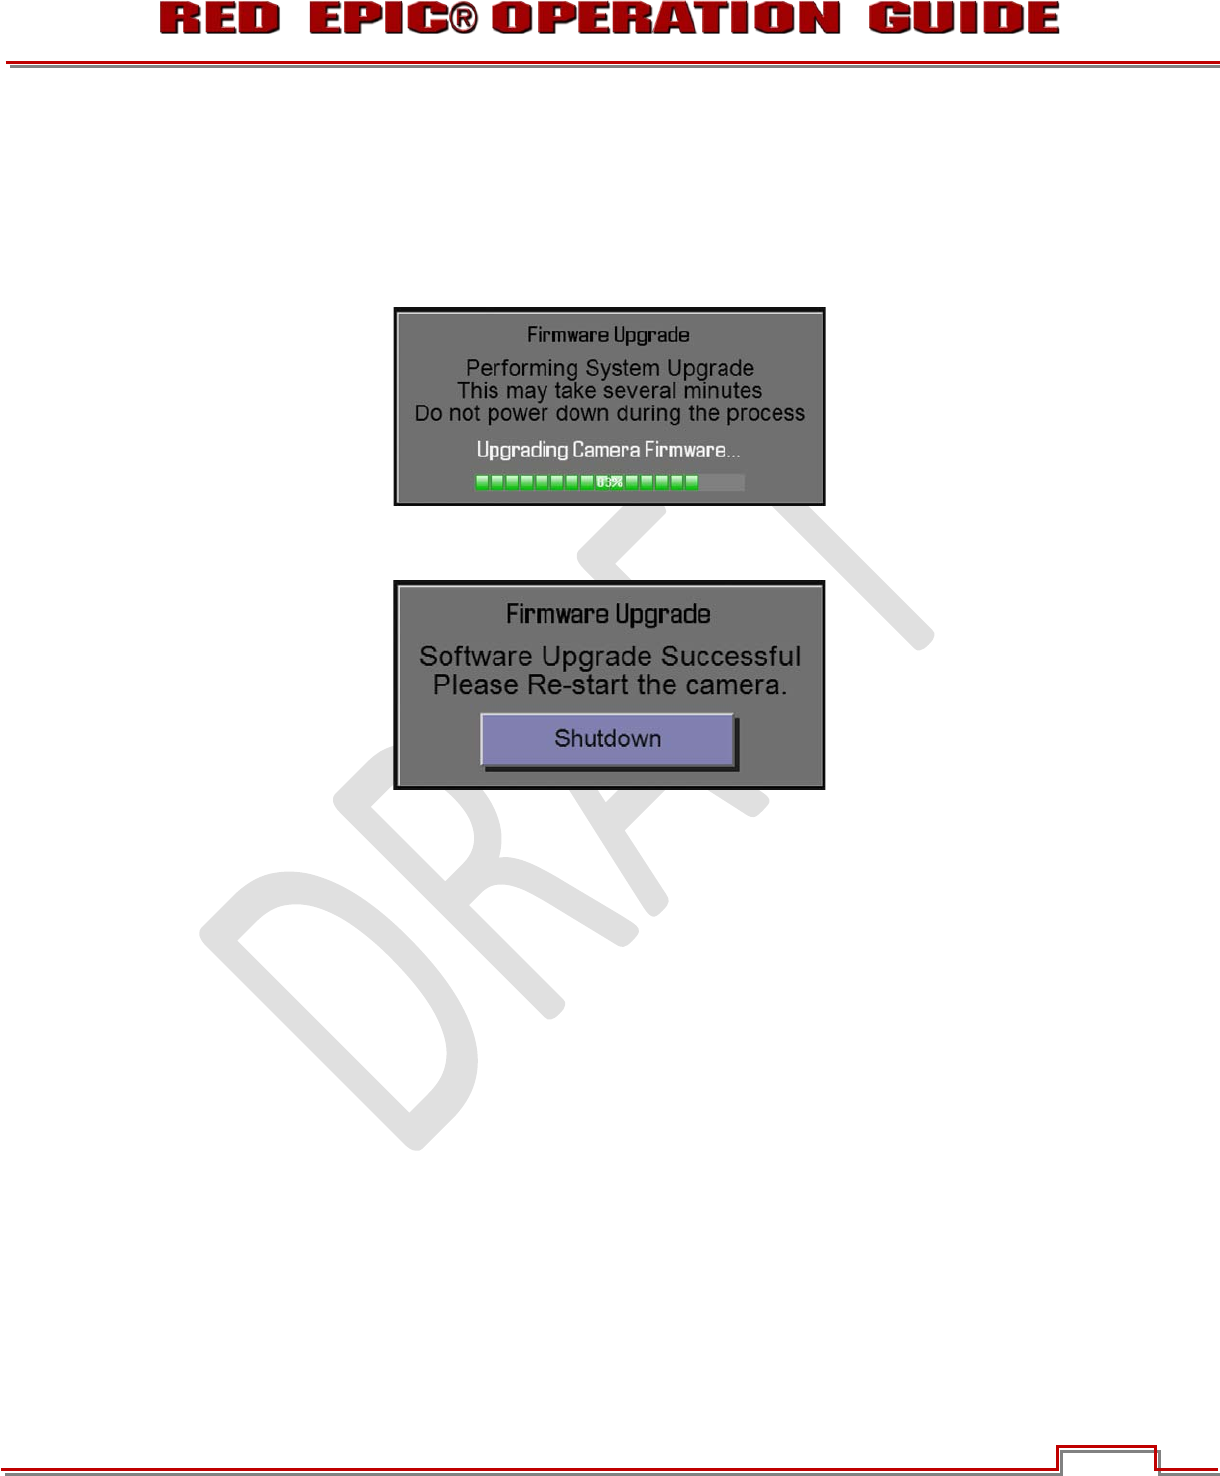
15. Select now to perform the upgrade procedure. All monitor outputs will display “FIRMWARE
UPGRADE, PERFORMING SYSTEM UPGRADE, THIS MAY TAKE SEVERAL MINUTES, DO NOT
POWER DOWN DURING THE PROCESS”. The progress of the upgrade is displayed in percentage
below.
16. After the upgrade completes, all monitor outputs will display “FIRMWARE UPGRADE, SOFTWARE
UPGRADE SUCCESSFUL, PLEASE RE-START THE CAMERA”.
17. Power the camera down and back up.
18. Perform a Dark Shading Calibration. Refer to SECONDARY MENUS > SETTINGS > MAINTENANCE
> CALIBRATION for complete information.