
Installation guide


120 Websense Installation Guide
Chapter 4: Installing Websense Enterprise or Web Security Suite
2. Following the Custom installation path brings you to the component
selection screen. Select eDirectory Agent and click Next.
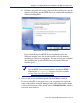
The installer asks you to identify the machine on which the Policy Server
is installed.
3. Enter the IP address of the Policy Server machine, and the port number if
different from the default, and then click Next.
If the installation machine is multihomed, all enabled network interface
cards (NICs) with an IP address appear in a list.
4. Select the IP address of the card you want eDirectory Agent to use to
communicate and click Next.
The installer asks for the Novell eDirectory name and password.
5. Enter the full distinguished name and a valid password, and then click
Next to continue.
The installer asks you to select an installation folder for the Websense
components.
6. Accept the default path (
C:\Program Files\Websense) or click
Browse to locate another installation folder, and then click Next to
continue.
The installer compares the system requirements for the installation you
have selected with the resources of the installation machine. If the
machine has inadequate disk space or memory, separate warnings are
displayed:
If the installation machine has insufficient disk space, the selected
components cannot be installed, and the installer will quit.
If the installation machine has less than the recommended amount of
memory, the installation can continue. To ensure the best performance
of the components you are installing, you should upgrade your
machine’s memory to the recommended amount.
Note
The configuration port (55806) in this dialog box is the
default port number used by the installer to install the
Policy Server. If you installed the Policy Server using a
different port number, enter that port number in this dialog
box.