
Installation guide

190 Chapter 21. Printer Configuration
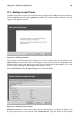
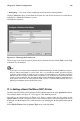
Click the Apply button in the main window to save your changes to the /etc/printcap
configuration file and restart the printer daemon (lpd). After applying the changes, print a
test page to ensure the configuration is correct. Refer to Section 21.7 for details.
If you need to print characters beyond the basic ASCII set (including those used for
languages such as Japanese), you need to go to your driver options and select Prerender
Postscript. Refer to Section 21.8 for details. You can also configure options such as paper
size if you edit the print queue after adding it.
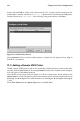
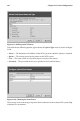
21.7. Printing a Test Page
After you have configured your printer, you should print a test page to make sure the printer
is functioning properly. To print a test page, select the printer that you want to test from the
printer list, and select the appropriate test page from the Test pulldown menu.
If you change the print driver or modify the driver options, you should print a test page to
test the different configuration.
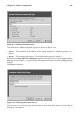
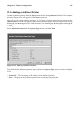
21.8. Modifying Existing Printers
To delete an existing printer, select the printer and click the Delete button on the toolbar. The
printer will be removed from the printer list. Click Apply to save the changes and restart the
printer daemon.
To set the default printer, select the printer from the printer list and click the Default button
on the toolbar. The default printer icon
appears in the first column of the printer list
beside the default printer.
If you want to modify an imported printer’s settings, you cannot modify its settings directly.
You must override the printer. You can only override an imported printer that has been
imported using the alchemist libraries. Imported printers have the
symbol beside them
in the first column of the printer list.
To override the printer, select the printer, and choose File => Override Queue from the
pulldown menu. After overriding a printer, the original imported printer will have the
symbol beside it in the first column of the printer list.
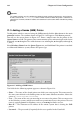
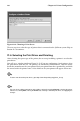
After adding your printer(s), you can edit settings by selecting the printer from the printer
list and clicking the Edit button. The tabbed window shown in Figure 21-16 will appear.
The window contains the current values for the printer that you selected to edit. Make any
changes, and click OK. Click Apply in the main printconf window to save the changes and
restart the printer daemon.