
Installation guide


120 Chapter 13. Apache Configuration
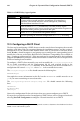
Figure 13-1. Basic Settings
Enter a fully qualified domain name that you have the right to use in the Server Name text
area. This option corresponds to the ServerName directive in httpd.conf. The ServerName
directive sets the hostname of the Web server. It is used when creating redirection URLs. If
you do not define a server name, Apache attempts to resolve it from the IP address of the
system. The server name does not have to be the domain name resolved from the IP address
of the server. For example, you might want to set the server name to www.your_domain.com
when your server’s real DNS name is actually foo.your_domain.com.
Enter the email address of the person who maintains the Web server in the Webmaster email
address text area. This option corresponds to the ServerAdmin directive in httpd.conf. If
you configure the server’s error pages to contain an email address, this email address will
be used so that users can report a problem by sending email to the server’s administrator.
The default value is root@localhost.
Use the Available Addresses area to define the ports on which Apache will accept incoming
requests. This option corresponds to the Listen directive in httpd.conf. By default, Red
Hat configures Apache to listen to port 80 for non-secure Web communications. Click the
Add button to define additional ports on which to accept requests. A window as shown in
Figure 13-2 will appear. Either choose the Listen to all addresses option to listen to all IP
addresses on the defined port or specify a particular IP address over which the server will
accept connections in the Address field. Only specify one IP address per port number. If you
want to specify more than one IP address with the same port number, create an entry for
each IP address. If at all possible, use an IP address instead of a domain name to prevent
a DNS lookup failure. Refer to http://httpd.apache.org/docs/dns-caveats.html for more
information about Issues Regarding DNS and Apache. Entering an asterisk (*) in the Address
field is the same as choosing Listen to all addresses. Clicking the Edit button shows the
same window as the Add button except with the fields populated for the selected entry. To
delete an entry, select it and click the Delete button.