
Installation guide

How to Configure a SiteMinder Web Agent on IIS 7.0
90 Web Agent Installation Guide
To add the agent ISAPI filter to additional web sites that you want to
protect with SiteMinder
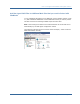
1. Open the Internet Information Services (IIS) Manager.
Note: If the User Account Control dialog appears, click Continue.
2. In the Connections pane, expand the web server.
The Sites folder appears.
3. Expand the Sites folder, and then click the icon of the additional web site that
you want to protect with SiteMinder.
4. Under the IIS section, double-click ISAPI Filters.
The ISAPI Filters screen appears.
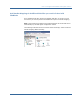
5. Under the actions pane, click Add.
The Add ISAPI Filter dialog appears.
6. Type a name for the filter. We recommend using a name that is easy to
recognize, such as "SiteMinder ISAPI Filter."
7. Click the ellipsis button (to the right of the Executable field).
The Open dialog appears.
8. Navigate to the following file:
web_agent_home\bin\ISAPI6WebAgent.DLL
9. Click Open.
The ISAPI6WebAgentDLL.dll file appears in the Add ISAPI Filter dialog.
10. Click OK.
The Add ISAPI Filter dialog closes and the SiteMinder ISAPI Filter appears in
the list.
11. Repeat Steps 3 through 10 to protect any other additional (non-default) web
sites with SiteMinder.