
User guide

Chapter 7: Developing Applications
7-40
(2) Deploying Servlet Application
Use the Interstage Management Console to deploy the servlet application in a servlet container. The
example below shows how to deploy an application in the IJServer WorkUnit “IJServer”. For IJServer
details, refer to “Design of J2EE Application “ in “Environment Where J2EE Applications are Operated
(IJServer)” in the J2EE User’s Guide.
If the IJServer workUnit "IJServer" has not been created, create a new IJServer with the name
"IJServer" of either of the following types:
• IJServer(Web + EJB[1VM])
• IJServer(Web + EJB[other VM])
• IJServer(Web Only)
Use the following procedure to deploy a servlet application:
1. Use the Interstage Management Console to select [System] > [WorkUnit] > [IJServer] tab and click
[Deploy].
2. Uncheck the check box specifying not to start IJServer automatically after completing deployment.
3. Click [Reference] in [Deployment File] to select jaassample.war stored in the sample directory.
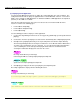
The Interstage Management Console may be installed on a server different from the Web browser
execution server on which the console is operated. If so, specify the jaassample.war path in the
server containing the console directly in the deployment file text box as shown below, after
choosing the radio button “Deploys files stored on the server”.
Interstage install directory: C:\Interstage
C:\Interstage\F3FMsso\ssoatzag\sample\javaapi\jaassample.war
/opt/FJSVssoaz/sample/javaapi/jaassample.war
4. Click [Deploy] to deploy the file after specifying the jaassample.war path.
The sample application is deployed in the following directories:
Interstage install directory: C:\Interstage
C:\Interstage\J2EE\var\deployment\ijserver\IJServer\webapps\jaassample
/opt/FJSVj2ee/var/deployment/ijserver/IJServer/webapps/jaassample