
Installation guide

23
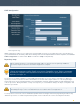
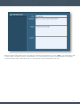
To create our test scan, click “Add” and then fill out the name and description for the scan. Under “Scan Schedule”,
choose “Template” and add a single test IP address or hostname under “Targets”. Select a repository where the scan
results will be stored and then click “Next”. Under “Policy”, choose the policy created earlier, or alternatively, select a
plugin from the “Browse Plugins” dialog. For “Scan Zone” choose “default” and then click “Next”.
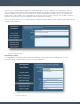
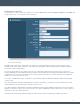
For this test, we will skip credentials; however, credentials can be used in later scans to give more accurate
and complete results (such as patch and configuration audits).
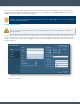
Select the options for the “Post Scan” settings and click “Submit” to generate the scan template. The “Scans” screen is
now displayed with the new template scan shown with a start time of “Never”. Highlight the scan and then click “Launch”
to generate the new scan.
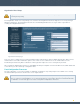
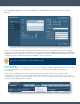
After the scan is complete, click “Scanning” and then “Scan Results” to drill down into the scan details and perform
target analysis.
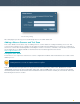
At this point, SecurityCenter is installed and ready for more advanced configuration. Please refer to the SecurityCenter
User and Admin Guides available for download from the Tenable Support Portal located at https://support.tenable.com for
additional configuration guidance.