
Installation guide


Chapter 26. Storage pools
232
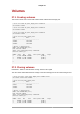
4. Start the storage pool
Use the virsh command pool-start for this. pool-start enables a directory storage pool,
allowing it to be used for volumes and guests.
# virsh pool-start guest_images_disk
Pool guest_images_disk started
# virsh pool-list --all
Name State Autostart
-----------------------------------------
default active yes
trial1 active no
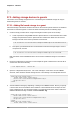
5. Turn on autostart
Turn on autostart for the storage pool. Autostart configures the libvirtd service to start the
storage pool when the service starts.
# virsh pool-autostart trial1
Pool trial1 marked as autostarted
Verify that the trial1 pool has autostart set:
# virsh pool-list --all
Name State Autostart
-----------------------------------------
default active yes
trial1 active yes
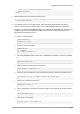
6. Verify the storage pool configuration
Verify the storage pool was created correctly, the sizes reported correctly, and the state reports as
running.
# virsh pool-info trial1
Name: trial1
UUID: afcc5367-6770-e151-bcb3-847bc36c5e28
State: running
Persistent: unknown
Autostart: yes
Capacity: 100.31 GB
Allocation: 0.00
Available: 100.31 GB
An iSCSI-based storage pool is now available.
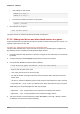
26.1.6. NFS-based storage pools
This procedure covers creating a storage pool with a NFS mount point in virt-manager.
26.1.6.1. Creating a NFS-based storage pool with virt-manager
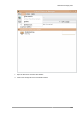
1. Open the host storage tab
Open the Storage tab in the Host Details window.
a. Open virt-manager.
b. Select a host from the main virt-manager window.