
Installation guide
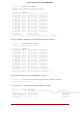

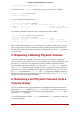

Table Of Contents
- LVM Administrator's Guide
- Table of Contents
- Introduction
- Chapter 1. The LVM Logical Volume Manager
- Chapter 2. LVM Components
- Chapter 3. LVM Administration Overview
- Chapter 4. LVM Administration with CLI Commands
- 1. Using CLI Commands
- 2. Physical Volume Administration
- 3. Volume Group Administration
- 3.1. Creating Volume Groups
- 3.2. Adding Physical Volumes to a Volume Group
- 3.3. Displaying Volume Groups
- 3.4. Scanning Disks for Volume Groups to Build the Cache File
- 3.5. Removing Physical Volumes from a Volume Group
- 3.6. Changing the Parameters of a Volume Group
- 3.7. Activating and Deactivating Volume Groups
- 3.8. Removing Volume Groups
- 3.9. Splitting a Volume Group
- 3.10. Combining Volume Groups
- 3.11. Backing Up Volume Group Metadata
- 3.12. Renaming a Volume Group
- 3.13. Moving a Volume Group to Another System
- 3.14. Recreating a Volume Group Directory
- 4. Logical Volume Administration
- 4.1. Creating Logical Volumes
- 4.2. Persistent Device Numbers
- 4.3. Resizing Logical Volumes
- 4.4. Changing the Parameters of a Logical Volume Group
- 4.5. Renaming Logical Volumes
- 4.6. Removing Logical Volumes
- 4.7. Displaying Logical Volumes
- 4.8. Growing Logical Volumes
- 4.9. Extending a Striped Volume
- 4.10. Shrinking Logical Volumes
- 5. Creating Snapshot Volumes
- 6. Controlling LVM Device Scans with Filters
- 7. Online Data Relocation
- 8. Activating Logical Volumes on Individual Nodes in a Cluster
- 9. Customized Reporting for LVM
- Chapter 5. LVM Configuration Examples
- Chapter 6. LVM Troubleshooting
- Chapter 7. LVM Administration with the LVM GUI
- Appendix A. The Device Mapper
- Appendix B. The LVM Configuration Files
- Appendix C. LVM Object Tags
- Appendix D. LVM Volume Group Metadata
- Index

# This is an example configuration file for the LVM2 system.
# It contains the default settings that would be used if there was no
# /etc/lvm/lvm.conf file.
#
# Refer to 'man lvm.conf' for further information including the file layout.
#
# To put this file in a different directory and override /etc/lvm set
# the environment variable LVM_SYSTEM_DIR before running the tools.
# This section allows you to configure which block devices should
# be used by the LVM system.
devices {
# Where do you want your volume groups to appear ?
dir = "/dev"
# An array of directories that contain the device nodes you wish
# to use with LVM2.
scan = [ "/dev" ]
# A filter that tells LVM2 to only use a restricted set of devices.
# The filter consists of an array of regular expressions. These
# expressions can be delimited by a character of your choice, and
# prefixed with either an 'a' (for accept) or 'r' (for reject).
# The first expression found to match a device name determines if
# the device will be accepted or rejected (ignored). Devices that
# don't match any patterns are accepted.
# Be careful if there there are symbolic links or multiple filesystem
# entries for the same device as each name is checked separately against
# the list of patterns. The effect is that if any name matches any 'a'
# pattern, the device is accepted; otherwise if any name matches any 'r'
# pattern it is rejected; otherwise it is accepted.
# Don't have more than one filter line active at once: only one gets used.
# Run vgscan after you change this parameter to ensure that
# the cache file gets regenerated (see below).
# If it doesn't do what you expect, check the output of 'vgscan -vvvv'.
# By default we accept every block device:
# Steel Toe installed filter -- use this line while running tests
filter = [ "r/hda/", "r/disk/", "a/.*/" ]
# Steel Toe installed filter -- use this line when installing new kernels
#filter = [ "r/disk/", "a/.*/" ]
# Exclude the cdrom drive
# filter = [ "r|/dev/cdrom|" ]
# When testing I like to work with just loopback devices:
# filter = [ "a/loop/", "r/.*/" ]
# Or maybe all loops and ide drives except hdc:
# filter =[ "a|loop|", "r|/dev/hdc|", "a|/dev/ide|", "r|.*|" ]
# Use anchors if you want to be really specific
# filter = [ "a|^/dev/hda8$|", "r/.*/" ]
# The results of the filtering are cached on disk to avoid
# rescanning dud devices (which can take a very long time). By
# default this cache file is hidden in the /etc/lvm directory.
# It is safe to delete this file: the tools regenerate it.
cache = "/etc/lvm/.cache"
# You can turn off writing this cache file by setting this to 0.
write_cache_state = 1
2. Sample lvm.conf File
69