
Installation guide
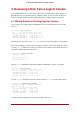
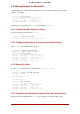

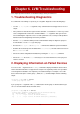

Table Of Contents
- LVM Administrator's Guide
- Table of Contents
- Introduction
- Chapter 1. The LVM Logical Volume Manager
- Chapter 2. LVM Components
- Chapter 3. LVM Administration Overview
- Chapter 4. LVM Administration with CLI Commands
- 1. Using CLI Commands
- 2. Physical Volume Administration
- 3. Volume Group Administration
- 3.1. Creating Volume Groups
- 3.2. Adding Physical Volumes to a Volume Group
- 3.3. Displaying Volume Groups
- 3.4. Scanning Disks for Volume Groups to Build the Cache File
- 3.5. Removing Physical Volumes from a Volume Group
- 3.6. Changing the Parameters of a Volume Group
- 3.7. Activating and Deactivating Volume Groups
- 3.8. Removing Volume Groups
- 3.9. Splitting a Volume Group
- 3.10. Combining Volume Groups
- 3.11. Backing Up Volume Group Metadata
- 3.12. Renaming a Volume Group
- 3.13. Moving a Volume Group to Another System
- 3.14. Recreating a Volume Group Directory
- 4. Logical Volume Administration
- 4.1. Creating Logical Volumes
- 4.2. Persistent Device Numbers
- 4.3. Resizing Logical Volumes
- 4.4. Changing the Parameters of a Logical Volume Group
- 4.5. Renaming Logical Volumes
- 4.6. Removing Logical Volumes
- 4.7. Displaying Logical Volumes
- 4.8. Growing Logical Volumes
- 4.9. Extending a Striped Volume
- 4.10. Shrinking Logical Volumes
- 5. Creating Snapshot Volumes
- 6. Controlling LVM Device Scans with Filters
- 7. Online Data Relocation
- 8. Activating Logical Volumes on Individual Nodes in a Cluster
- 9. Customized Reporting for LVM
- Chapter 5. LVM Configuration Examples
- Chapter 6. LVM Troubleshooting
- Chapter 7. LVM Administration with the LVM GUI
- Appendix A. The Device Mapper
- Appendix B. The LVM Configuration Files
- Appendix C. LVM Object Tags
- Appendix D. LVM Volume Group Metadata
- Index

unused space on the physical volumes, a new volume group can be created without adding new
disks.
In the initial set up, the logical volume mylv is carved from the volume group myvol, which in turn
consists of the three physical volumes, /dev/sda1, /dev/sdb1, and /dev/sdc1.
After completing this procedure, the volume group myvg will consist of /dev/sda1 and /dev/sdb1.
A second volume group, yourvg, will consist of /dev/sdc1.
3.1. Determining Free Space
You can use the pvscan command to determine how much free space is currently available in
the volume group.
[root@tng3-1 ~]# pvscan
PV /dev/sda1 VG myvg lvm2 [17.15 GB / 0 free]
PV /dev/sdb1 VG myvg lvm2 [17.15 GB / 12.15 GB free]
PV /dev/sdc1 VG myvg lvm2 [17.15 GB / 15.80 GB free]
Total: 3 [51.45 GB] / in use: 3 [51.45 GB] / in no VG: 0 [0 ]
3.2. Moving the Data
You can move all the used physical extents in /dev/sdc1 to /dev/sdb1 with the pvmove command.
The pvmove command can take a long time to execute.
[root@tng3-1 ~]# pvmove /dev/sdc1 /dev/sdb1
/dev/sdc1: Moved: 14.7%
/dev/sdc1: Moved: 30.3%
/dev/sdc1: Moved: 45.7%
/dev/sdc1: Moved: 61.0%
/dev/sdc1: Moved: 76.6%
/dev/sdc1: Moved: 92.2%
/dev/sdc1: Moved: 100.0%
After moving the data, you can see that all of the space on /dev/sdc1 is free.
[root@tng3-1 ~]# pvscan
PV /dev/sda1 VG myvg lvm2 [17.15 GB / 0 free]
PV /dev/sdb1 VG myvg lvm2 [17.15 GB / 10.80 GB free]
PV /dev/sdc1 VG myvg lvm2 [17.15 GB / 17.15 GB free]
Total: 3 [51.45 GB] / in use: 3 [51.45 GB] / in no VG: 0 [0 ]
3.3. Splitting the Volume Group
To create the new volume group yourvg, use the vgsplit command to split the volume group
myvg.
Before you can split the volume group, the logical volume must be inactive. If the file system is
mounted, you must unmount the file system before deactivating the logical volume.
You can deactivate the logical volumes with the lvchange command or the vgchange command.
The following command deactivates the logical volume mylv and then splits the volume group
yourvg from the volume group myvg, moving the physical volume /dev/sdc1 into the new volume
3.1. Determining Free Space
54