
Installation guide

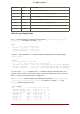
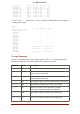
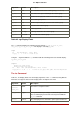
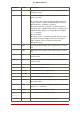
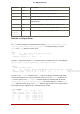

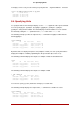
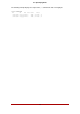
Table Of Contents
- LVM Administrator's Guide
- Table of Contents
- Introduction
- Chapter 1. The LVM Logical Volume Manager
- Chapter 2. LVM Components
- Chapter 3. LVM Administration Overview
- Chapter 4. LVM Administration with CLI Commands
- 1. Using CLI Commands
- 2. Physical Volume Administration
- 3. Volume Group Administration
- 3.1. Creating Volume Groups
- 3.2. Adding Physical Volumes to a Volume Group
- 3.3. Displaying Volume Groups
- 3.4. Scanning Disks for Volume Groups to Build the Cache File
- 3.5. Removing Physical Volumes from a Volume Group
- 3.6. Changing the Parameters of a Volume Group
- 3.7. Activating and Deactivating Volume Groups
- 3.8. Removing Volume Groups
- 3.9. Splitting a Volume Group
- 3.10. Combining Volume Groups
- 3.11. Backing Up Volume Group Metadata
- 3.12. Renaming a Volume Group
- 3.13. Moving a Volume Group to Another System
- 3.14. Recreating a Volume Group Directory
- 4. Logical Volume Administration
- 4.1. Creating Logical Volumes
- 4.2. Persistent Device Numbers
- 4.3. Resizing Logical Volumes
- 4.4. Changing the Parameters of a Logical Volume Group
- 4.5. Renaming Logical Volumes
- 4.6. Removing Logical Volumes
- 4.7. Displaying Logical Volumes
- 4.8. Growing Logical Volumes
- 4.9. Extending a Striped Volume
- 4.10. Shrinking Logical Volumes
- 5. Creating Snapshot Volumes
- 6. Controlling LVM Device Scans with Filters
- 7. Online Data Relocation
- 8. Activating Logical Volumes on Individual Nodes in a Cluster
- 9. Customized Reporting for LVM
- Chapter 5. LVM Configuration Examples
- Chapter 6. LVM Troubleshooting
- Chapter 7. LVM Administration with the LVM GUI
- Appendix A. The Device Mapper
- Appendix B. The LVM Configuration Files
- Appendix C. LVM Object Tags
- Appendix D. LVM Volume Group Metadata
- Index

Using the -v argument with the lvs --segments command adds the following fields to the default
display: seg_start, stripesize, chunksize.
# lvs -v --segments
Finding all logical volumes
LV VG Attr Start SSize #Str Type Stripe Chunk
lvol0 new_vg owi-a- 0 52.00M 1 linear 0 0
newvgsnap1 new_vg swi-a- 0 8.00M 1 linear 0 8.00K
The following example shows the default output of the lvs command on a system with one lo-
gical volume configured, followed by the default output of the lvs command with the segments
argument specified.
# lvs
LV VG Attr LSize Origin Snap% Move Log Copy%
lvol0 new_vg -wi-a- 52.00M
# lvs --segments
LV VG Attr #Str Type SSize
lvol0 new_vg -wi-a- 1 linear 52.00M
9.3. Sorting LVM Reports
Normally the entire output of the lvs, vgs, or pvs command has to be generated and stored in-
ternally before it can be sorted and columns aligned correctly. You can specify the --unbuffered
argument to display unsorted output as soon as it is generated.
To specify an alternative ordered list of columns to sort on, use the -O argument of any of the re-
porting commands. It is not necessary to include these fields within the output itself.
The following example shows the output of the pvs command that displays the physical volume
name, size, and free space.
# pvs -o pv_name,pv_size,pv_free
PV PSize PFree
/dev/sdb1 17.14G 17.14G
/dev/sdc1 17.14G 17.09G
/dev/sdd1 17.14G 17.14G
The following example shows the same output, sorted by the free space field.
# pvs -o pv_name,pv_size,pv_free -O pv_free
PV PSize PFree
/dev/sdc1 17.14G 17.09G
/dev/sdd1 17.14G 17.14G
/dev/sdb1 17.14G 17.14G
The following example shows that you do not need to display the field on which you are sorting.
# pvs -o pv_name,pv_size -O pv_free
PV PSize
/dev/sdc1 17.14G
/dev/sdd1 17.14G
/dev/sdb1 17.14G
9.3. Sorting LVM Reports
48