
Installation guide


Chapter 17. Installing on IBM System
z Systems
This chapter explains how to perform a Red Hat Enterprise Linux installation using the graphic-
al, mouse-based installation program. The following topics are discussed:
• Becoming familiar with the installation program's user interface
• Starting the installation program
• Selecting an installation method
• Configuration steps during the installation (language, keyboard, mouse, partitioning, etc.)
• Finishing the installation
1. The Graphical Installation Program User
Interface
If you have used a graphical user interface (GUI) before, you are already familiar with this pro-
cess; use your mouse to navigate the screens, click buttons, or enter text fields.
You can also navigate through the installation using the keyboard. The Tab key allows you to
move around the screen, the Up and Down arrow keys to scroll through lists, + and - keys ex-
pand and collapse lists, while Space and Enter selects or removes from selection a highlighted
item. You can also use the Alt-X key command combination as a way of clicking on buttons or
making other screen selections, where X is replaced with any underlined letter appearing within
that screen.
Note
While text mode installations are not explicitly documented, those using the text
mode installation program can easily follow the GUI installation instructions. One
thing to note is that manipulation of LVM (Logical Volume Management) disk
volumes and the configuration of zFCP devices are only possible in graphical
mode. In text mode it is only possible to view and accept the default LVM setup.
2. The Text Mode Installation Program User
Interface
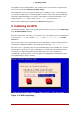
The Red Hat Enterprise Linux text mode installation program uses a screen-based interface that
includes most of the on-screen widgets commonly found on graphical user interfaces. Fig-
155