Red Hat Enterprise Linux 6 Security Guide A Guide to Securing Red Hat Enterprise Linux
Security Guide Red Hat Enterprise Linux 6 Security Guide A Guide to Securing Red Hat Enterprise Linux Edition 1.5 Author Copyright © 2010 Red Hat, Inc. The text of and illustrations in this document are licensed by Red Hat under a Creative Commons Attribution–Share Alike 3.0 Unported license ("CC-BY-SA"). An explanation of CC-BY-SA is available at http://creativecommons.org/licenses/by-sa/3.0/.
Preface vii 1. Document Conventions .................................................................................................. vii 1.1. Typographic Conventions .................................................................................... vii 1.2. Pull-quote Conventions ....................................................................................... viii 1.3. Notes and Warnings ............................................................................................ ix 2.
Security Guide 2.4.2. Openswan ....................................................................................................... 2.5. Firewalls .................................................................................................................... 2.5.1. Netfilter and IPTables ....................................................................................... 2.5.2. Basic Firewall Configuration ............................................................................. 2.5.3.
7.4. Payment Card Industry Data Security Standard (PCI DSS) .......................................... 110 7.5. Security Technical Implementation Guide ................................................................... 110 8. References 111 A. Encryption Standards A.1. Synchronous Encryption ........................................................................................... A.1.1. Advanced Encryption Standard - AES ............................................................. A.1.2.
vi
Preface 1. Document Conventions This manual uses several conventions to highlight certain words and phrases and draw attention to specific pieces of information. 1 In PDF and paper editions, this manual uses typefaces drawn from the Liberation Fonts set. The Liberation Fonts set is also used in HTML editions if the set is installed on your system. If not, alternative but equivalent typefaces are displayed. Note: Red Hat Enterprise Linux 5 and later includes the Liberation Fonts set by default. 1.1.
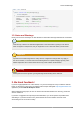
Preface Close to switch the primary mouse button from the left to the right (making the mouse suitable for use in the left hand). To insert a special character into a gedit file, choose Applications → Accessories → Character Map from the main menu bar. Next, choose Search → Find… from the Character Map menu bar, type the name of the character in the Search field and click Next. The character you sought will be highlighted in the Character Table.
Notes and Warnings public class ExClient { public static void main(String args[]) throws Exception { InitialContext iniCtx = new InitialContext(); Object ref = iniCtx.lookup("EchoBean"); EchoHome home = (EchoHome) ref; Echo echo = home.create(); System.out.println("Created Echo"); System.out.println("Echo.echo('Hello') = " + echo.echo("Hello")); } } 1.3. Notes and Warnings Finally, we use three visual styles to draw attention to information that might otherwise be overlooked.
x
Chapter 1. Security Overview Because of the increased reliance on powerful, networked computers to help run businesses and keep track of our personal information, entire industries have been formed around the practice of network and computer security. Enterprises have solicited the knowledge and skills of security experts to properly audit systems and tailor solutions to fit the operating requirements of their organization.
Chapter 1. Security Overview The Internet and its earlier protocols, however, were developed as a trust-based system. That is, the Internet Protocol (IP) was not designed to be secure in itself. There are no approved security standards built into the TCP/IP communications stack, leaving it open to potentially malicious users and processes across the network.
SELinux system administrators, developers, and engineers to ensure 24x7 reliability of their systems, services, and information. Falling victim to malicious users, processes, or coordinated attacks is a direct threat to the success of the organization. Unfortunately, system and network security can be a difficult proposition, requiring an intricate knowledge of how an organization regards, uses, manipulates, and transmits its information.
Chapter 1. Security Overview 1.1.3.1. Physical Controls Physical control is the implementation of security measures in a defined structure used to deter or prevent unauthorized access to sensitive material.
Vulnerability Assessment 1.2. Vulnerability Assessment Given time, resources, and motivation, an attacker can break into nearly any system. All of the security procedures and technologies currently available cannot guarantee that any systems are completely safe from intrusion. Routers help secure gateways to the Internet. Firewalls help secure the edge of the network. Virtual Private Networks safely pass data in an encrypted stream. Intrusion detection systems warn you of malicious activity.
Chapter 1. Security Overview 1.2.2. Defining Assessment and Testing Vulnerability assessments may be broken down into one of two types: Outside looking in and inside looking around. When performing an outside looking in vulnerability assessment, you are attempting to compromise your systems from the outside. Being external to your company provides you with the cracker's viewpoint.
Evaluating the Tools • Finds potential exploits before crackers find them • Results in systems being kept up to date and patched • Promotes growth and aids in developing staff expertise • Abates financial loss and negative publicity 1.2.2.1. Establishing a Methodology To aid in the selection of tools for a vulnerability assessment, it is helpful to establish a vulnerability assessment methodology.
Chapter 1. Security Overview 1.2.3.1.1. Using Nmap Nmap can be run from a shell prompt by typing the nmap command followed by the hostname or IP address of the machine to scan. nmap foo.example.com The results of a basic scan (which could take up to a few minutes, depending on where the host is located and other network conditions) should look similar to the following: Interesting ports on foo.example.
Attackers and Vulnerabilities 1.2.3.4. Anticipating Your Future Needs Depending upon your target and resources, there are many tools available. There are tools for wireless networks, Novell networks, Windows systems, Linux systems, and more. Another essential part of performing assessments may include reviewing physical security, personnel screening, or voice/PBX network assessment.
Chapter 1. Security Overview Gray hat hackers typically subscribe to another form of the hacker ethic, which says it is acceptable to break into systems as long as the hacker does not commit theft or breach confidentiality. Some would argue, however, that the act of breaking into a system is in itself unethical. Regardless of the intent of the intruder, it is important to know the weaknesses a cracker may likely attempt to exploit. The remainder of the chapter focuses on these issues. 1.3.2.
Threats to Server Security pathway into the system for crackers. Refer To Section 2.2, “Server Security” for information on closing ports and disabling unused services. 1.3.3.2. Unpatched Services Most server applications that are included in a default installation are solid, thoroughly tested pieces of software. Having been in use in production environments for many years, their code has been thoroughly refined and many of the bugs have been found and fixed.
Chapter 1. Security Overview Inherently, such services can also more easily fall prey to what the security industry terms the man-inthe-middle attack. In this type of attack, a cracker redirects network traffic by tricking a cracked name server on the network to point to his machine instead of the intended server. Once someone opens a remote session to the server, the attacker's machine acts as an invisible conduit, sitting quietly between the remote service and the unsuspecting user capturing information.
Common Exploits and Attacks explanations of how they are performed and how administrators can properly safeguard their network against such attacks. Table 1.1. Common Exploits Exploit Description Notes Null or Default Passwords Leaving administrative passwords blank or using a default password set by the product vendor.
Chapter 1. Security Overview Exploit Description Notes Preventative measures include services with cryptographic key exchange, one-time passwords, or encrypted authentication to prevent password snooping; strong encryption during transmission is also advised.
Security Updates Exploit Description Notes alleviate the burdens of multi-seat security deployments. Denial of Service (DoS) Attacks Attacker or group of attackers coordinate against an organization's network or server resources by sending unauthorized packets to the target host (either server, router, or workstation). This forces the resource to become unavailable to legitimate users. The most reported DoS case in the US occurred in 2000.
Chapter 1. Security Overview 1.5.2. Verifying Signed Packages All Red Hat Enterprise Linux packages are signed with the Red Hat GPG key. GPG stands for GNU Privacy Guard, or GnuPG, a free software package used for ensuring the authenticity of distributed files. For example, a private key (secret key) locks the package while the public key unlocks and verifies the package.
Applying the Changes rpm -ivh /tmp/updates/ Replace in the previous example with the name of the kernel RPM. Once the machine has been safely rebooted using the new kernel, the old kernel may be removed using the following command: rpm -e Replace in the previous example with the name of the older kernel RPM. Note It is not a requirement that the old kernel be removed.
Chapter 1. Security Overview Shared Libraries Shared libraries are units of code, such as glibc, which are used by a number of applications and services. Applications utilizing a shared library typically load the shared code when the application is initialized, so any applications using the updated library must be halted and relaunched. To determine which running applications link against a particular library, use the lsof command as in the following example: lsof /lib/libwrap.
Applying the Changes In the previous examples, replace with the process identification number (found in the second column of the ps command) for an IMAP session.
20
Chapter 2. Securing Your Network 2.1. Workstation Security Securing a Linux environment begins with the workstation. Whether locking down a personal machine or securing an enterprise system, sound security policy begins with the individual computer. A computer network is only as secure as its weakest node. 2.1.1.
Chapter 2. Securing Your Network user mode, which in turn allows them to start arbitrary processes on the system or copy sensitive data. 2. Preventing System Booting — Some BIOSes allow password protection of the boot process. When activated, an attacker is forced to enter a password before the BIOS launches the boot loader. Because the methods for setting a BIOS password vary between computer manufacturers, consult the computer's manual for specific instructions.
Password Security 2 Replace with the value returned by /sbin/grub-md5-crypt . The next time the system boots, the GRUB menu prevents access to the editor or command interface without first pressing p followed by the GRUB password. Unfortunately, this solution does not prevent an attacker from booting into an insecure operating system in a dual-boot environment. For this, a different part of the /boot/grub/grub.conf file must be edited.
Chapter 2. Securing Your Network cracker starts an attack in the middle of the night on a system with weak passwords, the cracker may have gained access before dawn and edited the log files to cover his tracks. In addition to format and storage considerations is the issue of content. The single most important thing a user can do to protect his account against a password cracking attack is create a strong password. 2.1.3.1.
Password Security • Your name • The names of pets • The names of family members • Any birth dates • Your phone number or zip code • Do Not Invert Recognizable Words — Good password checkers always reverse common words, so inverting a bad password does not make it any more secure. Some insecure examples include the following: • R0X4H • nauj • 9-DS • Do Not Write Down Your Password — Never store a password on paper. It is much safer to memorize it.
Chapter 2. Securing Your Network • Next, turn it into an acronym (including the punctuation). otrattw,tghwg. • Add complexity by substituting numbers and symbols for letters in the acronym. For example, substitute 7 for t and the at symbol (@) for a: o7r@77w,7ghwg. • Add more complexity by capitalizing at least one letter, such as H. o7r@77w,7gHwg. • Finally, do not use the example password above for any systems, ever.
Password Security • Slurpie — Slurpie is similar to John The Ripper and Crack, but it is designed to run on multiple computers simultaneously, creating a distributed password cracking attack. It can be found along with a number of other distributed attack security evaluation tools online at http:// www.ussrback.com/distributed.htm. Warning Always get authorization in writing before attempting to crack passwords within an organization. 2.1.3.2.2.
Chapter 2. Securing Your Network Refer to the man page for chage for more information on the available options. You can also use the graphical User Manager application to create password aging policies, as follows. Note: you need Administrator privileges to perform this procedure. 1. Click the System menu on the Panel, point to Administration and then click Users and Groups to display the User Manager. Alternatively, type the command system-config-users at a shell prompt. 2.
Administrative Controls Note The s may be upper case or lower case. If it appears as upper case, it means that the underlying permission bit has not been set. For the system administrators of an organization, however, choices must be made as to how much administrative access users within the organization should have to their machine. Through a PAM module called pam_console.
Chapter 2. Securing Your Network Method 1 Description Effects Does Not Affect · kdm · xdm · su · ssh · scp · sftp · FTP clients · Email clients Disabling root access via any console device (tty). An empty /etc/ securetty file prevents root login on any devices attached to the computer. Prevents access to the root account via the console or the network.
Administrative Controls Important Programs that do not require access to the shell, such as email clients or the sudo command, can still access the root account. 2.1.4.2.2. Disabling Root Logins To further limit access to the root account, administrators can disable root logins at the console by editing the /etc/securetty file. This file lists all devices the root user is allowed to log into.
Chapter 2. Securing Your Network sense=deny file=/etc/vsftpd.ftpusers onerr=succeed This instructs PAM to consult the /etc/vsftpd.ftpusers file and deny access to the service for any listed user. The administrator can change the name of this file, and can keep separate lists for each service or use one central list to deny access to multiple services. If the administrator wants to deny access to multiple services, a similar line can be added to the PAM configuration files, such as /etc/pam.
Administrative Controls Figure 2.2. Adding users to the "wheel" group. Open the PAM configuration file for su (/etc/pam.d/su) in a text editor and remove the comment # from the following line: auth required /lib/security/$ISA/pam_wheel.so use_uid This change means that only members of the administrative group wheel can use this program. Note The root user is part of the wheel group by default. 2.1.4.3.2. The sudo Command The sudo command offers another approach to giving users administrative access.
Chapter 2. Securing Your Network Important Users of the sudo command should take extra care to log out before walking away from their machines since sudoers can use the command again without being asked for a password within a five minute period. This setting can be altered via the configuration file, /etc/sudoers. The sudo command allows for a high degree of flexibility.
Available Network Services • Distributed Denial of Service Attack (DDoS) — A type of DoS attack which uses multiple compromised machines (often numbering in the thousands or more) to direct a co-ordinated attack on a service, flooding it with requests and making it unusable. • Script Vulnerability Attacks — If a server is using scripts to execute server-side actions, as Web servers commonly do, a cracker can attack improperly written scripts.
Chapter 2. Securing Your Network same is true for portmap. If you do not mount NFSv3 volumes or use NIS (the ypbind service), then portmap should be disabled. Figure 2.3. Services Configuration Tool If unsure of the purpose for a particular service, the Services Configuration Tool has a description field, illustrated in Figure 2.3, “Services Configuration Tool”, that provides additional information. Checking which network services are available to start at boot time is only part of the story.
Personal Firewalls Other services like finger and rwhod reveal information about users of the system. Examples of inherently insecure services include rlogin, rsh, telnet, and vsftpd. All remote login and shell programs (rlogin, rsh, and telnet) should be avoided in favor of SSH. Refer to Section 2.1.7, “Security Enhanced Communication Tools” for more information about sshd.
Chapter 2. Securing Your Network firewall). This tool creates broad iptables rules for a general-purpose firewall using a control panel interface. Refer to Section 2.5.2, “Basic Firewall Configuration” for more information about using this application and its available options. For advanced users and server administrators, manually configuring a firewall with iptables is probably a better option. Refer to Section 2.5, “Firewalls” for more information. Refer to Section 2.
Securing Services With TCP Wrappers and xinetd • Serve only one type of network service per machine whenever possible. • Monitor all servers carefully for suspicious activity. 2.2.1. Securing Services With TCP Wrappers and xinetd TCP Wrappers provide access control to a variety of services. Most modern network services, such as SSH, Telnet, and FTP, make use of TCP Wrappers, which stand guard between an incoming request and the requested service.
Chapter 2. Securing Your Network 2.2.1.1.2. TCP Wrappers and Attack Warnings If a particular host or network has been detected attacking the server, TCP Wrappers can be used to warn the administrator of subsequent attacks from that host or network using the spawn directive. In this example, assume that a cracker from the 206.182.68.0/24 network has been detected attempting to attack the server. Place the following line in the /etc/hosts.
Securing Services With TCP Wrappers and xinetd Edit the file /etc/xinetd.d/telnet and change the flags line to read: flags = SENSOR Add the following line: deny_time = 30 This denies any further connection attempts to that port by that host for 30 minutes. Other acceptable values for the deny_time attribute are FOREVER, which keeps the ban in effect until xinetd is restarted, and NEVER, which allows the connection and logs it.
Chapter 2. Securing Your Network 2.2.2. Securing Portmap The portmap service is a dynamic port assignment daemon for RPC services such as NIS and NFS. It has weak authentication mechanisms and has the ability to assign a wide range of ports for the services it controls. For these reasons, it is difficult to secure. Note Securing portmap only affects NFSv2 and NFSv3 implementations, since NFSv4 no longer requires it.
Securing NIS • /usr/sbin/rpc.ypxfrd — Also called the ypxfrd service, this daemon is responsible for NIS map transfers over the network. • /usr/sbin/yppush — This application propagates changed NIS databases to multiple NIS servers. • /usr/sbin/ypserv — This is the NIS server daemon. NIS is somewhat insecure by today's standards. It has no host authentication mechanisms and transmits all of its information over the network unencrypted, including password hashes.
Chapter 2. Securing Your Network Below is a sample entry from a /var/yp/securenets file: 255.255.255.0 192.168.0.0 Warning Never start an NIS server for the first time without creating the /var/yp/securenets file. This technique does not provide protection from an IP spoofing attack, but it does at least place limits on what networks the NIS server services. 2.2.3.4. Assign Static Ports and Use iptables Rules All of the servers related to NIS can be assigned specific ports except for rpc.
Securing NFS 2.2.4. Securing NFS Important The version of NFS included in Red Hat Enterprise Linux 6, NFSv4, no longer requires the portmap service as outlined in Section 2.2.2, “Securing Portmap”. NFS traffic now utilizes TCP in all versions, rather than UDP, and requires it when using NFSv4. NFSv4 now includes Kerberos user and group authentication, as part of the RPCSEC_GSS kernel module.
Chapter 2. Securing Your Network • MOUNTD_PORT — TCP and UDP port for mountd (rpc.mountd) • STATD_PORT — TCP and UDP port for status (rpc.statd) • LOCKD_TCPPORT — TCP port for nlockmgr (rpc.lockd) • LOCKD_UDPPORT — UDP port nlockmgr (rpc.lockd) Port numbers specified must not be used by any other service. Configure your firewall to allow the port numbers specified, as well as TCP and UDP port 2049 (NFS). Run the rpcinfo -p command on the NFS server to see which ports and RPC programs are being used. 2.2.5.
Securing FTP Important Do not remove the IncludesNoExec directive. By default, the Server-Side Includes (SSI) module cannot execute commands. It is recommended that you do not change this setting unless absolutely necessary, as it could, potentially, enable an attacker to execute commands on the system. 2.2.6. Securing FTP The File Transfer Protocol (FTP) is an older TCP protocol designed to transfer files over a network.
Chapter 2. Securing Your Network It also is possible to send additional banners to incoming connections using TCP Wrappers as described in Section 2.2.1.1.1, “TCP Wrappers and Connection Banners”. 2.2.6.2. Anonymous Access The presence of the /var/ftp/ directory activates the anonymous account. The easiest way to create this directory is to install the vsftpd package.
Securing Sendmail local_enable=NO 2.2.6.3.1. Restricting User Accounts To disable FTP access for specific accounts or specific groups of accounts, such as the root user and those with sudo privileges, the easiest way is to use a PAM list file as described in Section 2.1.4.2.4, “Disabling Root Using PAM”. The PAM configuration file for vsftpd is /etc/pam.d/vsftpd. It is also possible to disable user accounts within each service directly.
Chapter 2. Securing Your Network Note With NFSv4 using Kerberos, this is not the case, since the SECRPC_GSS kernel module does not utilize UID-based authentication. However, it is still considered good practice not to put the mail spool directory on NFS shared volumes. 2.2.7.3. Mail-only Users To help prevent local user exploits on the Sendmail server, it is best for mail users to only access the Sendmail server using an email program.
TCP Wrappers and xinetd This output shows the system is running portmap due to the presence of the sunrpc service. However, there is also a mystery service on port 834. To check if the port is associated with the official list of known services, type: cat /etc/services | grep 834 This command returns no output for port 834. Due to the format of the command, output for other ports (1834, 2834, and 3834) will be shown.
Chapter 2. Securing Your Network Figure 2.4. Access Control to Network Services This chapter focuses on the role of TCP Wrappers and xinetd in controlling access to network services and reviews how these tools can be used to enhance both logging and utilization management. Refer to Section 2.6, “IPTables” for information about using firewalls with iptables. 2.3.1.
TCP Wrappers Configuration Files Because TCP Wrappers are a valuable addition to any server administrator's arsenal of security tools, most network services within Red Hat Enterprise Linux are linked to the libwrap.a library. Some such applications include /usr/sbin/sshd, /usr/sbin/sendmail, and /usr/sbin/xinetd. Note To determine if a network service binary is linked to libwrap.
Chapter 2. Securing Your Network • Because access rules in hosts.allow are applied first, they take precedence over rules specified in hosts.deny. Therefore, if access to a service is allowed in hosts.allow, a rule denying access to that same service in hosts.deny is ignored. • The rules in each file are read from the top down and the first matching rule for a given service is the only one applied. The order of the rules is extremely important.
TCP Wrappers Configuration Files Note More information on some of the terms above can be found elsewhere in this guide: • Section 2.3.2.1.1, “Wildcards” • Section 2.3.2.1.2, “Patterns” • Section 2.3.2.2.4, “Expansions” • Section 2.3.2.2, “Option Fields” The following is a basic sample hosts access rule: vsftpd : .example.com This rule instructs TCP Wrappers to watch for connections to the FTP daemon (vsftpd) from any host in the example.com domain. If this rule appears in hosts.
Chapter 2. Securing Your Network Important The KNOWN, UNKNOWN, and PARANOID wildcards should be used with care, because they rely on a functioning DNS server for correct operation. Any disruption to name resolution may prevent legitimate users from gaining access to a service. 2.3.2.1.2. Patterns Patterns can be used in the client field of access rules to more precisely specify groups of client hosts.
TCP Wrappers Configuration Files • The slash (/) — If a client list begins with a slash, it is treated as a file name. This is useful if rules specifying large numbers of hosts are necessary. The following example refers TCP Wrappers to the /etc/telnet.hosts file for all Telnet connections: in.telnetd : /etc/telnet.hosts Other, less used patterns are also accepted by TCP Wrappers. Refer to the hosts_access man 5 page for more information. Warning Be very careful when using hostnames and domain names.
Chapter 2. Securing Your Network 2.3.2.2. Option Fields In addition to basic rules that allow and deny access, the Red Hat Enterprise Linux implementation of TCP Wrappers supports extensions to the access control language through option fields. By using option fields in hosts access rules, administrators can accomplish a variety of tasks such as altering log behavior, consolidating access control, and launching shell commands. 2.3.2.2.1.
TCP Wrappers Configuration Files in.telnetd : .example.com \ : spawn /bin/echo `/bin/date` from %h>>/var/log/telnet.log \ : allow • twist — Replaces the requested service with the specified command. This directive is often used to set up traps for intruders (also called "honey pots"). It can also be used to send messages to connecting clients. The twist directive must occur at the end of the rule line. In the following example, clients attempting to access FTP services from the example.
Chapter 2. Securing Your Network : spawn /bin/echo `/bin/date` access denied to %h>>/var/log/sshd.log \ : deny Similarly, expansions can be used to personalize messages back to the client. In the following example, clients attempting to access FTP services from the example.com domain are informed that they have been banned from the server: vsftpd : .example.
xinetd Configuration Files includedir /etc/xinetd.d These lines control the following aspects of xinetd: • instances — Specifies the maximum number of simultaneous requests that xinetd can process. • log_type — Configures xinetd to use the authpriv log facility, which writes log entries to the /var/log/secure file. Adding a directive such as FILE /var/log/xinetdlog would create a custom log file called xinetdlog in the /var/log/ directory.
Chapter 2. Securing Your Network • service — Specifies the service name, usually one of those listed in the /etc/services file. • flags — Sets any of a number of attributes for the connection. REUSE instructs xinetd to reuse the socket for a Telnet connection. Note The REUSE flag is deprecated. All services now implicitly use the REUSE flag. • socket_type — Sets the network socket type to stream. • wait — Specifies whether the service is single-threaded (yes) or multi-threaded (no).
xinetd Configuration Files This section discusses using xinetd to control access to services. Note Unlike TCP Wrappers, changes to access control only take effect if the xinetd administrator restarts the xinetd service. Also, unlike TCP Wrappers, access control through xinetd only affects services controlled by xinetd. The xinetd hosts access control differs from the method used by TCP Wrappers. While TCP Wrappers places all of the access configuration within two files, /etc/hosts.allow and /etc/ hosts.
Chapter 2. Securing Your Network When using TCP Wrappers in conjunction with xinetd access controls, it is important to understand the relationship between the two access control mechanisms. The following is the sequence of events followed by xinetd when a client requests a connection: 1. The xinetd daemon accesses the TCP Wrappers hosts access rules using a libwrap.a library call. If a deny rule matches the client, the connection is dropped.
Additional Resources socket_type = stream wait = no server = /usr/kerberos/sbin/telnetd log_on_success += DURATION USERID log_on_failure += USERID bind = 123.123.123.123 redirect = 10.0.1.13 23 } The bind and redirect options in this file ensure that the Telnet service on the machine is bound to the external IP address (123.123.123.123), the one facing the Internet. In addition, any requests for Telnet service sent to 123.123.123.
Chapter 2. Securing Your Network • /usr/share/doc/tcp_wrappers-/ — This directory contains a README file that discusses how TCP Wrappers work and the various hostname and host address spoofing risks that exist. • /usr/share/doc/xinetd-/ — This directory contains a README file that discusses aspects of access control and a sample.conf file with various ideas for modifying service-specific configuration files in the /etc/xinetd.d/ directory.
How Does a VPN Work? 2.4.1. How Does a VPN Work? When a packet is transmitted from a client, it sends it through the VPN router or gateway, which adds an Authentication Header (AH) for routing and authentication. The data is then encrypted and, finally, enclosed with an Encapsulating Security Payload (ESP). This latter constitutes the decryption and handling instructions.
Chapter 2. Securing Your Network • /etc/ipsec.d/cert*.db - Certificate database files. The old default NSS database file is cert8.db. From Red Hat Enterprise Linux 6 onwards, NSS sqlite databases are used in the cert9.db file. • /etc/ipsec.d/key*.db - Key database files. The old default NSS database file is key3.db. From Red Hat Enterprise Linux 6 onwards, NSS sqlite databases are used in the key4.db file. • /etc/ipsec.d/cacerts - Location for Certificate Authority (CA) certificates. • /etc/ipsec.
Firewalls • Adding/deleting a connection: • ipsec auto --add/delete • Connection establishment/breaking: • ipsec auto --up/down • Generating RSA keys: • ipsec newhostkey --configdir /etc/ipsec.d --password password --output / etc/ipsec.d/ • Checking ipsec policies in Kernel: • ip xfrm policy • ip xfrm state • Creating self-signed certificate: • certutil -S -k rsa -n -s "CN=ca-cert-common-name" -w 12 -t "C,C,C" -x -d /etc/ipsec.
Chapter 2. Securing Your Network Apart from the differences between hardware and software firewalls, there are also differences in the way firewalls function that separate one solution from another. Table 2.2, “Firewall Types” details three common types of firewalls and how they function: Table 2.2.
Netfilter and IPTables 2.5.1. Netfilter and IPTables The Linux kernel features a powerful networking subsystem called Netfilter. The Netfilter subsystem provides stateful or stateless packet filtering as well as NAT and IP masquerading services. Netfilter also has the ability to mangle IP header information for advanced routing and connection state management. Netfilter is controlled using the iptables tool. 2.5.1.1.
Chapter 2. Securing Your Network Figure 2.5. Firewall Configuration Tool Note The Firewall Configuration Tool only configures a basic firewall. If the system needs more complex rules, refer to Section 2.6, “IPTables” for details on configuring specific iptables rules. 2.5.2.2. Enabling and Disabling the Firewall Select one of the following options for the firewall: • Disabled — Disabling the firewall provides complete access to your system and does no security checking.
Basic Firewall Configuration 2.5.2.3. Trusted Services Enabling options in the Trusted services list allows the specified service to pass through the firewall. WWW (HTTP) The HTTP protocol is used by Apache (and by other Web servers) to serve web pages. If you plan on making your Web server publicly available, select this check box. This option is not required for viewing pages locally or for developing web pages. This service requires that the httpd package be installed.
Chapter 2. Securing Your Network 2.5.2.5. Saving the Settings Click OK to save the changes and enable or disable the firewall. If Enable firewall was selected, the options selected are translated to iptables commands and written to the /etc/sysconfig/ iptables file. The iptables service is also started so that the firewall is activated immediately after saving the selected options. If Disable firewall was selected, the /etc/sysconfig/iptables file is removed and the iptables service is stopped immediately.
Common IPTables Filtering The three built-in chains are INPUT, OUTPUT, and FORWARD. These chains are permanent and cannot be deleted. The chain specifies the point at which a packet is manipulated. The -j option specifies the target of the rule; i.e., what to do if the packet matches the rule. Examples of built-in targets are ACCEPT, DROP, and REJECT. Refer to the iptables man page for more information on the available chains, options, and targets. 2.5.3.2.
Chapter 2. Securing Your Network To allow users to perform network-related functions and to use networking applications, administrators must open certain ports for communication. For example, to allow access to port 80 on the firewall, append the following rule: [root@myServer ~ ] # iptables -A INPUT -p tcp -m tcp --dport 80 -j ACCEPT This allows users to browse websites that communicate using the standard port 80. To allow access to secure websites (for example, https://www.example.
FORWARD and NAT Rules Administrators must, therefore, find alternative ways to share access to Internet services without giving public IP addresses to every node on the LAN. Using private IP addresses is the most common way of allowing all nodes on a LAN to properly access internal and external network services. Edge routers (such as firewalls) can receive incoming transmissions from the Internet and route the packets to the intended LAN node.
Chapter 2.
Malicious Software and Spoofed IP Addresses With this command, all HTTP connections to port 80 from outside of the LAN are routed to the HTTP server on a network separate from the rest of the internal network. This form of network segmentation can prove safer than allowing HTTP connections to a machine on the network. If the HTTP server is configured to accept secure connections, then port 443 must be forwarded as well. 2.5.6.
Chapter 2. Securing Your Network • ESTABLISHED — A packet that is part of an existing connection. • RELATED — A packet that is requesting a new connection but is part of an existing connection. For example, FTP uses port 21 to establish a connection, but data is transferred on a different port (typically port 20). • INVALID — A packet that is not part of any connections in the connection tracking table.
IPTables 2.5.9.3. Related Documentation • Red Hat Linux Firewalls, by Bill McCarty; Red Hat Press — a comprehensive reference to building network and server firewalls using open source packet filtering technology such as Netfilter and iptables. It includes topics that cover analyzing firewall logs, developing firewall rules, and customizing your firewall using various graphical tools.
Chapter 2. Securing Your Network The built-in chains for the nat table are as follows: • PREROUTING — Alters network packets when they arrive. • OUTPUT — Alters locally-generated network packets before they are sent out. • POSTROUTING — Alters network packets before they are sent out. The built-in chains for the mangle table are as follows: • INPUT — Alters network packets targeted for the host. • OUTPUT — Alters locally-generated network packets before they are sent out.
Command Options for IPTables Regardless of their destination, when packets match a particular rule in one of the tables, a target or action is applied to them. If the rule specifies an ACCEPT target for a matching packet, the packet skips the rest of the rule checks and is allowed to continue to its destination. If a rule specifies a DROP target, that packet is refused access to the system and nothing is sent back to the host that sent the packet.
Chapter 2. Securing Your Network Type iptables -h to view a comprehensive list of iptables command structures. 2.6.2.2. Command Options Command options instruct iptables to perform a specific action. Only one command option is allowed per iptables command. With the exception of the help command, all commands are written in upper-case characters. The iptables commands are as follows: • -A — Appends the rule to the end of the specified chain.
Command Options for IPTables • -N — Creates a new chain with a user-specified name. The chain name must be unique, otherwise an error message is displayed. • -P — Sets the default policy for the specified chain, so that when packets traverse an entire chain without matching a rule, they are sent to the specified target, such as ACCEPT or DROP. • -R — Replaces a rule in the specified chain. The rule's number must be specified after the chain's name. The first rule in a chain corresponds to rule number one.
Chapter 2. Securing Your Network If the -i parameter is used but no interface is specified, then every interface is affected by the rule. • -j — Jumps to the specified target when a packet matches a particular rule. The standard targets are ACCEPT, DROP, QUEUE, and RETURN. Extended options are also available through modules loaded by default with the Red Hat Enterprise Linux iptables RPM package. Valid targets in these modules include LOG, MARK, and REJECT, among others.
Command Options for IPTables Warning Secure the /etc/services file to prevent unauthorized editing. If this file is editable, crackers can use it to enable ports on your machine you have otherwise closed. To secure this file, type the following commands as root: [root@myServer ~]# chown root.root /etc/services [root@myServer ~]# chmod 0644 /etc/services [root@myServer ~]# chattr +i /etc/services This prevents the file from being renamed, deleted or having links made to it. 2.6.2.4.1.
Chapter 2. Securing Your Network • SYN • URG • ALL • NONE For example, an iptables rule that contains the following specification only matches TCP packets that have the SYN flag set and the ACK and FIN flags not set: --tcp-flags ACK,FIN,SYN SYN Use the exclamation point character (!) before the --tcp-flags to reverse the effect of the match option. • --tcp-option — Attempts to match with TCP-specific options that can be set within a particular packet.
Command Options for IPTables The limit module enables the following options: • --limit — Sets the maximum number of matches for a particular time period, specified as a / pair. For example, using --limit 5/hour allows five rule matches per hour. Periods can be specified in seconds, minutes, hours, or days. If a number and time modifier are not used, the default value of 3/hour is assumed. • --limit-burst — Sets a limit on the number of packets able to match a rule at one time.
Chapter 2. Securing Your Network • — A user-defined chain within the table. User-defined chain names must be unique. This target passes the packet to the specified chain. • ACCEPT — Allows the packet through to its destination or to another chain. • DROP — Drops the packet without responding to the requester. The system that sent the packet is not notified of the failure. • QUEUE — The packet is queued for handling by a user-space application.
Saving IPTables Rules 2.6.2.6. Listing Options The default list command, iptables -L [], provides a very basic overview of the default filter table's current chains. Additional options provide more information: • -v — Displays verbose output, such as the number of packets and bytes each chain has processed, the number of packets and bytes each rule has matched, and which interfaces apply to a particular rule. • -x — Expands numbers into their exact values.
Chapter 2. Securing Your Network Note Note the difference between the iptables command (/sbin/iptables), which is used to manipulate the tables and chains that constitute the iptables functionality, and the iptables service (/sbin/service iptables), which is used to enable and disable the iptables service itself. 2.6.4.
IPTables Control Scripts value of IPTABLES_STATUS_NUMERIC to no. Refer to Section 2.6.4.1, “IPTables Control Scripts Configuration File” for more information about the iptables-config file. • panic — Flushes all firewall rules. The policy of all configured tables is set to DROP. This option could be useful if a server is known to be compromised.
Chapter 2. Securing Your Network • IPTABLES_STATUS_NUMERIC — Outputs IP addresses in numeric form instead of domain or hostnames. This directive accepts the following values: • yes — The default value. Returns only IP addresses within a status output. • no — Returns domain or hostnames within a status output. 2.6.5. IPTables and IPv6 If the iptables-ipv6 package is installed, netfilter in Red Hat Enterprise Linux can filter the nextgeneration IPv6 Internet protocol.
Chapter 3. Encryption There are two main types of data that must be protected: data at rest and data in motion. These different types of data are protected in similar ways using similar technology but the implementations can be completely different. No single protective implementation can prevent all possible methods of compromise as the same information may be at rest and in motion at different points in time. 3.1.
Chapter 3. Encryption should also be protected when transmitted across a network. If the network session was encrypted then you would not have to worry as much about the data being compromised while it is being transmitted. Data in motion is particularly vulnerable to attackers because the attacker does not have to be near the computer in which the data is being stored rather they only have to be somewhere along the path. Encryption tunnels can protect data along the path of communications. 3.5.
LUKS Disk Encryption default_algorithms = ALL dynamic_path = /usr/lib/openssl/engines/libpadlock.so init = 1 Note: for 64-bit systems, use dynamic_path = /usr/lib64/openssl/engines/ libpadlock.so.
Chapter 3. Encryption 3.8.2. Manually Encrypting Directories Warning Following this procedure will remove all data on the partition that you are encrypting. You WILL lose all your information! Make sure you backup your data to an external source before beginning this procedure! 3.8.3. Step-by-Step Instructions 1. enter runlevel 1: telinit 1 2. unmount your existing /home: umount /home 3. if it fails use fuser to find and kill processes hogging /home: fuser -mvk /home 4.
What you have just accomplished. 3.8.4. What you have just accomplished. Congratulations, you now have an encrypted partition for all of your data to safely rest while the computer is off. 3.8.5. Links of Interest For additional information on LUKS or encrypting hard drives under Red Hat Enterprise Linux please visit one of the following links: 5 • LUKS - Linux Unified Key Setup • HOWTO: Creating an encrypted Physical Volume (PV) using a second hard drive and pvmove 6 3.9.
Chapter 3. Encryption Warning If you forget your passphrase, the key cannot be used and any data encrypted using that key will be lost. To find your GPG key ID, look in the ''Key ID'' column next to the newly created key. In most cases, if you are asked for the key ID, you should prepend "0x" to the key ID, as in "0x6789ABCD". You should make a backup of your private key and store it somewhere secure. 3.9.3.
About Public Key Encryption At the confirmation prompt, enter the letter O to continue if all entries are correct, or use the other options to fix any problems. Finally, enter a passphrase for your secret key. The gpg program asks you to enter your passphrase twice to ensure you made no typing errors. Finally, gpg generates random data to make your key as unique as possible. Move your mouse, type random keys, or perform other tasks on the system during this step to speed up the process.
102
Chapter 4. General Principles of Information Security The following general principals provide an overview of good security practices: • encrypt all data transmitted over networks to help prevent man-in-the-middle attacks and eavesdropping. It is important to encrypt authentication information, such as passwords. • minimize the amount of software installed and running services.
104
Chapter 5. Secure Installation Security begins with the first time you put that CD or DVD into your disk drive to install Red Hat Enterprise Linux. Configuring your system securely from the beginning makes it easier to implement additional security settings later. 5.1. Disk Partitions The NSA recommends creating separate partitions for /boot, /, /home, /tmp, and /var/tmp. The reasons for each are different and we will address each partition.
106
Chapter 6. Software Maintenance Software maintenance is extremely important to maintaining a secure system. It is vital to patch software as soon as it becomes available in order to prevent attackers from using known holes to infiltrate your system. 6.1. Install Minimal Software It is best practice to install only the packages you will use because each piece of software on your computer could possibly contain a vulnerability.
108
Chapter 7. Federal Standards and Regulations 7.1. Introduction In order to maintain security levels, it is possible for your organization to make efforts to comply with federal and industry security specifications, standards and regulations. This chapter describes some of these standards and regulations. 7.2. Federal Information Processing Standard (FIPS) The Federal Information Processing Standard (FIPS) Publicaton 140-2, is a computer security standard, developed by a U.S.
Chapter 7. Federal Standards and Regulations 7.3. National Industrial Security Program Operating Manual (NISPOM) The NISPOM (also called DoD 5220.22-M), as a component of the National Industrial Security Program (NISP), establishes a series of procedures and requirements for all government contractors with regard to classified information. The current NISPOM is dated February 28, 2006. The NISPOM document can be downloaded from the following URL: https://www.dss.
Chapter 8. References The following references are pointers to additional information that is relevant to SELinux and Red Hat Enterprise Linux but beyond the scope of this guide. Note that due to the rapid development of SELinux, some of this material may only apply to specific releases of Red Hat Enterprise Linux. Books SELinux by Example Mayer, MacMillan, and Caplan Prentice Hall, 2007 Tutorials and Help Understanding and Customizing the Apache HTTP SELinux Policy http://docs.fedoraproject.
Chapter 8. References Community Fedora SELinux User Guide http://docs.fedoraproject.org/ Fedora SELinux Managing Confined Services Guide http://docs.fedoraproject.org/ SELinux community page http://selinuxproject.org/ IRC irc.freenode.net, #selinux, #fedora-selinux, #security History Quick history of Flask http://www.cs.utah.edu/flux/fluke/html/flask.html Full background on Fluke http://www.cs.utah.edu/flux/fluke/html/index.
Appendix A. Encryption Standards A.1. Synchronous Encryption A.1.1. Advanced Encryption Standard - AES In cryptography, the Advanced Encryption Standard (AES) is an encryption standard adopted by the U.S. government. The standard comprises three block ciphers, AES-128, AES-192 and AES-256, adopted from a larger collection originally published as Rijndael. Each AES cipher has a 128-bit block size, with key sizes of 128, 192 and 256 bits, respectively.
Appendix A. Encryption Standards collaborated to publicly break a DES key in 22 hours and 15 minutes (see chronology). There are also some analytical results which demonstrate theoretical weaknesses in the cipher, although they are unfeasible to mount in practice. The algorithm is believed to be practically secure in the form of Triple DES, although there are theoretical attacks. In recent years, the cipher has been superseded by the 5 Advanced Encryption Standard (AES).
RSA communications channel. This key can then be used to encrypt subsequent communications using a 12 symmetric key cipher. A.2.1.1. Diffie-Hellman History The scheme was first published by Whitfield Diffie and Martin Hellman in 1976, although it later emerged that it had been separately invented a few years earlier within GCHQ, the British signals intelligence agency, by Malcolm J. Williamson but was kept classified.
Appendix A. Encryption Standards of the decisional Diffie–Hellman assumption. Developed by Ronald Cramer and Victor Shoup in 1998, it is an extension of the Elgamal cryptosystem. In contrast to Elgamal, which is extremely malleable, Cramer–Shoup adds additional elements to ensure non-malleability even against a resourceful attacker.
Appendix B. Revision History Revision 1.5 Apr 19 2010 Minor fixes, final build for Beta Scott Radvan sradvan@redhat.com Revision 1.4.1 Mar 5 2010 QE Review and Updates Scott Radvan sradvan@redhat.com Revision 1.3 Feb 19 2010 Push to testing area ready for review. Scott Radvan sradvan@redhat.
118