
Installation guide


Chapter 4. Installing Red Hat Enterprise Linux 23
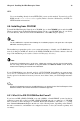
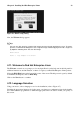
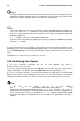
Figure 4-6. HTTP Setup Dialog
Next, the Welcome dialog appears.
Tip
You can save disk space by using the ISO images you have already copied to the server. To accom-
plish this, install Red Hat Enterprise Linux using ISO images without copying them into a single tree
by loopback mounting them. For each ISO image:
mkdir discX
mount -o loop example-1.iso discX
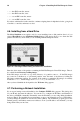
4.11. Welcome to Red Hat Enterprise Linux
The Welcome screen does not prompt you for any input. Read over the help text in the left panel for
additional instructions and information on where to register your Red Hat Enterprise Linux product.
Notice the Hide Help button at the bottom left corner of the screen. The help screen is open by default.
To minimize the help text, click on Hide Help.
Click on the Next button to continue.
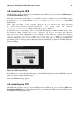
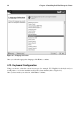
4.12. Language Selection
Using your mouse, select a language to use for the installation (refer to Figure 4-7).
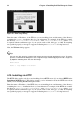
Selecting the appropriate language also helps target your time zone configuration later in the installa-
tion. The installation program tries to define the appropriate time zone based on what you specify on
this screen.