
User`s guide


??????????????????????????????????????????????????????????????????????????????????????????????????????????????????????+???????????????????????×?????????????????????????????????????????????????−26217
Additional Information
72 RedHawk Linux Version 5.4 Release Notes
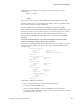
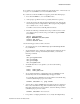
Normally, you must ensure that the grub entries contain the correct root
LABEL or root partition information along with the correct disk order. For
example, note the differences in “hd0” and “hd1” and “sda2” and “sdb2”
below:
title RedHawk Linux 5.1.2-20080916 (Trace=Yes, Debug=No)
root (hd0,0)
kernel /vmlinuz-2.6.23.17-RedHawk-5.1.2-trace ro
root=/dev/sda2
title RedHawk Linux 5.4-20091211 (Trace=Yes, Debug=No)
root (hd1,0)
kernel /vmlinuz-2.6.31.6-RedHawk-5.4-trace ro
root=/dev/sdb2
In this case you would most likely be referencing sda in /etc/fstab on
/dev/sda2 and sdb in /etc/fstab on /dev/sdb2.
8.1.5 How to Install Using VNC
Virtual Network Computing (VNC) is a graphical desktop sharing system which uses the
RFB protocol to remotely control another computer. It transmits the keyboard and mouse
events from one computer to another, relaying the graphical screen updates in reverse
direction, over a network.
VNC by default uses TCP ports 5900 through 5906, each port corresponding to a separate
screen (:0 to :6).
If you are having difficulties installing in graphical mode and do not want to use text mode,
VNC is an option. You need to be able to establish a network connection between the
system you are installing (the VNC server) and the system that will remotely display the
installation GUI (the VNC client).
Any system with a VNC viewer application can be used as a VNC client. If you are
currently running a previously installed RedHawk system, the VNC client application is
accessed under the gnome desktop cascading menu selection: Applications ->
Accessories -> VNC Viewer, or by using the command /usr/bin/vncviewer.
Note that VNC installs have only been tested using another RedHawk system as the VNC
client.
Perform the following steps to install using VNC.
On the system you wish to install (VNC server):
1. Follow the procedure outlined in section 5.0. Installation Procedures
on page 12 until you reach 5.1.1 step 4.
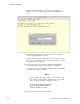
2. At step 4, enter “linux vnc” then press Enter to start the VNC installer:
boot: linux [options] vnc
3. Continue with step 5 in section 5.1.1.
4. After step 5, the VNC installer prompts you with a text based GUI for extra
setup. Use the Tab key to jump between fields, the up/down arrows within
the fields, and the space bar to select your settings.
a. Select the language. The default is “English”. Select [OK] and press Enter to
continue.