
User`s guide

??????????????????????????????????????????????????????????????????????????????????????????????????????????????????????+???????????????????????×?????????????????????????????????????????????????−26217
Installation Procedures
RedHawk Linux Version 5.4 Release Notes 37
9. Reboot the system choosing the new RedHawk kernel and verify that the
system boots properly.
10. Continue with the next section if an RCIM is to be installed. Otherwise,
proceed to the following section to install Frequency-Based Scheduler
(FBS).
5.3 Installing the RCIM
The following serves as an installation checklist for installing a PCI-based RCIM board in an
iHawk system. If an RCIM is not installed in your iHawk system, it should be installed now.
See the Real-Time Clock and Interrupt Module (RCIM) User’s Guide for complete details. The
PDF file for this manual is available for viewing by clicking on the “Documents” icon on the
desktop.
5.3.1 Quick Hardware Installation Checklist
1. Before installing the RCIM, determine if you will be using the RCIM to
accept or deliver external interrupts and the mode in which the RCIM will
run (see “RCIM Connection Modes” on page 70).
NOTE
The initial release of the RCIM III board does not support cabling
(chaining) boards together or distributing RTC or PIG operations
to local Distributed Interrupt devices.
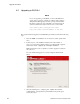
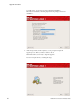
2. Verify that the ccur-rcim RPM has been installed by executing the
command rpm -q ccur-rcim. The system will inform you if it is not
installed. It is a standard package in the RedHawk installation.
3. Power down the system and remove all
power cords.
NOTE
Concurrent Computer Corporation strongly recommends that you
use an antistatic wrist strap and a conductive foam pad when
installing and removing printed circuit boards.
4. Open the case of your system and identify the PCIe slot (RCIM III) or PCI
slot (RCIM II or RCIM I) where you want the RCIM to reside. In general,
it is best for the RCIM to be configured in a slot where minimal or no
contention with other devices occurs and at the highest IRQ priority
possible. For more information, refer to the iHawk Optimization Guide,
publication number 0898011. The PDF file for this manual is available for
viewing by clicking on the “Documents” icon on the desktop.
5. Insert the RCIM into the selected PCI slot and lock it down.
6. If this is to be part of an RCIM chain, attach the synchronization cable as
required (see the Real-Time Clock and Interrupt Module (RCIM) User’s
Guide manual for complete details).