
System information

Using the Profiler to Troubleshoot Performance Problems
Page 166 Identity Manager 7.1 Update 1 • Release Notes
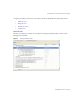
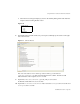
3. Complete the following fields on the Name and Location panel, and then click Next:
❍ Project Name: Enter
Idm711
as the project name.
❍ Project Location: Use the default location or specify a different location.
❍ Project Folder: Use the default folder or specify a different folder.
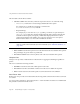
4. When the Identity Manager WAR File Location panel displays, enter the location of the
Identity Manager 7.1 Update 1
war
file. Typically, this file is located in the
waveset\images
directory.
5. Click Next to continue to the Repository Setup panel.
You should not have to change the default settings on this panel, just click Finish. When
you see the
BUILD SUCCESSFUL
message in the Identity Manager IDE Output window, you
can extract the Profiler tutorial files. See “Step 2: Unzip the Profiler Tutorial” for
instructions.
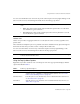
Step 2: Unzip the Profiler Tutorial
Unzip
profiler-tutorial.zip
in the project root. The extracted files include:
project root
/custom/WEB-INF/config/ProfilerTutorial1.xml
project root
/custom/WEB-INF/config/ProfilerTutorial2.xml
project root
/src/org/example/ProfilerTutorialExample.java
project root
/PROFILER_TUTORIAL_README.txt
You are now ready to start the Profiler.
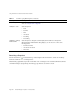
Step 3: Starting the Profiler
To start the Profiler,
1. Use the instructions provided in “Before You Begin” on page 152 to increase the memory
for your server and Netbeans JVM.
2. Use any of the methods described in “Overview” on page 147 to start the Profiler.
3. When the Profiler Options dialog displays (Figure 8), you can specify profiling options.
NOTE Currently, version 7.1 Update 1 is the only Identity Manager version that
supports profiling.