
Installation guide


backup directory.
5. Delete the temporary directory.
rm -rf /tmp/rhds80
6. After the Directory Server packages are installed, run the setup program to set up and
configure the default Directory Server instance and the Administration Server.
/usr/sbin/setup-ds-admin.pl
7. Accept the initial screens for licensing and dsktune output, then select the setup type, and
proceed with configuring the new Directory Server instance.
• Section 3, “Express Setup”
• Section 4, “Typical Setup”
• Section 5, “Custom Setup”
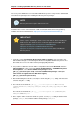
NOTE
Directory Server version 8.0 conforms to the Filesystem Hierarchy Standards.
This means that the directories and files are in different locations than previous
versions. For more information on FHS, see the http://www.pathname.com/fhs/
homepage. For a table showing the new file locations, see Section 1, “Directory
Server File Locations”.
2.2. Installing from an ISO Image
The Red Hat Network Red Hat Directory Server 8.0 Solaris channel also has an ISO image
which contains all of the required packages. Like installing the packages individually, the ISO
image uses Sun's pkgadd to manage the installation. To install the Directory Server on Solaris,
do the following:
1. Download the ISO image from Red Hat Network, and burn it to a CD or DVD.
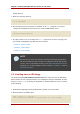
2. Mount the CD on any writable drive:
mount -F hsfs -o ro `lofiadm -a
/directory/solaris9-rhdirserv-8.0-sparcv9-disc1.iso` /directory/tmp
Chapter 5. Setting up Red Hat Directory Server on Sun Solaris
64