
Installation guide

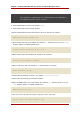


Creating directory server . . .
Your new DS instance 'example2' was successfully created.
Creating the configuration directory server . . .
Beginning Admin Server reconfiguration . . .
Creating Admin Server files and directories . . .
Updating adm.conf . . .
Updating admpw . . .
Registering admin server with the configuration directory server . . .
Updating adm.conf with information from configuration directory server . . .
Updating the configuration for the httpd engine . . .
Restarting admin server . . .
The admin server was successfully started.
Admin server was successfully reconfigured and started.
Exiting . . .
Log file is '/tmp/setupulSykp.log'
When the setup-ds-admin.pl script is done, then the Directory Server is configured and
running. To log into the Directory Server Console to begin setting up your directory service, do
the following:
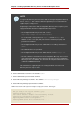
1. Get the Administration Server port number from the Listen parameter in the console.conf
configuration file.
grep \^Listen /etc/dirsrv/admin-serv/console.conf
Listen 0.0.0.0:9830
2. Using the Administration Server port number, launch the Console.
/usr/bin/redhat-idm-console -a http://localhost:9830
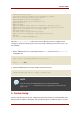
NOTE
If you do not pass the Administration Server port number with the
redhat-idm-console command, then you are prompted for it at the Console
login screen.
5. Custom Setup
Custom setup provides two special configuration options that allow you to add information to the
Directory Server databases during the setup period. One imports an LDIF file, which is useful if
Custom Setup
39