
Installation guide


122
EMC NetWorker Release 8.1 SP1 Installation Guide
Microsoft Windows Installation
4. On the Welcome to NetWorker Maintenance window and click Next.
5. On the Maintenance Type window, select Change and click Next.
6. Click Configure the Windows firewall and click Next.
7. Click Language Packs and click Next.
8. On the Feature Selection window, select the required language packs, select This
feature will be installed on local hard drive and click Next.
The English language pack is required and cannot be unselected.
9. In the Ready to Change window, review the settings and click Change.
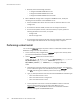
10. On the NetWorker Server Selection window, specify the short name and FQDN of each
NetWorker servers that will perform backups and directed recoveries on this host:
• To add a NetWorker server that does not appear in the Available Servers list, type
the name of the server in Enter a server name, click Add.
The first name specified in the servers file becomes the default NetWorker server
for the host.
• To browse for available NetWorker servers, click Update List. Select a NetWorker
server from the Available Servers list.
• To add or remove NetWorker servers from the Available Servers list to the Selected
Servers list, use the arrow buttons.
If you do not specify a NetWorker server, any NetWorker server can backup this
host and perform a directed recovery of this host. The list of trusted NetWorker
servers is stored in the
NetWorker_installation_directory
\res\servers file.
11. Click Next.
12. Click OK to complete the install.
Changing the installation type
A host set up as a NetWorker client, NetWorker server, or NetWorker storage node can be
changed to another type.
This section describes how to change the installation type from:
◆
A NetWorker client to a NetWorker storage node.
◆
A NetWorker client to a NetWorker server.
◆
A NetWorker server to a NetWorker client.
◆
A NetWorker server to a NetWorker storage node.
◆
A NetWorker storage node to a NetWorker server.
◆
A NetWorker storage node to a NetWorker client.