
Installation guide
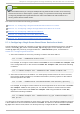


option, as described in Section 5.5, “ Configuring Fence Devices” . Each node is configured with a
unique APC switch power port number: The port number for nod e-0 1. example. co m is 1, the port
number for no d e-0 2. example. co m is 2, and the port number for nod e-0 3. example. co m is 3.
ccs -h node01.example.com --addmethod APC node01.example.com
ccs -h node01.example.com --addmethod APC node02.example.com
ccs -h node01.example.com --addmethod APC node03.example.com
ccs -h node01.example.com --addfenceinst my_apc node01.example.com APC
port=1
ccs -h node01.example.com --addfenceinst my_apc node02.example.com APC
port=2
ccs -h node01.example.com --addfenceinst my_apc node03.example.com APC
port=3
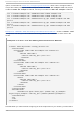
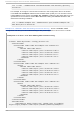
Example 5.2, “ cl uster.co nf After Adding Power-Based Fence Methods ” shows a cl uster. co nf
configuration file after you have added these fencing methods and instances to each node in the
cluster.
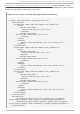
Examp le 5.2. cl uster.co nf Af t er Ad d in g Po wer- B ased Fen ce Met h o d s
<cluster name="mycluster" config_version="3">
<clusternodes>
<clusternode name="node-01.example.com" nodeid="1">
<fence>
<method name="APC">
<device name="my_apc" port="1"/>
</method>
</fence>
</clusternode>
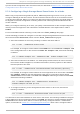
<clusternode name="node-02.example.com" nodeid="2">
<fence>
<method name="APC">
<device name="my_apc" port="2"/>
</method>
</fence>
</clusternode>
<clusternode name="node-03.example.com" nodeid="3">
<fence>
<method name="APC">
<device name="my_apc" port="3"/>
</method>
</fence>
</clusternode>
</clusternodes>
<fencedevices>
<fencedevice agent="fence_apc" ipaddr="apc_ip_example"
login="login_example" name="my_apc" passwd="password_example"/>
</fencedevices>
<rm>
</rm>
</cluster>
Note that when you have finished configuring all of the components of your cluster, you will need to
Red Hat Ent erprise Linux 6 Clust er Administ rat ion
78