
Specifications


Copyright © 2015. Tenable Network Security, Inc. All rights reserved. Tenable Network Security and Nessus are registered trademarks of Tenable Network Security, Inc.
36
On the new server, do the following steps:
1. Install the Nessus 6.1 x64 DMG package, according to the installation instructions at the beginning of the Mac OS
X section of this document.
2. When the Nessus login page opens in your web browser, close the page or tab.
3. Open a terminal window and run the sudo command. You will be prompted for the user password:
# sudo –s
Password:
4. Stop the Nessus service:
# launchctl unload -w /Library/LaunchDaemons/com.tenablesecurity.nessusd.plist
5. Log in to the Tenable Support Portal and reset the Nessus activation code for this installation.
6. Restore and overwrite the critical files from the older server. To do this, untar the tar ball in the correct directory:
# mv tmp/tarOfMyNessusInstallation.tar.gz /
# tar -zxvf tarOfMyNessusInstallation.tar.gz
7. Register the activation code with this installation. This will also have Nessus fetch the latest plugins.
# /Library/Nessus/run/sbin/nessuscli fetch -register <activation code>
8. Re-index Nessus plugins. This may take up to 15-20 minutes, depending on your system.
# /Library/Nessus/run/sbin/nessus-service -R
9. Once Nessus completes the re-indexing process, restart the Nessus service:
# launchctl load -w /Library/LaunchDaemons/com.tenablesecurity.nessusd.plist
10. Log in to your Nessus scanner using the Nessus UI at https://yoursystem:8834/.
11. Once you confirm your new system is working correctly and all the files are migrated, go through the removal
process on the original system listed in the Mac OS X section of this document.
For backing up and/or restoring a complete Nessus installation, please contact Tenable Support if you have any
questions. This will help to ensure there are no deviations from a normal installation that may prevent critical data from
being maintained.
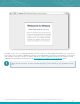
Feed Registration and UI Configuration
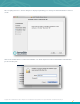
This section describes how to configure the Nessus 6 server on all platforms. The initial configuration options such as
proxy options and supplying an Activation Code is performed via a web-based process. After the installation of Nessus,
you have six hours to complete the registration process for security reasons. If the registration is not completed in that
time, restart nessusd and restart the registration process.
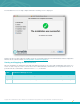
If the software installation does not open your web browser to the configuration page, you can load a browser and go to
https://[Nessus Server IP]:8834/WelcomeToNessus-Install/welcome (or the URL provided during the install process) to
begin the process. Note: Unix-based installations may give a URL containing a relative host name that is not in DNS (e.g.,
http://mybox:8834/). If the host name is not in DNS, you must connect to the Nessus server using an IP address or a valid
DNS name.