
Specifications

Copyright © 2015. Tenable Network Security, Inc. All rights reserved. Tenable Network Security and Nessus are registered trademarks of Tenable Network Security, Inc.
19
/opt/nessus/etc/nessus
/opt/nessus/sbin
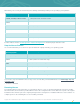
The migration steps works for Nessus 5 and higher. You will be able to migrate from Nessus 5.2.7 to Nessus
6, but not be able to downgrade.
The first steps are done on the original system where you have Nessus installed.
1. Open a terminal window and run the sudo or su command to enable root privileges. You will be prompted for the
user password:
# sudo –s
Password:
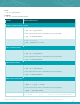
2. Stop the Nessus service:
# /sbin/service nessusd stop
3. Change to the root directory:
# cd /
4. Backup the critical files in /opt/nessus/var/nessus and all of the /opt/nessus/etc/nessus directory.
Given these will be copied to another system, Tenable recommends creating a tar ball of the files and directories:
# tar -zcvf /tmp/tarOfMyNessusInstallation.tar.gz
/opt/nessus/nessus/global.db
/opt/nessus/var/nessus/master.key
/opt/nessus/var/nessus/policies.db
/opt/nessus/var/nessus/users
/opt/nessus/etc/nessus
This will create a tarball in the /tmp directory with the name tarOfMyNessusInstallation.tar format.
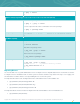
5. Copy over the tar ball to the new server:
# scp /tmp/tarOfMyNessusInstallation.tar.gz mynewsystem:/tmp
On the new server, do the following steps:
1. Install the Nessus 6.1 x64 Linux package, according to the installation instructions at the beginning of the Linux
section of this document.
2. Open a terminal window and run the sudo command. You will be prompted for the user password:
# sudo –s
Password:
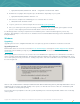
3. Log in to the Tenable Support Portal and reset the Nessus activation code for this installation.
4. Restore and overwrite the critical files from the older server. To do this, untar the tar ball in the correct directory:
# mv /tmp/tarOfMyNessusInstallation.tar.gz /
# tar -xvf tarOfMyNessusInstallation.tar.gz
5. Register the activation code with this installation. This will also have Nessus fetch the latest plugins.