Nessus 6.
Table of Contents Introduction ......................................................................................................................................... 4 Standards and Conventions........................................................................................................................... 4 Organization .................................................................................................................................................. 4 New in Nessus 6.1 .........
System Configuration ....................................................................................................................... 42 Resetting Activation Codes .......................................................................................................................... 43 Scanners ..................................................................................................................................................... 43 Software Updates on the Local Scanner ...............
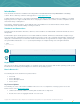
Introduction This document describes the installation and configuration of Tenable Network Security’s Nessus 6.1 vulnerability scanner. Please email any comments and suggestions to support@tenable.com. Tenable Network Security, Inc. is the author and maintainer of the Nessus vulnerability scanner. In addition to constantly improving the Nessus engine, Tenable writes most of the plugins available to the scanner, as well as compliance checks and a wide variety of audit policies.
Hosts and Vulnerabilities can be selected via checkbox and deleted/modified in bulker a history tab. New policy scan editor that uses templates and organizes the settings into categories. Users can now define if Nessus automatically updates and which components are updated. Revamped multi-scanner settings allow for a scanner to serve as both a primary and secondary.
CVE Compatible – Most plugins link to CVE for administrators to retrieve further information on published vulnerabilities. They also frequently include references to Bugtraq (BID), OSVDB, and vendor security alerts. Plugin Architecture – Each security test is written as an external plugin and grouped into one of the plugin families. This way, you can easily add your own tests, select specific plugins, or choose an entire family without having to read the code of the Nessus server engine, nessusd.
Memory: 2 GB RAM (4 GB RAM recommended) Nessus scanning large networks including audit trails and PDF report generation CPU: 1 Dual-core 2GHz Intel CPU (2 dual-core recommended) Memory: 3 - 4 GB RAM (8 GB RAM recommended) 30 GB Nessus can be run under a VMware instance, but if the virtual machine is using Network Address Translation (NAT) to reach the network, many of Nessus’ vulnerability checks, host enumeration, and operating system identification will be negatively affected. As of the Nessus 6.
Certain network devices that perform stateful inspection, such as firewalls, load balancers, and Intrusion Detection/Prevention Systems, may react negatively when a scan is conducted through them. Nessus has a number of tuning options that can help reduce the impact of scanning through such devices, but the best method to avoid the problems inherent in scanning through such network devices is to perform a credentialed scan.
where Nessus is installed, and Nessus must be on an IPv6 capable network (Nessus cannot scan IPv6 resources over IPv4, but it can enumerate IPv6 interfaces via credentialed scans over IPv4). Both full and compressed IPv6 notation is supported when initiating scans. Scanning IPv6 Global Unicast IP address ranges is not supported unless the IPs are entered separately (i.e., list format). Nessus does not support ranges expressed as hyphenated ranges or CIDR addresses.
# rpm -Uvh Nessus-6.1.0-es7.x86_64.rpm Once the upgrade is complete, restart the nessusd service with the following command: # service nessusd start Sample Output # service nessusd stop Shutting down Nessus services: [ OK ] # rpm -Uvh Nessus-6.1.0-es5.x86_64.rpm Preparing... ########################################### [100%] Shutting down Nessus services: /etc/init.d/nessusd: … 1:Nessus ########################################### [100%] Fetching the newest plugins from nessus.org...
SuSE 10 and 11 (64 bit) Upgrade Commands # service nessusd stop Use one of the appropriate commands below that corresponds to the version of SuSE you are running: # rpm -Uvh Nessus-6.1.0-suse10.x86_64.rpm # rpm -Uvh Nessus-6.1.0-suse11.x86_64.rpm Once the upgrade is complete, restart the nessusd service with the following command: # service nessusd start Sample Output # service nessusd stop Shutting down Nessus services: # rpm -Uvh Nessus-6.1.0-suse11.x86_64.rpm Preparing... [ OK ] [ OK ] [..
Ubuntu you are running: # dpkg -i Nessus-6.1.0-ubuntu910_amd64.deb # dpkg -i Nessus-6.1.0-ubuntu1110_amd64.deb # /etc/init.d/nessusd start Sample Output # /etc/init.d/nessusd stop # dpkg -i Nessus-6.1.0-ubuntu1110_amd64.deb (Reading database ... 19831 files and directories currently installed.) Preparing to replace nessus 5.2.7 (using Nessus-6.1.0ubuntu1110_amd64.deb) ... [..] # /etc/init.d/nessusd start Starting Nessus : .
Processing the Nessus plugins... [##################################################] All plugins loaded # Notes To upgrade Nessus on FreeBSD you must first uninstall the existing version and then install the newest release. This process will not remove the configuration files or files that were not part of the original installation. Installation Download the latest version of Nessus from the Nessus download page or through the Tenable Support Portal.
# rpm -ivh Nessus-6.1.0-fc20.x86_64.rpm Sample Output Preparing... [..] # SuSE 10 and 11 (64 bit) Install Command Use one of the appropriate commands below that corresponds to the version of SuSE you are running: # rpm -ivh Nessus-6.1.0-suse10.x86_64.rpm # rpm -ivh Nessus-6.1.0-suse11.x86_64.rpm Sample Output # rpm -ivh Nessus-6.1.0-suse11.x86_64.rpm Preparing...################################## [100%] 1:Nessus ################################## [100%] [..
[..] # FreeBSD 10 (64 bit) Install Command Use one of the appropriate commands below that corresponds to the version of FreeBSD you are running: # pkg add Nessus-6.1.0-fbsd10-amd64.txz Sample Output # pkg add Nessus-6.1.0-fbsd10-amd64.txz nessusd (Nessus) 6.1.0 for FreeBSD (C) 1998 – 2014 Tenable Network Security, Inc. [..] # When the installation is completed, start the nessusd daemon as instructed in the next section depending on the distribution.
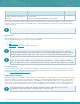
Alternatively, Nessus may be started using the following command depending on the operating system platform: Operating System Command to Start nessusd Red Hat, CentOS, & Oracle Linux # /sbin/service nessusd start Fedora # /sbin/service nessusd start SuSE # /etc/rc.d/nessusd start Debian/Kali # /etc/init.d/nessusd start FreeBSD # service nessusd start Ubuntu # /etc/init.d/nessusd start Continue with the section “Feed Registration and GUI Configuration” to install the plugin Activation Code.
Linux: # rm -rf /opt/nessus FreeBSD: # rm -rf /usr/local/nessus/bin Platform Removal Instructions Red Hat ES 5, CentOS 5, and Oracle Linux 5; Red Hat ES 6, CentOS 6, and Oracle Linux 6; Red Hat ES 7, CentOS 7, and Oracle Linux 7 (64 bit) Remove Command Determine the package name: # rpm -qa | grep Nessus Use the output from the above command to remove the package: # rpm -e Sample Output # rpm -qa | grep -i nessus Nessus-6.1.0-es5 # rpm -e Nessus-6.1.
# dpkg -r nessus # Ubuntu 10.04 (9.10 package), 11.10, 12.04, 12.10, 13.04, 13.10, and 14.04 (x86-64) Remove Command Determine the package name: # dpkg -l | grep -i nessus Use the output from the above command to remove the package: # dpkg -r Sample Output # dpkg -l | grep -i nessus ii nessus 6.1.
/opt/nessus/etc/nessus /opt/nessus/sbin The migration steps works for Nessus 5 and higher. You will be able to migrate from Nessus 5.2.7 to Nessus 6, but not be able to downgrade. The first steps are done on the original system where you have Nessus installed. 1. Open a terminal window and run the sudo or su command to enable root privileges. You will be prompted for the user password: # sudo –s Password: 2. Stop the Nessus service: # /sbin/service nessusd stop 3.
# /opt/nessus/sbin/nessuscli fetch --register 6. Reindex Nessus plugins. This may take up to 15-20 minutes, depending on your system. # /opt/nessus/sbin/nessus-service -R 7. Once Nessus completes the reindexing process, restart the Nessus service: # /sbin/service nessusd start 8. Log in to your Nessus scanner using the Nessus UI at https://yoursystem:8834. 9.
Installation Downloading Nessus Download the latest version of Nessus from the Nessus download page or through the Tenable Support Portal. Confirm the integrity of the installation package by comparing the download MD5 checksum with the one listed in the product release notes. Nessus 6 is available for Windows 7, Server 2008, Server 2008 R2, Server 2012, Server 2012 R2, and Windows 8. Nessus distribution file sizes and names vary slightly from release to release, but are approximately 25 MB in size.
Installation Questions During the installation process, Nessus will prompt you for some basic information. Before you begin, you must read and agree to the license agreement: Copyright © 2015. Tenable Network Security, Inc. All rights reserved. Tenable Network Security and Nessus are registered trademarks of Tenable Network Security, Inc.
You will be prompted to confirm the installation location and then verify you want to install: Copyright © 2015. Tenable Network Security, Inc. All rights reserved. Tenable Network Security and Nessus are registered trademarks of Tenable Network Security, Inc.
After the initial installation is complete, Nessus will initiate the installation of WinPcap, a third-party driver that is used to support Ethernet communication for Nessus, if it is not already present on your system: You must also agree to the WinPcap license agreement: Copyright © 2015. Tenable Network Security, Inc. All rights reserved. Tenable Network Security and Nessus are registered trademarks of Tenable Network Security, Inc.
WinPcap will also confirm that you want to launch the driver when the system boots up. It is strongly recommended that you keep this configuration option for seamless Nessus use: Once installation of both components is complete, click “Finish” to acknowledge each: Copyright © 2015. Tenable Network Security, Inc. All rights reserved. Tenable Network Security and Nessus are registered trademarks of Tenable Network Security, Inc.
At this point, Nessus will continue by loading a page in your default web browser that will handle the initial configuration, which is discussed in the section “Feed Registration and GUI Configuration”. Starting and Stopping the Nessus Daemon During the installation and daily operation of Nessus, manipulating the Nessus service is generally not required. There are times when an administrator may wish to temporarily stop or restart the service though.
Removing Nessus To remove Nessus, under the Control Panel open “Add or Remove Programs”. Select “Tenable Nessus” and then click on the “Change/Remove” button. This will open the InstallShield Wizard. Follow the directions in this wizard to completely remove Nessus. You will be prompted to decide if you want to remove the entire Nessus folder. Reply “Yes” only if you do not want to retain any scan results or policies that you may have generated.
1. Install the Nessus 6.1 installation package, according to the installation instructions at the beginning of the Windows section of this document. 2. When the Nessus login page opens in your web browser, close the page or tab. 3. Run cmd.exe with “Run as…” privileges set to “Administrator”. 4. At the Windows command prompt, stop the Nessus service: C:\> net stop "Tenable Nessus" 5. Leave this cmd.exe window open. 6.
To install Nessus on Mac OS X, you need to download the file Nessus-6.x.x.dmg.gz, and then double click on it to unzip it. Double click on the Nessus-6.x.x.dmg file, which will mount the disk image and make it appear under “Devices” in “Finder”. Once the volume “Nessus 6” appears in “Finder”, double click on the file Install Nessus package as shown below: Note that you will be prompted for a system user name and password during the installation with administrator rights.
Click “Continue”, and the software license will be displayed. Click “Continue” again, and a dialog box will appear requiring that you accept the license terms before continuing: Copyright © 2015. Tenable Network Security, Inc. All rights reserved. Tenable Network Security and Nessus are registered trademarks of Tenable Network Security, Inc.
After accepting the license, another dialog box is displayed permitting you to change the default installation location as shown: Click on the “Install” button to continue the installation. You will be required to enter the administrator username and password at this point: Copyright © 2015. Tenable Network Security, Inc. All rights reserved. Tenable Network Security and Nessus are registered trademarks of Tenable Network Security, Inc.
The installation has successfully completed when the following screen is displayed: At this point, Nessus will continue by loading a page in your default web browser that will handle the initial configuration, which is discussed in the section “Feed Registration and GUI Configuration”. Starting and Stopping the Nessus Service After the installation, the nessusd service will start. During each reboot, the service will automatically start.
Alternately, the Nessus service can be managed via System Preferences: Copyright © 2015. Tenable Network Security, Inc. All rights reserved. Tenable Network Security and Nessus are registered trademarks of Tenable Network Security, Inc.
Click on “Nessus” in System Preferences to load the Nessus.Preferences pane: To make changes to the service state, click the lock icon and provide the root password. This will allow you to change the system startup setting, or start and stop the Nessus service: Removing Nessus To remove Nessus, delete the following directories (including subdirectories) and files: /Library/Receipts/Nessus* /Library/LaunchDaemons/com.tenablesecurity.nessusd.plist /Library/Nessus /Library/PreferencePanes/Nessus Preferences.
There are freeware tools such as “DesInstaller.app” (http://www.macupdate.com/info.php/id/7511) and “CleanApp” (http://www.macupdate.com/info.php/id/21453/cleanapp) that can also be used to remove Nessus. Tenable has no affiliation with these tools and they have not been specifically tested for removing Nessus. Migrating Nessus It is not uncommon for a system administrator to have to migrate a Nessus implementation from one machine to another.
On the new server, do the following steps: 1. Install the Nessus 6.1 x64 DMG package, according to the installation instructions at the beginning of the Mac OS X section of this document. 2. When the Nessus login page opens in your web browser, close the page or tab. 3. Open a terminal window and run the sudo command. You will be prompted for the user password: # sudo –s Password: 4. Stop the Nessus service: # launchctl unload -w /Library/LaunchDaemons/com.tenablesecurity.nessusd.plist 5.
The initial screen serves as a warning that all traffic to the Nessus GUI uses SSL (HTTPS). The first time you connect to the Nessus web server, your browser will display some type of error indicating the connection is not trusted due to a self-signed SSL certificate. For the first connection, accept the certificate to continue configuration. Instructions for installing a custom certificate are covered later in this document, in the “Configuring Nessus with Custom SSL Certificate” section.
Depending on the browser you use, there may be an additional dialog that provides the ability to accept the certificate: Copyright © 2015. Tenable Network Security, Inc. All rights reserved. Tenable Network Security and Nessus are registered trademarks of Tenable Network Security, Inc.
Once accepted, you will be redirected to the initial registration screen that begins the walk-through. Click Continue. The first step is to create an account for the Nessus server. The initial account will be an administrator; this account has access to execute commands on the underlying OS of the Nessus installation, so it should be considered in the same manner as any other administrator account: The next screen requests a plugin Activation Code and allows you to configure optional proxy settings.
If you are using the Tenable SecurityCenter, the Activation Code and plugin updates are managed from SecurityCenter. Nessus needs to be started to be able to communicate with SecurityCenter, which it will normally not do without a valid Activation Code and plugins. To have Nessus ignore this requirement and start (so that it can get the information from SecurityCenter), input “SecurityCenter” (case insensitive) without quotes into the Activation Code box.
Once the Activation Code and optional proxy setting configuration has been completed, click “Next” to register your scanner: After registration, Nessus must download the plugins from Tenable. This process may take several minutes to an hour, depending on your connection speed, as it transfers a considerable amount of data to the machine, verifies file integrity, and compiles them into an internal database. Note that subsequent plugin updates are processed much more quickly.
Using the administrative credentials created during the installation, log in to the Nessus interface to verify access. Once authenticated, click on the down arrow next to the username (e.g., “admin”) and select “Settings” to view information about Nessus and the plugin set. System Configuration Nessus server configuration is managed via the GUI. The nessusd.conf file is deprecated.
Resetting Activation Codes After the initial Activation Code is entered during the setup process, subsequent Activation Code changes are performed through the “Overview” link under “Local”. This can be accessed by clicking the pencil next to the activation code on the lower right of the UI. Inputting a new code in the “Update Registration” field of the “Register” button and clicking “Save” will update the Nessus scanner with the new code (e.g., if upgrading from Nessus Home to commercial Nessus).
Software Updates on the Local Scanner Under the Local scanner, you can configure “Software Update”. This can be used to force Nessus to update plugins from a specific host. For example, if plugins must be updated from a site residing in the U.S., you can specify “pluginsus.nessus.org”. Additionally, you can update the plugins or all components automatically. This is toggled through the radio buttons listed below Automatic Updates.
Note that if “Update plugins” is selected, the scanner will not receive automatic updates for the Web UI and engine, which could prevent new features from working. In Nessus Enterprise, you can control the permissions of the scanner: Copyright © 2015. Tenable Network Security, Inc. All rights reserved. Tenable Network Security and Nessus are registered trademarks of Tenable Network Security, Inc.
Configuring Multi-Scanner The Multi Scanner functionality gives your Nessus scanner the ability to delegate vulnerability scanning to multiple secondary servers, or be delegated to perform scans for another. You can use your own Nessus server to act as the primary, or you can configure your Nessus Enterprise Cloud scanner in the cloud to be the primary. This allows for consolidated reporting in a single Nessus user interface with scheduled scanning and emailing results.
By default, a Nessus scanner will have this feature disabled. As a primary scanner, your installation will gain the ability to designate scans to additional scanners that have been configured to be a secondary scanner. After selecting the “Settings” under the Remote scanner section, select “Enable Remote”. A key will be generated that is used as a shared secret for a secondary scanner to authenticate to the primary: This key is only used for the initial linking of two scanners.
As a primary scanner, you can unlink a secondary scanner via the icon on the left. Unlinking the scanner will make it unavailable for scheduled scans until re-linked. To completely remove a scanner, click the “X”. To retrieve information about the secondary scanner, click on the scanner name: In Nessus Enterprise, you can configure the permissions of the users or groups who Can use, Can manage, or have No access the remote scanner: Copyright © 2015. Tenable Network Security, Inc. All rights reserved.
To configure your scanner to be a secondary scanner, check the “Link Scanner” under the Local scanner Link menu item: Assign the scanner a unique name for easy identification, along with the key generated from the primary scanner, the primary scanner IP address, and primary scanner port. If communication must be directed through a proxy, select this option. Once selected, the scanner will use the proxy configured under Settings > Proxy.
Create and Manage Nessus Users During the initial setup, one administrative user is created. Using the credentials specified during the setup, log in to the Nessus GUI. Once authenticated, click on the “Users” heading at the top: To create a new user, click “New User” on the upper left. This will open a dialogue box prompting for required details: Input the username and password, verify the password, and determine if the user will have administrator privileges. Copyright © 2015.
Option Description Username Nessus user account name Password The Nessus user’s password Confirm Password Re-type the password for confirmation User Role There are two types of user roles in Nessus: standard and system administrator. System administrators can link scanners, administer user accounts and other system settings, and can configure software updates. Nessus user roles are different in Nessus Enterprise. They are discussed later in the document.
If you require a Nessus user account to have scanning restrictions placed on it, use the command-line interface (CLI) covered later in this document in the “Using and Managing Nessus from the Command Line” section. Create and Manage Nessus Enterprise User Roles and Groups Nessus Enterprise has an extensive set of user and group roles that allow for granular sharing of policies, schedules, and scan results. In the Settings under “Accounts”, you will be able to configure both users and groups.
The “Accounts” shows the current authenticated user as well as the user role: Read Only, Standard, Administrator, or System Administrator. The default “admin” account has the user role System Administrator. Copyright © 2015. Tenable Network Security, Inc. All rights reserved. Tenable Network Security and Nessus are registered trademarks of Tenable Network Security, Inc.
The user roles in Nessus Enterprise are defined below: User Role Description Read Only Users with the Read Only user role can only read scan results. Standard Users with the Standard user role can create scans, policies, schedules, and reports. They cannot change any user, user groups, scanner, or system configurations. Administrator Users with the administrator role have the same privileges as the standard user but can also manage users, user groups, and scanners.
To create a new group, click on the “New Group” button in the upper right. This will navigate you to the New Group dialog: Once the group is created, the display will return to the list of groups. Click on the desired group name to manage the users within the group: To remove a user from the group, click on the delete button to the right of each user. If you wish to delete multiple users at a time, select the desired users and click the remove button.
From the drop-down, select the desired user to add to the group. This will return you to the group listing. Communication The communication section covers configuring Nessus to interact with external servers. This includes the proxy server and the SMTP server. For Nessus Enterprise, this also includes the LDAP server and the Cisco ISE. Proxy Settings Under the “Network” menu via the drop-down on the top left, the “Proxy Setting” tab allows you to configure a web proxy for plugin updates.
There are five fields that control proxy settings, but only the host and port are required. Optionally, a username and password can be supplied, if necessary. Option Description Host The hostname or IP of the proxy (e.g., proxy.example.com). Port The port of the proxy (e.g., 8080). Username Optional: If a username is required for proxy usage (e.g., “jdoe”). Password Optional: If a password is required for proxy usage (e.g., “guineapigs”).
STMP Server The “STMP Server” tab (under the “Network” menu), allows you to configure an SMTP server to notify users of scan completion via email. Option Description Host The host or IP of the SMTP server (e.g., smtp.example.com). Port The port of the SMTP server (e.g., 25). From (sender email) Who the report should appear to be from. Copyright © 2015. Tenable Network Security, Inc. All rights reserved. Tenable Network Security and Nessus are registered trademarks of Tenable Network Security, Inc.
Nessus Server Hostname (for email links) The IP address or hostname for the Nessus server. Note that this will only work if the Nessus host is reachable to the user reading the report. Encryption Specify what type of encryption should be used. Auth Method Method for authenticating to the SMTP server. Supported methods are None, Plain, NTLM, Login, and CRAM-MD5. Username The username used to authenticate to the SMTP server.
Option Description Host The host or IP of the LDAP server (e.g., ldap.example.com) Port The port of the LDAP server (e.g., 389) Username LDAP account with administrator access Password Password for the LDAP account name above Base DN Top level of the LDAP directory tree. Example for a common name of users in example.com is cn=users,dc=example,dc=com.
Option Description Host Host name or IP address of Cisco ISE server Port Port for accessing Cisco ISE server (e.g. 1700) Username User account to access Cisco ISE Password Password for the user account Copyright © 2015. Tenable Network Security, Inc. All rights reserved. Tenable Network Security and Nessus are registered trademarks of Tenable Network Security, Inc.
Advanced Nessus uses a wide variety of configuration options to offer more granular control of how the scanner operates. Under the “Advanced” option on the top menu an administrative user can manipulate these settings. WARNING: Any changes to the Nessus scanner configuration will affect ALL Nessus users. Edit these options carefully! Each option can be configured by editing the corresponding field and clicking the “Save” button at the bottom of the screen.
After clicking “Save”, three buttons appear on the Advanced Settings: After the changes are made, you can Save or Discard them. Note that Save will reload the configuration with the new changes. For details on each of the configuration options, consult the “Configure the Nessus Daemon (Advanced Users)” section of this document.
Configure the Nessus Daemon (Advanced Users) The Nessus GUI configuration menu contains several configurable options. For example, this is where the maximum number of checks and hosts being scanned at one time, the resources you want nessusd to use and the speed at which data should be read are all specified, as well as many other options. It is recommended that these settings be reviewed and modified appropriately based on your scanning environment.
A conservative starting point to determine the best max_hosts setting in an enterprise environment is to set it to “20” on a Unix-based Nessus system and “10” on a Windows Nessus scanner. In addition to max_hosts, the server allows a global.max_hosts setting that controls the total hosts that can be scanned across all users at the same time. Administrators are bound by the same restrictions on both settings to avoid excessive load on the scanning server, which may have adverse effects on other users.
global.max_hosts Maximum number of simultaneous checks against each host tested. global.max_scans If set to non-zero, this defines the maximum number of scans that may take place in parallel. Note: If this option is not used, no limit is enforced. global.max_simult_tcp_ sessions Maximum number of simultaneous TCP sessions between all scans. Note: If this option is not used, no limit is enforced. global.
plugin_upload Designate if admin users may upload plugins. plugins_timeout Maximum lifetime of a plugin’s activity (in seconds). port_range Range of the ports the port scanners will scan. Can use keywords “default” or “all”, as well as a comma delimited list of ports or ranges of ports. purge_plugin_db Determines if Nessus will purge the plugin database at each update. This directs Nessus to remove, re-download, and re-build the plugin database for each update.
throttle_scan Throttle scan when CPU is overloaded. use_kernel_congestion_ detection Use Linux’s TCP congestion messages to scale back scan activity as required. www_logfile Location where the Nessus Web Server (user interface) log is stored. xmlrpc_idle_session_ timeout XMLRPC Idle Session Timeout in minutes. (0 for no timeout). xmlrpc_listen_port Port for the Nessus Web Server to listen to (new XMLRPC protocol). By default, report_crashes is set to “yes”.
The following table lists the location of the certificate files based on the operating system: Operating System Certificate File Locations Linux /opt/nessus/com/nessus/CA/servercert.pem /opt/nessus/var/nessus/CA/serverkey.pem FreeBSD /usr/local/nessus/com/nessus/CA/servercert.pem /usr/local/nessus/var/nessus/CA/serverkey.pem Windows Vista and later C:\ProgramData\Tenable\Nessus\nessus\CA\ Mac OS X /Library/Nessus/run/com/nessus/CA/servercert.pem /Library/Nessus/run/var/nessus/CA/serverkey.
Windows Vista and later: C:\> copy \ProgramData\Tenable\Nessus\nessus\CA\cacert.pem C:\ProgramData\Tenable\Nessus\nessus\CA\ORIGcacert.pem 3. If the certificates to be used for authentication are created by a CA other than the Nessus server, the CA certificate must be installed on the Nessus server: Linux/Unix: Copy the organization’s CA certificate to /opt/nessus/com/nessus/CA/cacert.pem Windows 7 and later: Copy the organization’s CA certificate to C:\ProgramData\Tenable\Nessus\nessus\CA\cacert.pem 4.
Your country (two letter code) [US]: Your state or province name [NY]: MD Your location (e.g. town) [New York]: Columbia Your organization []: Content Your organizational unit []: Tenable ********** We are going to ask you some question for each client certificate If some question have a default answer, you can force an empty answer by entering a single dot '.' ********* User #1 name (e.g.
Enable Connections with Smart Card or CAC Card Once the CAcert for the smart card, CAC, or similar device has been put in place, corresponding users must be created to match within Nessus. During this process, the users created must match the CN used on the card with which the user will use to connect. 1. On the Nessus server, run the nessus-mkcert-client command. Linux/Unix: # /opt/nessus/sbin/nessuscli mkcert-client Windows (Run as a local Administrator user): C:\> \Program Files\Tenable\Nessus\nessuscli.
Your client certificates are in C:\Users\admin\AppData\Local\Temp\nessus-0000040e You will have to copy them by hand Client certificates are created in a randomized temporary directory appropriate to the system. The temporary directory will be identified on the line beginning with “Your client certificates are in”. For the use of card authentication, these certificates are not needed and may be deleted. 3.
4. Upon navigating to the Nessus web interface, the user may briefly see the username and password screen followed by an automatic login as the designated user. The Nessus user interface may be used normally. If you log out of the session, you will be presented with the standard Nessus login screen. If you wish to log in again with the same certificate, refresh your browser. If you need to use a different certificate, you must restart your browser session.
This will produce a string called a “challenge code” that looks like the following: 569ccd9ac72ab3a62a3115a945ef8e710c0d73b8 Obtain and Install Up-to-date Plugins Next, go to https://plugins.nessus.org/offline.php and copy and paste the “challenge” string as well as the Activation Code that you received previously into the appropriate text boxes: This will produce a URL similar to the screen capture below: Copyright © 2015. Tenable Network Security, Inc. All rights reserved.
This screen gives you access to download the latest Nessus plugin feed (all-2.0.tar.gz) along with a link to the nessus-fetch.rc file at the bottom of the screen. Save this URL because you will use it every time you update your plugins, as described below. A registration code used for offline registration cannot then be used for online registration, unless the code has been reset via the Tenable Support Portal first.
Now, you will have the latest plugins available. Each time you wish to update your plugins while not having Internet access, you must go to the provided URL, obtain the tar/gz file, copy it to the system running Nessus, and repeat the process above.
The following example highlights the creation of a second Nessus user with password authentication and user rules that restrict the user to scanning a class B subnet, 172.20.0.0/16. For further examples and the syntax of user rules please see the Nessus v6 Command Line Reference guide for nessuscli. # /opt/nessus/sbin/nessuscli adduser Login : tater-nessus Login password : Login password (again) : Do you want this user to be a Nessus 'admin' user ? (can upload plugins, etc...
NICs with these IP addresses set. -D When starting the nessusd server, this option will make the server run in the background (daemon mode). -v Display the version number and exit. -l Display the plugin feed license information and exit. -h Show a summary of the commands and exit. --ipv4-only Only listen on IPv4 socket. --ipv6-only Only listen on IPv6 socket. -q Operate in “quiet” mode, suppressing all messages to stdout. -R Force a re-processing of the plugins.
Nessus Service Manipulation via Windows CLI Nessus can also be started or stopped from the command line. Note that the command window must be called with Administrative privileges: C:\Windows\system32>net stop "Tenable Nessus" The Tenable Nessus service is stopping. The Tenable Nessus service was stopped successfully. C:\Windows\system32>net start "Tenable Nessus" The Tenable Nessus service is starting. The Tenable Nessus service was started successfully.
An example screen capture of the SecurityCenter 4.8 “Add Scanner” page is shown below: After successfully adding the scanner, the following banner is displayed: For more information on integrating Nessus and SecurityCenter, please refer to the “SecurityCenter Administration Guide” available on the Tenable Support Portal.
Nessus Windows Troubleshooting Installation /Upgrade Issues Issue: The nessusd.messages log indicates nessusd started, but it hasn’t. Solution: The “nesssud started” message only indicates that the nessusd program was executed. The message “nessusd is ready” indicates that the Nessus server is running and ready to accept connections.
For Further Information Tenable has produced a variety of documents detailing Nessus’ installation, deployment, configuration, user operation, and overall testing: Nessus 6.1 Installation and Configuration Guide – step by step walk through of installation and configuration Nessus 6.1 User Guide – how to configure and operate the Nessus User Interface Nessus Enterprise 6.
Other online resources are listed below: Nessus Discussions Forum: https://discussions.nessus.org/ Tenable Blog: http://www.tenable.com/blog Tenable Podcast: http://www.tenable.com/podcast Example Use Videos: http://www.youtube.com/user/tenablesecurity Tenable Twitter Feed: http://twitter.com/tenablesecurity Please feel free to contact Tenable at support@tenable.com, sales@tenable.com, or visit our website at http://www.tenable.com/.