
Specifications

COPYRIGHT © 2013 RED.COM, INC
RED DSMC OPERATION GUIDE
955-0020_V5.1, REV-A | 64
ANAMORPHIC
Select your Anamorphic setting, if applicable.
EPIC DRAGON cameras support anamorphic 1.3x and 2x with each format.
EPIC MYSTERIUM-X and SCARLET MYSTERIUM-X cameras support the following anamorphic settings:
5K FF: Anamorphic 1.3x and 2x.
5K 1.2:1: Anamorphic 2x
LOOKAROUND
When Lookaround is enabled, the Frame Guide and recording area are scaled down on the display so that you
can see what images are going to enter the recording area.
You can assign a Shading overlay to the Lookaround area (the area outside of the recording area) in the Guides:
General screen. For more information about Shading settings, go to “General Tab” on page 53.
Lookaround limits the available frame rates. Also, higher resolutions (such as 5K Full Frame in EPIC MYSTERI-
UM-X and 6K Full Frame in EPIC DRAGON) show the full sensor area or full sensor height on the video display,
so Lookaround is either very limited or not possible in these formats.
AUDIO
The AUDIO menu lets you configure the audio subsystem. For more information about the DSMC audio system,
go to “Audio Subsystem” on page 102.
RECORDING
This menu lets you select and configure different recording modes. Available tabs are Mode, Frame Processing,
and Pre-Record.
NOTE: The Frame Processing menu is not accessible on any EPIC DRAGON or SCARLET DRAGON.
RECORDING MODE
You can select the following recording modes: Continuous Record, Internal Timelapse Timer, External Frame
Trigger, Speed Ramp Mode, and External Record Only.
CONTINUOUS RECORD
This is the “normal” recording mode. The camera continuously records frames at the current sensor frame rate.
You can limit each recording to a specific amount of frames using the Limit Recording to setting.
INTERNAL TIMELAPSE TIMER
In this mode, the camera periodically records the specified number of frames at a specified interval. The current
sensor frame rate determines the timing of the frames per pulse.
You can limit each recording to a specific amount of frames using the Limit Recording to setting.
You can also use the Timer/Trigger Settings to set a specific amount of frames to be captured during an in-
terval of 1–3,599 seconds. When using the Timer/Trigger Settings, the trigger is the REC key or any key that
is programmed to start recording. The Interval setting specifies the frequency at which the frame or group of
frames is captured.
For example, in Internal Timelapse Timer mode, you can choose to record a total amount of 1000 frames, and
take 1 frame every 4.67 seconds. After you’ve recorded 1000 frames (which takes 4,670.00 seconds), the re-
cording process stops.
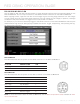
While recording in this mode, you can see how many frames you’ve recorded out of the total amount of frames
on the overlay.