IdeaPad Flex 3 Chromebook (11″, 6) User Guide
Read this first Before using this documentation and the product it supports, ensure that you read and understand the following: • Generic Safety and Compliance Notices • Safety and Warranty Guide • Setup Guide First edition (March 2021) © Copyright Lenovo 2021. LIMITED AND RESTRICTED RIGHTS NOTICE: If data or software is delivered pursuant to a General Services Administration “GSA” contract, use, reproduction, or disclosure is subject to restrictions set forth in Contract No. GS35F-05925.
About this documentation • Illustrations in this documentation might look different from your product. • Depending on the model, some features and software programs might not be available on your computer. • Documentation content is subject to change without notice. Lenovo makes constant improvement on the documentation of your computer, including this User Guide. To get the latest documentation, go to https:// support.lenovo.com.
Contents About this documentation . . . . . . . . . . . . ii Chapter 1. Meet your Chromebook . . . 1 Front . . . . . . . . . . . . . Base . . . . . . . . . . . . . Left . . . . . . . . . . . . . Right . . . . . . . . . . . . . Features and specifications . . . . Statement on USB transfer rate . Operating environment . . . . . . . . . . . . . . . . . . . . . . . . . . . . . . . . . . . . . . . . . . . . . . . . . . . . . . . 1 2 3 4 5 6 6 Chapter 2. Get started with your Chromebook . . . . . . . .
ii IdeaPad Flex 3 Chromebook (11″, 6) User Guide
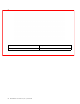
Chapter 1. Meet your Chromebook Note: Your computer might look different from the illustrations in this chapter. Front 1. Antennas 2. Microphones 3. Camera 4. Camera cover slider 5. Camera light 6.
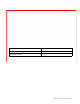
Base 1. Speaker 3. Touchpad 2 IdeaPad Flex 3 Chromebook (11″, 6) User Guide 2.
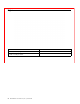
Left 1. Charging LED 2. Power connector/USB-C® connector 3. USB (3.1 Gen 1) Type-A connector 4. Combo audio jack 5. MicroSD card slot Chapter 1.
Right 1. Power button 2. Volume buttons 3. USB (3.1 Gen 1) Type-A connector 4. HDMITM 1.4 connector 5.
Features and specifications Dimensions Approximately 285.5 mm x 205.2 mm x 18.45 mm (11.2 inches x 8.1 inches x 0.7 inches) Weight Approximately 1.25 kg (2.76 lb) Screen • Color display with In-Plane Switching (IPS) technology • Multi-touch screen • Resolution: 1366 x 768 pixels HD • Size: 294.6 mm (11.
Battery pack • Type: Built-in Li-Polymer battery • Number of cells: 3 • Capacity: 42 Wh Note: The capacity listed here is the typical or average capacity as measured in a specific test environment. Capacities measured in other environments may differ but are no lower than the rated capacity (see product label). ac power adapter • Input: 100 V to 240 V, 50 Hz to 60 Hz • Output: 15 V • Power: 45 W Note: Specifications might change without notice.
Chapter 2. Get started with your Chromebook Charge your Chromebook The USB-C connector on your Chromebook works as the power connector. Plug in the ac power adapter to charge the built-in battery pack and provide power to the Chromebook. Connect to ac power CAUTION: All plugs must be firmly and securely inserted into receptacles. 1. Connect the power cord to the ac power adapter. 2. Plug the power adapter into the USB-C connector of the Chromebook. 3. Plug the power cord into an electrical outlet.
User interface 1. The Launcher button Open the search box and App Launcher. 2. App shelf Pin your frequently-used app or Web page to the app shelf for easy access. 3. Search box and App Launcher • Type the name of your device, app, or Web page in the search box. • Open an app quickly from the App Launcher. 4. Status tray Manage connections, updates, and settings. By default, the time, network connection status, battery status, and your account picture are displayed. 5.
Your Chromebook features the following four YOGA modes. You can switch among different modes according to your preference. Notebook mode Stand mode Tent mode Tablet mode Use the power button When you open the computer screen, the Chromebook automatically starts. If it doesn’t, press the power button. You also can use the power button to put your Chromebook to sleep or wake your Chromebook. The power button is on the right side of the computer. For details, see “Use the special keys” on page 11.
Table 1. Power button LED behavior LED status Power status on (white) powered on blink (white) plugged in and in sleep mode off powered off Connect to Bluetooth devices Your Chromebook supports Bluetooth feature. You can connect your Chromebook to a Bluetooth keyboard, mouse, speakers, or other Bluetooth devices. Note: The Bluetooth devices must be within a short distance, usually 10 meters (33 feet), from the Chromebook. 1. Click your account picture, and then click the Bluetooth icon. 2.
Chapter 3. Navigate the screen Use the multi-touch screen Note: Some gestures might not be available depending on the app you use. Tap Tap and hold Open an app or perform an action on an open app, such as Copy, Save, and Delete, depending on the app. Open a shortcut menu. Slide Drag an item to the location you want Scroll through items, such as lists, pages, and photos. Move two fingers closer together Move an object. Move two fingers farther apart Zoom in. Zoom out.
Go to the previous page Go to the next page Reload your current page Hide the tabs and the App Launcher in full-screen mode Show all windows in overview mode Decrease the brightness of the computer screen Increase the brightness of the computer screen Mute the speakers Decrease the volume Increase the volume Lock the computer screen Your Chromebook also supports the following key combinations: ctrl + Take a screenshot Switch the Caps Lock function alt + +L Lock your computer screen ctrl + alt + ? View
Tap Two-finger tap Tap anywhere on the touchpad with one finger to select or open an item. Tap anywhere on the touchpad with two fingers to display a shortcut menu. Two-finger scroll Swipe three fingers up or down Put two fingers on the touchpad and move them in the vertical or horizontal direction. This action enables you to scroll through the document, Website, or apps. Put three fingers on the touchpad and move them up or down to see all your open windows. To change the settings: 1.
14 IdeaPad Flex 3 Chromebook (11″, 6) User Guide
Chapter 4. Use multimedia Use the camera The built-in camera can be used for video calling or video conferencing. The indicator next to the camera turns on when the camera is activated. To take photos with the camera: 1. Click the Launcher button, and then click All apps. 2. Click Camera. 3. Click the camera icon. Use audio You can connect headphones or a headset with a 3.5-mm (0.14-inch), 4-pole plug to the audio connector to listen to the sound from your Chromebook. To play a saved audio or video: 1.
16 IdeaPad Flex 3 Chromebook (11″, 6) User Guide
Chapter 5. Account, login, and logout Types of user account for logging into Chrome There are three types of user accounts you may use to log into the Chromebook. Types of user account Description Google® Account A user account that has access to a variety of Google Web services, including Gmail™, Google Drive, and Google Docs. Typically a Google Account is created when you apply for a Gmail account.
Note: This step cannot be skipped. You must be connected to the Internet when starting your Chromebook for the first time. 4. Sign in with your Google Account. If you do not have a Google Account, select Create a Google Account and follow the on-screen instructions to create one. You’re now your Chromebook’s owner. To verify this, refer to “Check a Chromebook’s owner” on page 19. Sign in with a Google Account other than the owner’s As the device owner, you may share your Chromebook with other people.
Control who can use your Chromebook By default, anyone with a valid Google Account can sign in to a Chromebook. However, as a Chromebook owner, you can set up permissions to only allow people with certain accounts to sign in. 1. Start the Chromebook. 2. Sign in with the owner’s Google Account. Note: If you’re not sure who is the Chromebook’s owner, refer to “Check a Chromebook’s owner” on page 19. 3. Click the status area in the lower-right corner and then click Settings. 4.
Reset your Chromebook If you need to transfer ownership of your Chromebook or if you experience problems with the operating system, you might need to reset your Chromebook. Important: After resetting your Chromebook, user data for all accounts stored locally will be deleted. Back up important data to Google Drive or external storage devices before resetting your Chromebook. 1. Click the status tray in the lower-right corner. 2. Click the settings icon and then click Advanced. 3.
Chapter 6. Manage files and folders What is Google Drive Google Drive is a server-based file storage and sharing service provided by Google. By creating a Google Account, you get an initial free storage space where you can save files of various formats. From your Chromebook, you can use the Google Drive app or the Files app to create and manage files on your online storage space. Note: The Google Drive client software is available for Windows®, Android™, OSX and iOS.
2. On the left pane, select a storage space. 3. Click the settings icon in the upper right corner. The amount of available storage is displayed. Expand the local storage You can insert a microSD card into the microSD card slot to expand the Chromebook’s local storage capacity. Insert a microSD card 1. Locate the card slot. 2. Ensure the metal contacts of the microSD card is facing downwards when inserting it into the slot. 3. Insert the card firmly into the card slot. Remove a microSD card 1.
Chapter 7. Language settings Change display language When starting your Chromebook for the first time, you’re prompted to select the display language. This setting can be changed at a later time if you need to use a different language. 1. Sign in to your Chromebook with your Google Account. 2. Click the status tray in the lower-right corner and then click the settings icon. 3. Click Advanced. 4.
24 IdeaPad Flex 3 Chromebook (11″, 6) User Guide
Chapter 8. Add and manage apps You can add features and functions to your Chromebooks by downloading apps from the Web Store or the Play Store. Table 3. Comparison of available resources between the Web Store and the Play Store Web Store Play Store Apps Apps Extensions Music Themes Movies Games Games Note: You cannot download and install apps if you’re signing in as Guest.
Note: Not all apps in the Play Store are free of charge. Some apps require purchase for downloading or full-function using. The installed Android apps are accessible from the App Launcher. Pin apps to shelf Apps pinned to shelf are accessible from the lower-left corner of the Chrome desktop. 1. Locate the app icon in the App Launcher. 2. Pressing and holding the app icon, select Pin to shelf on the context menu.
Chapter 9. Lenovo help and support Lenovo support Web site Technical support information is available on the Lenovo support Web site at https://support.lenovo.com. Call Lenovo customer support center If you have tried to correct the problem yourself but still need help, during the warranty period, you can get help and information by telephone through the customer support center.
Note: Phone numbers are subject to change without notice. If the number for your country or region is not provided, contact your Lenovo reseller or Lenovo marketing representative.
Appendix A. Important safety information Non-rechargeable coin-cell battery notice DANGER If the coin-cell battery is incorrectly replaced, there is danger of an explosion. The battery contains a small amount of harmful substance. Do not heat to more than 100 °C (212 °F). The following statement applies to users in the state of California, U.S.A. Products containing manganese dioxide lithium coin-cell batteries may contain perchlorate. Perchlorate Material - special handling may apply, see www.dtsc.ca.
30 IdeaPad Flex 3 Chromebook (11″, 6) User Guide
Appendix B. Compliance information Lenovo compliance information Web sites The latest electronic compliance and environmental information are available from the Lenovo compliance information Web sites. • To view compliance information, go to https://www.lenovo.com/compliance • To download environmental declarations, go to https://www.lenovo.
Location for the FCC ID and IC ID If you purchased your computer in the United States or Canada and the computer includes factorypreinstalled wireless modules, a piece of text containing identification strings for these modules (FCC ID and IC ID) is visible on the computer’s bottom cover. The text may either be laser etched on the bottom cover or on a physical label affixed to it.
Appendix C. Accessibility, ergonomic, and maintenance information Accessibility information Lenovo is committed to providing users who have hearing, vision, and mobility limitations with greater access to information and technology. This section provides information about the ways these users can get the most out of their computer experience. You also can get the most up-to-date accessibility information from the following Web site: https://www.lenovo.
keyboard with all the standard keys. You can select keys using the mouse or another pointing device, or you can tap to select the keys if your computer supports multi-touch screen. • High Contrast High Contrast is a feature that heightens the color contrast of some text and images on your screen. As a result, those items are more distinct and easier to identify. • Personalized keyboard Adjust keyboard settings to make your keyboard easier to use.
– Change the size of all the items on your screen. 1. Right-click a blank area on the desktop and then click Display settings ➙ Display. 2. Change the item size by following the on-screen instructions. For some applications, your configuration might not take effect until you sign out and then sign in again. – Change the size of the items on a Web page. Press and hold Ctrl, and then press the plus-sign key (+) to enlarge or the minus-sign key (–) to reduce the text size.
General posture: Make minor modifications in your working posture to deter the onset of discomfort caused by long periods of working in the same position. Frequent short breaks from your work also help to prevent minor discomfort associated with your working posture. Display: Position the display to maintain a comfortable viewing distance of 510 mm to 760 mm (20 inches to 30 inches). Avoid glare or reflections on the display from overhead lighting or outside sources of light.
Cleaning your computer It is a good practice to clean your computer periodically to protect the surfaces and ensure trouble-free operation. Cleaning the computer cover Wipe it with a lint-free cloth dampened in mild soap and water. Avoid applying liquids directly to the cover. Cleaning the keyboard Wipe the keys one by one with a lint-free cloth dampened in mild soap and water. If you wipe several keys at a time, the cloth might hook onto an adjacent key and possibly damage it.
38 IdeaPad Flex 3 Chromebook (11″, 6) User Guide
Notices and trademarks Notices Lenovo may not offer the products, services, or features discussed in this document in all countries. Consult your local Lenovo representative for information on the products and services currently available in your area. Any reference to a Lenovo product, program, or service is not intended to state or imply that only that Lenovo product, program, or service may be used.
Any performance data contained herein was determined in a controlled environment. Therefore, the result obtained in other operating environments may vary significantly. Some measurements may have been made on development-level systems and there is no guarantee that these measurements will be the same on generally available systems. Furthermore, some measurements may have been estimated through extrapolation. Actual results may vary.