
Replacement Part List


Table Of Contents
- CONTENT
- 3. PRODUCT OVERVIEW
- Warning Sign on the Device
- 5. GENERAL SAFETY INSTRUCTIONS
- Here there is a Danger of Death
- Here there is Danger of Injury
- 7. OPERATION INSTRUCTIONS
- 7.2 Mounting of high pressure hose
- A
- 7.3 Mounting of lance and nozzle
- 7.4 Water connection
- 7.5 Start/stop of the machine
- 7.6 Adjustable Nozzle
- 7.8 Angle Nozzle (optional)
- 7.9 Patio Cleaner (optional)
- 7.7 High pressure detergent bottle
- 9. INSTRUCTIONS FOR USE
- 8. CONNECTION REQUIREMENTS
- 8.1 Electrical connection
- 8.2 Extension Lead
- 8.3 Water Connection
- 9.2 Water
- 9.3 Bleeding the Device before Use
- 9.4 Cleaning Method
- 9.5 Water Loss
- 9.6 Protection against Damage
- 10. AFTER USE INSTRUCTIONS
- 11.1 Cleaning of inlet filter
- 11.2 Cleaning of air vents
- 11.3 Greasing of couplings
- 12. TROUBLE SHOOTING
- 14. WARRANTY
- Zhejiang Xinchang Bigyao Power Tool Co., Ltd Head Office:
-5-
start again when you re-activate the
trigger gun (7).
7.6 Adjustable Nozzle
The pressure can be adjusted by turning
the adjustable nozzle (10).
WARNING: Do not do this under
operation to avoid that the hand hits
the jet.
7.8 Angle Nozzle (optional)
The angle nozzle (13) can be used for
many applications e.g. cleaning the
underbody of a car, underneath a lawn
mower without being splashed back
with debris, etc.
After attaching the angle nozzle (13) be
aware of the moment on the lance
trigger gun (7) and lance (9) as the jet
is coming out perpendicular to these.
7.9 Patio Cleaner (optional)
The patio cleaner is a powerful
accessory for cleaning patio, driveways,
etc.
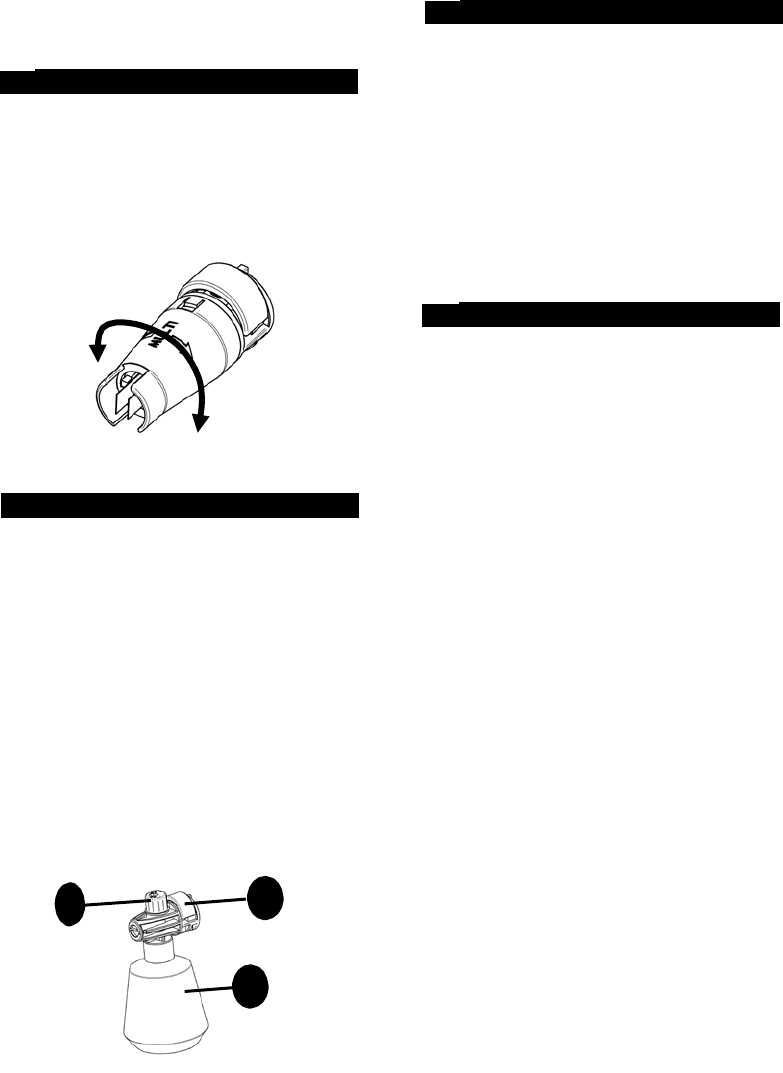
7.7 High pressure detergent bottle
1.
Unscrew the container (A) from the
high pressure detergent bottle (11).
2.
Add detergent to the container (A)
and screw the container to the high
pressure detergent bottle (11).
3.
Adjust the amount of detergent
with the button (B).
4.
Foam equipped quick connector.
Press (C), then insert into the gun.
Caution: When attaching the
detergent bottle, the button (C)
should come out again. Check
before activating the trigger that
the nozzle is properly fixed.
1.
Insert the extension lance (A) into to
the housing (B).
2.
Fix the extension lance (A) with the
two screws to the housing (B).
3.
Insert the rotor arm (C) into the
extension lance.
4.
Insert the U-pin (D) to fix the rotor
arm (C).
NOTE: Make sure the rotor arm (C) is
properly fixed to the extension lance (A)
with the U-pin (D).
NOTE: Do not use the Patio Cleaner (15)
as a broom but let it surf smoothly over
the surface.
B
C
A