
User's Manual


Installation Hints
Please consider the following points when mounting the sensor:
z The XANBOO homesight Door/Window Sensor is constructed of UV resistant ABS plastic allowing for indoor
or outdoor use.
z The homesight Wireless Door/Window Sensor is constructed of UV-resistant ABS plastic. If installing the
Wireless Door/Window Sensor outside, it should be shielded from the elements, such as underneath a porch roof.
Do not install the sensor where it is subjected directly to the elements.
z Typically, the sensor's wireless reception is good to up to 250 feet from the Wireless System Controller,
depending on indoor or outdoor use and the number of obstacles. These can include metal framing, thick walls,
and other wireless devices operating at 418 MHz. It is recommended that different positions be tried for optimal
results.
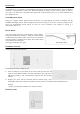
Installing Your Door/Window Sensor
The spacing between the sensor and the contact should be between 1/10 inch and ½ inch (.25 cm to 1.27 cm).
Mount Your Door/Window Sensor
Discover your sensor before mounting it.
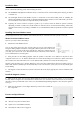
1. Mount Your Door/Window Sensor
You can also mount the sensor more securely using the screws in the hardware kit.
Using the drilling template found later in this guide, drill two pilot holes for the screws.
Affix the screws to one side of the object (typically the "stationary" side) leaving 1/16"
(1.6 mm) space between the screw head and the object. Mount the sensor onto the
screws and slide down to lock into place.
2. Using the holes on the drilling template, mark the position of the holes to be drilled. For drywall or other
composite surfaces use a 7/ 32" drill bit. Drill a hole for each of the mounting screws and insert a plastic wall anchor
into each hole. For other solid surfaces use a 1/16" drill bit. Drill a pilot hole for each of the mounting screws.
Warning, when mounting near a window, drilling too close to the glass could break the glass and possibly cause it to
shatter. The window extends deeper into the frame than can be seen; therefore, ensure your screw is beyond the glass
before drilling.
3. The magnetic contact should now be placed on the other side of the object (typically the contact is installed on the
side that
Install the Magnetic Contact
1. Either peels the paper strip from the double-sided tape located on the back of the contact, or you can more
securely attach it using screws in the hardware kit. Remove the cover from the contact and insert the screws through
the holes on the top and bottom of the contact. Use the Wall Mounting Drilling template at the end of this guide to
assist you.
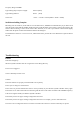
2. Make sure the magnetic contact aligns with the top of the sensor on either the
left or right side.
Features and Specifications
z Device signal communication
z Attaches to any flat non-metal surface
z Operates on 2-AAA Alkaline batteries
z LED indicator when sensor is triggered