
User's Manual

7
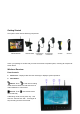
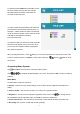
Viewing Mode
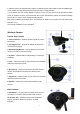
1. Signal Indicator – The signal indicator shows the strength of the signal being received from the
camera. one or no bars indicate a poor signal and 4 bars indicate a strong signal.
Signal Indicators:
2. Channel Indicator–Displays the current channel
number. Use touch key
to switch between
available cameras.
Note: To automatically switch between channels,
use touch key
View. In auto switch mode,
touch
View to enter quad mode.
3. New Record Indicator – When there is new
recorded file, the indicator will be shown on the
LCD screen and flashes to alert users. Meanwhile, the indication LED NEW below the LCD screen will
be on.
Flashes yellow when writing data to the SD card. Flashes red when the SD card is full.
4. SD Card Indicator – When a SD card is inserted into the SD card slot, the indicator will be shown on
the LCD screen.
5. Recording Indicator–When the receiver is recording, the red indicator ●REC will be shown on the
LCD screen. And under the indicator, you can see the name of the recorded file.
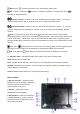
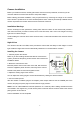
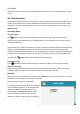
OUT OF RANGE Warning
When the receiver can’t get signal from cameras, warning message
will be displayed. Reposition the camera, or check the camera
power connection.
To change viewing modes:
1. Use View to enable Auto Sequence Viewing Mode and switch automatically between channels.
2. Use
to switch channels manually.
NOTE: By default, Auto Sequence Viewing Mode is enabled when you first power on the system, and
when you exit Screen Saver mode.