
User's Manual
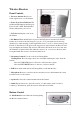
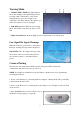
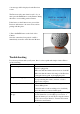

Viewing Mode
1. SIGNAL INDICATOR-The signal indicator
shows the strength of the signal being received
from the camera. The number of bars in the
Signal Indicator shows the strength of the
signal-One or No Bars indicates the signal is poor,
and 4 bars indicate a very strong signal.
2. Talk Indicator-Press Talk button in viewing
Mode, this indicator will show up, then you can
talk.
3. Night vision indicator-when the Night vision of camera turns on, it will show up.
Low Signal/No Signal Warnings
When the Camera is positioned too far from the
Receiver, warning messages will be displayed:
NO SIGNAL: The “No Signal” message means
the receiver cannot access the camera. Please
reposition the camera, or check the Camera
power.
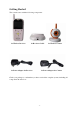
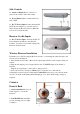
Camera Pairing
The System comes with camera that has already been paired. This camera will
communicate with the receiver once powered on.
NOTE: It is highly recommended to pair the Camera to the Receiver before permanently
mounting the Cameras.
1. Power on the Camera by connecting the Power Adapter or Battery Pack. The power LED
for the Camera should be ON.
2. Power on the Receiver by connecting the power adaptor to the 5V Input on the side. Turn
on the receiver.
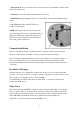
3. Press the PAIR button located on the bottom of
the Receiver using a pen tip or paperclip.
- 7 -