
User's Manual
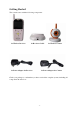
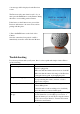

3. Microphone-Receives sounds for the area near the camera, and transmits sound from the
Camera to the Receiver.
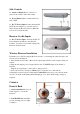
4. Speaker-Produces the sound transmitted from the receiver.
5. PAIR Button-The pairing button is located on the back of the camera behind the stand
mount
6. DC 9V Power-Connect the DC 9V Power
Adaptor to the Camera.
NOTE: The camera can also be powered by the
optional rechargeable battery pack. If the camera is
plugged in with the AC adapter, the battery pack
will not be used. the battery pack is intended for
short term, potable camera use.
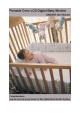
Camera Installation
Before you install the camera, carefully plan where and how it will be positioned, and
where you will route the cable that connects the camera to the power adaptor.
Before starting permanent installation, verify its performance by observing the image on
the receiver when camera is positioned in the same location/position where it will be
permanently installed and the receiver is places in the location where it will be used most
of the time.
Installation Warnings
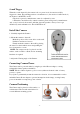
Aim the Camera to best optimize the viewing area: Select a location for the camera that
provides a clear view of the area you want to monitor, which is free from dust, and is not in
line-of-sight to a strong light source or direct sunlight.
Avoid installing the camera where there are thick walls, or obstructions between the
Camera and the Receiver.
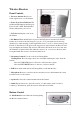
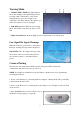
Night Vision
This camera has built-in IR LEDs, which provides the camera with ability to view images
in no/low light conditions. It is important to use the provided power adapter (and not the
battery pack) when using the camera for prolonged periods in low light conditions ,as the
built-in IR LEDs will drain the battery more quickly than regular daytime use.
Adjust EV to get the best image while the IR LEDs is on.
- 5 -