
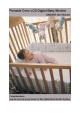
User's Manual
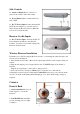

Side Controls
11. Alarm +/-Button-Press to increase or
decrease the volume of the audio alarm.
12. Power Button-Slide to turn the Receiver
ON or OFF.
13. DC 5V Power Input-Connect the included
DC5V Power Adapter to power the receiver
and/or charge the Receiver battery (When the
receiver is not in the Cradle).
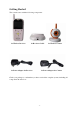
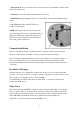
Receiver Cradle Inputs
14. DC 5V Power Input –Connect the DC 5V
Power Adapter (included) to the Receiver
Cradle to power the receiver and/or charge the
Receiver (when docked).
Wireless Receiver Installation
Determine if you will be using the Receiver Cradle, or connecting the cables directly to the
receiver before installation:
1. Place the Receiver Cradle or Receiver in a place that will have clear reception with your
camera.
2. Plug the AC adapter power output cable into the 5V POWER input of the Cradle or
Receiver.
Plug the power plug into a wall outlet or surge protector.
3. Leave the receiver to charge for 6hours prior to first time use so the built-in
rechargeable receiver battery is fully charged. DO NOT remove the power cable from the
receiver / from the cradle during initial charging process .After initial charge, charge as
required.
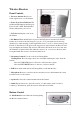
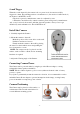
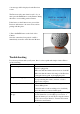
Camera
Front & Back
1. Camera Antenna-Receives &
Sends signals to or from the
Receiver.
2. Lens/IR LED-Infrared LEDs
provide viewing in no/low light
conditions.
- 4 -