
User's Manual
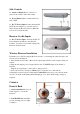

Wireless Receiver
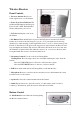
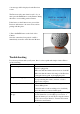
Front Controls
1. Receiver Antenna-Receives &
Sends signals from or to the Camera.
2. Power /Low Power Indicator-The
left Green LED indicates the Receiver
Power is ON or OFF. The Red LED’s
flash to indicate the power is low.
3. LCD Screen-Displays video from
the Camera.
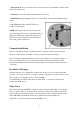
4. P/S Button-When the P/S button is pressed, the LCD Screen is turned off. The P/S
feature can be used for the following two reasons: (1) To prevent the user from being
disturbed (i.e. when sleeping) by the bright LCD screen, or (2) To conserve battery power.
If audio is detected above the preset audio trigger level on the Camera, the Receiver will
beep and display the Camera. The receiver will return to P/S mode about 5 seconds after
the Alarm has completed. Press P/S while the screen is off, or press any other key in the
front panel while the screen is on will cancel this mode.
5. Navigation Controls-Use the controls in Viewing Mode.
Viewing Mode: The following controls are used while watching live video from the
camera:
Press the UP/DOWN buttons to Increase or Decrease the volume.
Press the LEFT/RIGHT butters to decrease or increase the EV.
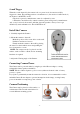
6. Talk-Press and hold the button in Viewing Mode to talk with the baby.
7. Microphone-Receives sounds for the area near the receiver, and transmits the sound
from the receiver to the camera.
8. Speaker-Produces the sound transmitted from the Camera.
9. Stand-Flip the stand out to place the receiver on a flat surface (such as a table or
countertop). Alternatively, place the receiver in the Receiver Cradle.
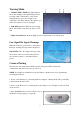
Bottom Control
10. Pair Button-Press the Pair button when pairing
the Receiver with a Camera.
- 3 -