
Installation guide


Installation / Dish Assembly 89
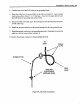
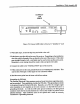
CONNECT
LNB
CABLE
u: .e. 0000000000000 0000000O00000000O!
E_::=o)
Figure 74, Connect LNB Cable to Receiver's "Satellite In" Jack
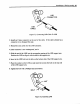
4. With cable clips, secure the drip loop and cable to the wall.
5. In the home, route the cable to the rear of the receiver. Depending on the installation
site, this could be through a floor or directly to the rear of the receiver. If the cable
goes straight though a wall, a wall plate may be used to dress up the access point.
Remember, every attempt should be made to hide and protect the cable.
6. Connect the cable to the "SATELLITE IN" jack of the receiver.
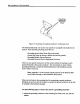
7. If the connectors on the coax ground block are not weatherproof, seal them. This
can be done with tape or other types of coax connector sealant.
8. Seal the access point into the home with silicon sealant.
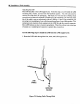
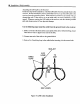
Grounding the DSS dish
The National Electrical Codes requires masts and metal structures supporting anten-
nas be grounded. These guidelines include the DSS dish. This grounding is similar
to the ground required for the LNB cable. Basically, use a NO. 10 or larger copper
wire (insulation is not required on the wire) connect it to the DSS foot and to a
grounding electrode. As with the LNB cable ground conductor, the dish ground
conductor must also be securely fastened to a wall or other surface to protect it from
physical damage. This conductor must not be spliced and it must be correctly
connected to a grounding electrode.