
Specifications


Chapter 7: Post Installation Procedures
65
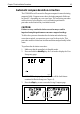
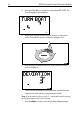
8. Use the +1 and -1 keys, or the +10 and -10 keys, to increase or
decrease the displayed heading, until it agrees with the ships
steering compass or a known transit bearing.
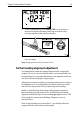
9. Press and hold standby for 2 seconds to exit calibration and save
the new settings.
Note: Setup options are always saved on exit.
Further heading alignment adjustment
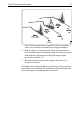
You should always check the compass alignment after swinging the
compass. However, once the initial deviation correction procedure has
been performed, you can make adjustments to the alignment as often as
you wish, without swinging the compass again.
Although the compass deviation correction procedure removes most of
the alignment error, you will probably be left with small errors (of the
order of a few degrees) that will vary depending on the heading.
Ideally, you should check the heading reading against a number of
known headings, plot a deviation curve, and determine the heading
alignment value that will give the lowest average alignment error. This
value can then be entered on the Heading Alignment screen, as
described above.
If the average heading error is more than 5°, you should perform the
compass deviation correction procedure again.