
Specifications


Chapter 7: Post Installation Procedures
59
Chapter 7: Post Installation Procedures
This chapter applies to systems where the ST6000 Plus has been
installed as the only control unit for a Type 100/300 Course Computer.
Once you have installed the system, you need to confirm that it is wired
correctly and is also set up to suit your type of boat.
This chapter provides instructions for the following procedures:
Functional test, consisting of a few simple tests to confirm that the
system is wired correctly
Initial sea trial, to swing the compass and align the heading, check
the autopilots operation and check the rudder gain
Further customisation can be performed after the sea trial, as described
in Chapter 5.
7.1 Functional test and initial calibration
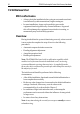
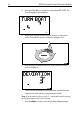
Switch on
Having installed your ST6000 Plus system, switch on the main power
breaker. If the control head is active and the system operating, the
following will occur:
The control head beeps and displays the pilot type as ST6000.
After 2 seconds the Standby screen is displayed.
This shows that the control head is active.
If the head does not beep, check the fuse/circuit breaker.
If the SEATALK FAIL or NO LINK alarm is displayed, check the
SeaTalk connections.
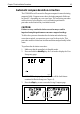
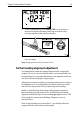
Initial calibration
Use the Dealer Setup function (see Chapter 5) as soon as you have
completed this functional test.
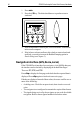
Operating sense
The operating sense defines the direction the helm will be applied when
a course change key is pressed or the vessel goes off course. Check the
operating sense as follows: