2-year RATIONAL warranty Secure your 2-year guarantee and your free membership of Club RATIONAL www.rational-online.
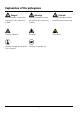
Explanation of the pictograms Danger! Warning: Caution! Directly hazardous situation that could result in very severe injury or death. Potentially hazardous situation that could result in severe injury or death. Potentially hazardous situation that could result in minor injury. Corrosive substances Risk of fire! Risk of burns! Attention: Damage may be caused if this is ignored.
Dear Customer Congratulations on the purchase of your new CombiMaster. Your decision to buy a new CombiMaster means that you now have a top-of-the-range combi-steamer. Your CombiMaster will give you many years of reliable service in your kitchen thanks to its outstanding quality of workmanship and almost unlimited cooking potential. We give a 12 month warranty from the date of initial installation.
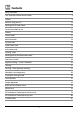
Contents Safety Instructions 5 Care, inspection, maintenance and repair 8 Features 9 Notes on using your unit 10 Working with the hand shower 12 General instructions for use 13 Controls 14 Control modes 15 Moist Heat mode 16 Dry Heat mode 18 Combi-Steam mode 21 Vario-Steam mode 23 Finishing® mode 25 Working with the core temperature probe 27 Cool Down Function 30 Appliance settings – Celsius / Fahrenheit 30 Cleaning 31 Servicing - Steam generator descaling 33 Aborting the
Safety Instructions Warning: Incorrect installation, servicing, maintenance, cleaning or modifications to the unit may result in damage, injury or death. Read these operating instructions carefully before you start to use the unit. This unit must only be used to cook food in catering establishments. Any other use is not intended and is therefore considered dangerous. It must not be used to cook food containing flammable materials (such as food with alcohol).
Safety Instructions Keep this manual handy so that it can always be consulted by anyone using the unit. This unit must not be used by children or people with limited physical, sensor or mental capacity or those without the necessary experience and/or knowledge, unless such people are supervised by a person who is responsible for their safety. Operate using hands only. Damage caused by the use of pointed, sharp or other objects will invalidate the warranty.
Safety Instructions Warning: Safety instructions during use - If containers are filled with liquid or contents which liquefy during cooking, do not use rack levels higher than those that allow the user to see into the slide-in containers - Risk of burns!Warning sticker is enclosed with appliance. - Always open the cooking cabinet door very slowly (hot vapours) - Risk of burns. - Always wear thermal protective clothing to hold accessories and other objects in the hot cooking cabinet - Risk of burns.
Care, inspection, maintenance and repair Your unit must be cleaned every day to maintain the high quality of the stainless steel, for hygiene reasons and to avoid operating faults. To do this, follow the instructions in the “Manual cleaning” section.. Warning: I f the unit is not cleaned or is not cleaned well enough, deposits of grease or food residues in the cooking cabinet may catch fire - Risk of fire.
Features Appliance serial number (visible only when door is open) Draft diverter (optional) (gas appliances only) Interior lighting m Appliance door with double glass pane Door handle Table-top units: one-handed operation with slam function o Floor models: one-handed operation Unlocking device to open double glass door panel (inside) Integral, self-draining door drip pan (inside) Table-top unit 6 x 1/1 GN, identical for 6 x 2/1 GN, 10 x 1/1 GN and
Notes on using your unit - Avoid having heat sources (e.g. grill plates, deep-fat fryers etc.) near the unit. - You can only use the unit in areas with a room temperature > 5 °C. For ambient temperatures of less than + 5 °C, you must heat the cooking cabinet to room temperature (> + 5 °C) before starting. - As soon as you open the cooking cabinet door, the heating and fan wheel shut down automatically. The integral fan wheel brake is activated. The fan wheel keeps running for a brief period only.
Notes on using your unit Table-top units with hanging racks (6 x 1/1 GN, 6 x 2/1 GN, 10 x 1/1 GN, 10 x 2/1 GN) - To remove, raise the hanging rack slightly in the middle and pull it out of the front locking mechanism. - Swivel the hanging rack to the middle of the cooking cabinet. - Lift the hanging rack out of its fixing by lifting it up. Reverse the above sequence to reset.
Working with the hand shower - I f you use the hand shower, pull the hose at least 20 cm out of the park position. - You can select 2 jet strengths by pressing the control button. - Always let the hand shower slide slowly back into the park position. Caution! The hand shower and water from the hand shower may be hot – Risk of burns. The hand shower has no latch position. If you pull hard on the hand shower and it exceeds the maximum available hose length, it will damage the hose.
General instructions for use H2O The message “H2O” may appear on the display when you switch on. This means that the steam generator is not yet filled with water. When it is full the display goes out automatically. If the cooking cabinet is hotter than the set temperature, the button for the selected mode will flash (e.g. Steam). (See the „Cool Down“ section for cooling the cooking cabinet).
Controls Moist Heat (100 °C) Dry Heat (30 °C to 300 °C) Combi-Steam (30 °C to 300 °C) Control Mode switch Vario-Steam (30 °C to 99 °C) F Finishing® (30 °C to 300 °C) Additional „Cool Down“ function Cabinet temperature display Cabinet temperature dial Heating mode display Clock button (0 to 23 hours 59 min.
Control modes „Moist Heat“ mode The high-performance steam generator produces fresh steam. This is fed, unpressurised, into the cooking cabinet and is circulated at high speed by the fan. The patented control system regulates the input of steam, supplying only as much as the food is actually able to absorb. In this mode cabinet temperature is set to a constant 100 °C. „Dry Heat“ mode Powerful heating elements heat the dry air. The fan circulates the hot air evenly throughout the cabinet.
Moist Heat mode Sample dishes „Moist Heat“ The steam generator produces hygienic fresh steam. In this mode the cabinet temperature is set to a constant 100 °C. Cooking modes: Steaming, stewing, blanching, poaching, simmering, vacuum cooking, thawing, preserving. 1 Preheat until heating indicator light goes out 2 3 0:25 2 76°C Target • Starters Scrambled eggs, poached eggs, hard-boiled eggs, asparagus, vegetable flans, stuffed vegetables (onions, kohlrabi, leeks, celery, etc.).
Moist Heat mode Hints • To get the most out of your Combi-Master check daily the types of food which can be cooked together using „Moist Heat“. Remember that fish, meat, vegetables, side dishes and fruit can be cooked together (as long as they are all being prepared by the same method). • Cook potatoes in perforated GN containers, the perforations let the steam circulate and give faster, more intensive cooking. • Vegetable stock can be collected by inserting a container on the bottom rack.
Dry Heat mode Sample dishes „Dry Heat“ Powerful heating elements heat the dry air. Cabinet temperature can be set to between 30 °C and 300 °C. Cooking methods: Baking, roasting, grilling, deep-frying, gratinating, glazing. 1 Preheat until heating indicator light goes out. 2 160°C 0:25 Or work with the core temperature probe 4 Target • Soup garnishes Savoury straws, cheese croûtons.
Dry Heat mode • Breaded products all types of breadcrumb coating can be used. Browning is improved by brushing with fat or a blend of paprika and oil. Press the breadcrumbs in firmly, brush with melted fat and do not overload the unit. Rule of thumb: allow approx. 8 to 10 minutes per 1cm thickness of meat. Hints • Cooking times Cooking times will depend on product quality, weight and height. Do not overload grids or containers so that air can circulate evenly.
Dry Heat mode • Baking Preheat to baking temperature. For a full load you may need to select a higher preheating temperature. Baking temperature: approx. 20 to 25 °C lower than in a conventional oven. For rolls use only every second shelf. For frozen convenience products preheat to 300 °C. Defrost frozen rolls and leave to rise for a short time. Accessories: Use perforated Teflon-coated baking trays, Roasting and baking trays or granite enamelled GN containers.
Combi-Steam mode Sample dishes „Combi-Steaming“ Moist Heat and Dry Heat modes are combined by a control system. This creates a hot, humid climate for especially intensive cooking. The temperature can be set to between 30 °C and 300 °C. Cooking modes: roasting, baking. Preheat until heating indicator light goes out. 160°C • Side dishes Potato gratin, frozen products (potato turnovers), baked potatoes. • Desserts Yeast dough.
Combi-Steam mode Hints • Do not place joints too close together to allow even cooking. • Joints with rinds or larger joints should be steamed for approximately 1/3 of the cooking time. • Collect condensate in a container (additional rail) and make the gravy by adding it to the lightly roasted bones. • Preparing sauces – IPlace a solid container on an additional rail. – Add bones, mirepoix, seasonings to the container and roast under the meat.
Vario-Steam mode Sample dishes „Vario-steaming“ The steam generator produces hygienic fresh steam. Cabinet temperature can be variably set to between 30 °C and 99 °C. • Mise en place Blanching bacon and ham, poaching fish garnishes, soups, sauces, stocks, fumets etc., pasteurising (semi-preserved foods). 1 • Starters Galantines, fish dumplings, terrines, vacuum dishes. Preheat until heating indicator light goes out. 2 • Soup garnishes Stuffing, dumplings, royale.
Vario-Steam mode • Advantages: – Firm textured fillings. – Products have intenser taste and aroma. – Stock loss very low in fatty material. Approximate temperature: 72 to 80 °C. Hints • „Vario-Steam“ cooking times Moist Heat cooking times can be used as approximate values. As a general rule, the lower the cooking temperature the longer the cooking time.
F Finishing mode ® F 3 „Finishing®“ A combination of Moist Heat and Dry Heat modes. This produces the ideal cooking climate, by preventing the food drying out and also the formation of unwanted puddles. Cabinet temperature can be set to between 30 °C and 300 °C. 4 76°C Target 19°C Actual Sample dishes 1 • Starters All types of spaghetti, canneloni, lasagne, vegetable dishes, cheese and herb noodles, quiche Lorraine, spring rolls, vegetarian cutlets, onion flans.
F Finishing® mode Hints • Finishing® utensils Porcelain plates, earthenware, glass, silverware, copper pans, stainless steel, aluminium dishes (brought in). • Banqueting service/tour groups Reheat plates in the mobile plate rack. – Large quantities in next to no time. – Fast loading and unloading. – Shorter serving times, so high hourly throughput, rapid table change, more turnover.
Working with the core temperature probe Can be selected for all control modes Caution! The core temperature probe can be hot – Risk of burns. Wear oven gloves. F 1 2 160°C 3 4 Insert the needle of the core temperature probe into the thickest point at an angle of 30-45 degrees. You must insert the needle through the middle of the food. 76°C Target The timer is not operational. 19°C Actual A buzzer sounds when the preselected temperature has been reached.
Working with the core temperature probe Approximate core temperature values Hints • When roasting meat for slicing set the core temperature approx. 5 °C lower, as the joint will continue to cook during the cool-down phase. For example: „Roasting“, core temperature – cooking time ratio. • To avoid holes (protein coagulation) in the product, cool the core temperature probe before use. • You can change the set temperatures and cooking modes at any time.
Working with the core temperature probe Approximate core temperature values Approximate core temperature values Beef How well done Veal Saddle of veal pale pink Leg of veal, well done and topside noisettes, fricandeau Loin with kidneys well done Roast veal/ well done shoulder Breast of veal well done Beef How well done Pies and similar Poultry Chicken well done Goose/duck well done Turkey well done Saddle of mutton rare Saddle of mutton well done Leg of mutton rare Leg of mutton Coretemperature
Cool Down Function Appliance settings – Celsius / Fahrenheit You have been running your appliance at high temperature and you now want to carry on working at reduced cabinet temperature. Use the „Cool Down“ function to cool the cabinet quickly and gently. Warning: - Do not use the Cool-down function unless the air baffle has been locked correctly - Risk of injury. - During "Cool Down", the fan wheel does not switch off when the door is opened. - Do not touch the fan wheel - Risk of injury.
Cleaning 4 For hygiene reasons and to prevent malfunctions it is essential to clean your unit every day. • Follow the safety instructions on the spray bottle and cleaner canister. • Use only genuine cleaning agents and the genuine hand spray gun (article no.: 6004.0100) from the unit manufacturer. • Never leave hand spray guns under pressure. • Never spray other people, animals or objects. Spray the space behind the air baffle, cooking cabinet, inside of the door and door seal with cleaner.
Cleaning Warning: Aggressive chemical fluid – risk of chemical burns. It is essential that you use: protective clothing, safety goggles, gloves and facemask. At the end of the cleaning time, you will be prompted to open the doors. door 9 When the cleaning program has finished, rinse the appliance down, including behind the air baffle. 10 Wipe the cooking cabinet and door seal with a damp cloth. If necessary, fold back the inner pane and wipe it down as well.
Servicing - Steam generator descaling Your appliance is equipped with the patented automatic Self Clean system. Automatic Self Clean significantly extends the period between descaling intervals. The steam generator in your appliance still needs regular descaling, depending on water hardness and use. We recommend the following descaling intervals, based on 8 hours’ steaming per day: up to 18 °dH (to 3.2 mmol/litres) at least 1x annually up to 24 °dH (to 4.
Servicing - Steam generator descaling 7 10 Remove left grid shelf and air baffle. Place canister of descaling fluid in the cooking cabinet and run the hose into the canister 8 Descaling fluid reacts with lime and can foam over. 11 Very slowly fill with descaling fluid using the appliance manufacturer’s descaling pump. Guide hose into steam inlet opening as far as the mark Note The allocation of marks to unit size is described in the instructions for the descaler pump.
Servicing - Steam generator descaling 12 Remove descaler accessories from the cooking cabinet (hand pump and canister). 13 Thoroughly rinse off any descaling fluid in the cooking cabinet and descaler accessories with water. 14 17 You exit the descaling process by selecting a cooking mode. You can now use your unit for cooking. Note: You need: Electric descaler pump – Article no.: 60.70.409 Descaler, 10 litre canister – Article no.: 6006.
Aborting the descaling process Draining the steam generator Aborting the descaling process Draining the steam generator If necessary you can discontinue the descaling process. Before filling with descaling fluid You can drain the steam generator before moving it or to stop it freezing. 1 1 please hold down the core temperature button for 10 seconds. End Your appliance can now be used for cooking. 2 Open cabinet doors.
Fault indications Any faults in your appliance will be indicated on the display. E 11 Faults in your appliance which allow you to carry on cooking can be suppressed by pressing the clock button. Fault Cause Remedial action indication E1 Appliance defective E2 Heating switched off for more than 2 Check energy optimisation system! minutes by an external energy optimising system.
Sample applications: beef and veal load per container Product Hints Accessories 1⁄1 2⁄1 pre- haeting Fillet steak season, brush with oil CombiGrill 9 pcs. 300 ° Rump steak season, brush with oil CombiGrill 9 pcs.
Please note that quantities given always refer to a full load. In certain instances reducing the load can improve food quality. Foods are natural products, cooking times and temperatures are intended as guides and should, if necessary, be adjusted to suit the individual product. Cooking process Maximum load quantity for each type of unit 10x2/1 1st Step 2nd Step 3rd Step 6x1/1 6x2/1 10x1/1 20x1/1 20x2/1 230-250 ° 27 pcs. 45 pcs. 45 pcs. 54 pcs. 108 pcs. 7-10 Min. 260 ° 27 pcs.
Sample applications: pork, mutton and lamb load per container Product Hints Accessories 1⁄1 2⁄1 pre- haeting Pork medallions season, brush with oil CombiGrill 20 pcs. 300 ° approx. 70 to 80 g Escalopes au naturel, brush with oil CombiGrill 9 pcs. 300 ° Pork chops browning fat, Roasting and baking tray 8 pcs. 16 pcs. 250 ° (breaded) Burgers Roasting and baking tray 10 pcs. 30 pcs. 300 ° Meat balls 20 mm granite 45 pcs. 90 pcs.
Please note that quantities given always refer to a full load. In certain instances reducing the load can improve food quality. Foods are natural products, cooking times and temperatures are intended as guides and should, if necessary, be adjusted to suit the individual product. Cooking process Maximum load quantity for each type of unit 10x2/1 1st Step 2nd Step 3rd Step 6x1/1 6x2/1 10x1/1 20x1/1 20x2/1 230-250 ° 60 pcs. 100 pcs. 100 pcs. 120 pcs. 240 pcs.
Sample applications: sausages and frozen food Food Hints Sausages, to reheat Stuffing ffor mise en place cover with foil Live dumplings lightly grease container Semi-preserved filling weight 200 g foods Sausages in jars Attention: Cook without lid! (250 g) Test jars to make sure they can withstand heating Suitable load per container GN container/grid 1⁄1 2⁄1 pre- haeting 40 mm CNS 30 pcs. 60 pcs. 85 ° 20 mm CNS 50 pcs. 100 pcs. 85 ° 20 mm CNS 30 pcs. 60 pcs.
Please note that quantities given always refer to a full load. In certain instances reducing the load can improve food quality. Foods are natural products, cooking times and temperatures are intended as guides and should, if necessary, be adjusted to suit the individual product. Cooking process Approx. loading capacity 10x2/1 1st Step 2nd Step 3rd Step 6x1/1 6x2/1 10x1/1 85 ° 180 pcs. 360 pcs. 300 pcs. CT 72 ° 85 ° 300 pcs. 600 pcs. 500 pcs. 10-20 Min. 100 ° 180 pcs. 360 pcs. 300 pcs.
Sample applications: Game, poultry and pies load per container Product Hints Accessories 1⁄1 2⁄1 pre- haeting Saddle of venison, Grid and 3 pcs. 4 pcs. 250 ° 20 mm granit. Leg of venison debone, season, bard, tie Grid and 5-6 kg 10-12 kg 250 ° CNS 40 mm Haunch of venison marinate Grid and 6 kg 12 kg 250 ° CNS 40 mm Saddle of hare season 20 mm granite 6-8 12-16 250 ° rare pcs. pcs. Larded marinate, season, add granite 12 pcs. 24 pcs.
Please note that quantities given always refer to a full load. In certain instances reducing the load can improve food quality. Foods are natural products, cooking times and temperatures are intended as guides and should, if necessary, be adjusted to suit the individual product. Cooking process Maximum load quantity for each type of unit 10x2/1 1st Step 2nd Step 3rd Step 6x1/1 6x2/1 10x1/1 20x1/1 20x2/1 180-200 ° 140-160 ° 6 pcs. 8 pcs. 10 pcs. 20 pcs. 40 pcs. 5-10 Min.
Sample applications: Fish, shellfish and crustaceans Food Hints Salmon Salmon, put abdomen (whole) flap outside Salmon trout fillets, in serving dish, add Salmon steaks fumet or wine Halibut salt, pepper, chopped herbs (portions) Sole roulades can also be stuffed Plaice pale side up Pan fried trout season, brush with oil Blue trout season stock with vinegar, put abdomen flap to the side Perch first blanch julienne ((on vegetable julienne) Mussels add wine, vegetable julienne, etc.
Please note that quantities given always refer to a full load. In certain instances reducing the load can improve food quality. Foods are natural products, cooking times and temperatures are intended as guides and should, if necessary, be adjusted to suit the individual product. Cooking process Approx. loading capacity 1st Step 2nd Step 3rd Step 6x1/1 6x2/1 10x1/1 78 ° 2 pcs. 4 pcs. 3 pcs. CT 67 ° 78 ° 120 pcs. 240 pcs. 200 pcs. CT 68 ° 90 pcs. 180 pcs. 150 pcs. 78 ° 90 port.
Sample applications: vegetables, side dishes load per container Product Hints Accessories 1⁄1 2⁄1 pre- haeting Broccoli frozen (fresh, perforated container, CNS 65 mm 5 kg 10 kg 100 ° plunge in iced water) perforated Cauliflower cut rosettes CNS 65 mm ca. 4 ca.
Please note that quantities given always refer to a full load. In certain instances reducing the load can improve food quality. Foods are natural products, cooking times and temperatures are intended as guides and should, if necessary, be adjusted to suit the individual product. Cooking process Maximum load quantity for each type of unit 10x2/1 1st Step 2nd Step 3rd Step 6x1/1 6x2/1 10x1/1 20x1/1 20x2/1 100 ° 15 kg 30 kg 25 kg 50 kg 75 kg 10-15 Min.
Sample applications: Eggs, side dishes load per container Product Hints Accessories 1⁄1 2⁄1 pre- haeting Eggs Soft 7 Min. CNS 65 mm perforated 60-100 120-200 100 ° (hard boiled) Hard 15 Min. pcs. pcs.
Please note that quantities given always refer to a full load. In certain instances reducing the load can improve food quality. Foods are natural products, cooking times and temperatures are intended as guides and should, if necessary, be adjusted to suit the individual product. Cooking process Maximum load quantity for each type of unit 10x2/1 2nd Step 3rd Step 6x1/1 6x2/1 10x1/1 20x1/1 20x2/1 1st Step 100 ° 300 pcs. 600 pcs. 500 pcs. 1000 pcs. 2000 pcs. 7-15 Min.
Sample applications: Pasty, bread, rolls, desserts 1 load per container Product Hints Accessories 1⁄1 2⁄1 pre- haeting Apple strudel brush with milk, egg or sugar-water Roasting and baking tray 2 pcs. 4 pcs. 200 ° (Strudel dough Frozen brush with liaison if desired Roasting and baking tray 10 pcs. 20 pcs.
Please note that quantities given always refer to a full load. In certain instances reducing the load can improve food quality. Foods are natural products, cooking times and temperatures are intended as guides and should, if necessary, be adjusted to suit the individual product. Cooking process Maximum load quantity for each type of unit 10x2/1 2nd Step 3rd Step 6x1/1 6x2/1 10x1/1 20x1/1 20x2/1 1st Step 140-160 ° 6 pcs. 12 pcs. 10 pcs. 20 pcs. 40 pcs. 40-60 Min. 150-170 ° 60 pcs.
Sample applications: Pasty, bread, dessert 2 Food Hints Yeast cakes every 2nd rack Yeast plaits 500 g Cheesecake every 2nd rack Marble cake grease tins carefully, cut top after baking for 10 minutes Mixed-grain bread Short pastry and make sure thickness is even piped biscuits every 2nd rack Danish pastries baking temperature depends on filling Madeira-type cake tins on grids Savarin butter and flour tins Stollen light mix approx.
Please note that quantities given always refer to a full load. In certain instances reducing the load can improve food quality. Foods are natural products, cooking times and temperatures are intended as guides and should, if necessary, be adjusted to suit the individual product. Cooking process Approx. loading capacity 10x2/1 1st Step 2nd Step 3nd Step 6x1/1 6x2/1 10x1/1 20x1/1 140-160 ° 160-180 ° 6 kg 12 kg 10 kg 20 kg 5-10 Min. 15-30 Min. 140-160 ° 160-180 ° 6 pcs. 12 pcs. 10 pcs.
Before you call customer service Error Possible cause To eliminate Water dripping out of the unit’s door Door is not closed correctly. If the door is closed correctly, the door handle will point down on floor units. Door seal is worn or damaged. Replace the door seal (see the „Maintenance” section of the manual). Care instructions for a maximum service life: - At the end of production, clean the door seal thoroughly with a damp cloth.
Before you call customer service Error Possible cause To eliminate The unit does not indicate a External main switch is function after it is switched switched off. on. Fuse on the premises’ distribution board has tripped. The gas unit indicates „PLO”. Switch on at the main switch. Check the fuses on the premises’ distribution board. The ambient temperature after switching the unit off remained below 5 °C (41 °F) for a long time. Heat the cooking cabinet to above 20 °C (68 °F).
Maintenance The following inspections can be carried out by experienced employees. Only use genuine spare parts from the unit manufacturer. Cleaning the air filter Replacing the door seal Replacing the halogen lamp Push the lever to the left in order to release the lug. Then push the filter to the left and pull down to remove. -C lean the air filter in the dishwasher at least once a month and replace in unit after drying. - Air filters should be replaced at least twice a year.
EU Declaration of Conformity for electrical units RATIONAL AG Iglinger Straße 62 D-86899 Landsberg/Germany www.rational-ag.
EU Declaration of Conformity for gas units RATIONAL AG Iglinger Straße 62 D-86899 Landsberg/Germany www.rational-ag.
CLUB RATIONAL Register now and become a member. As a CLUB RATIONAL member you have access to an Internet-based platform that is unique within the industry and offers many services and benefits.
- 62 -
RATIONAL Großküchentechnik Iglinger Straße 62 86899 Landsberg a. Lech/Germany Tel.: +49 1805 998899 Fax: +49 8191 327231 E-mail: info@rational-online.de www.rational-online.de RATIONAL Belgium nv Zandvoortstraat 10 Bus 5 2800 Mechelen/Belgium Tel: +32 15 285500 Fax: +32 15 285505 E-mail: info@rational.be www.rational.be RATIONAL France S.A.S. 6 Rue de la Mare Blanche 77186 Noisiel/France Tel: +33 (0) 1 60 53 56 53 Fax: +33 (0) 1 60 53 56 50 E-mail: info@rational-france.fr www.rational-france.