3 3.2 / 3.5 Touch-Display Ausgabe 13.10.
3 3.2 / 3.5 Touch-Display Index 1. Connection 2. Installing the software 3. Using the buttons on the 3.2“ TFT 4. Calibrating the touchscreen 5. Simultaneously using the LCD and the HDMI output 6. Support Ausgabe 13.10.
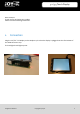
3.2 / 3.5 Touch-Display Dear customer Thank you for purchasing our product. Please note the following instructions: 1. Connection Plug the 3.2“/3.5“ TFT-Display on the Raspberry Pi so that the display is plugged onto the first 26 PINs of the GPIO connector strip. The backlight should light up now. Ausgabe 13.10.
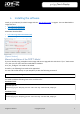
3 2. 3.2 / 3.5 Touch-Display Installing the software Install, on your SD-Card, the FBTFT Image with the „Win32 Disk Imager“-Program. You can download the image files here: 3,2“ LCD Image-Download 3,5“ LCD Image-Download Alternative downloadlinks: 3,2“ LCD Image-AlternativeDownload 3,5“ LCD Image-AlternativeDownload [Expert-Section] Manual installation of the FBTFT-Modul If you are already using a Raspbian Jessie Image and want to upgrade this with the 3.2“/3.
3 3.2 / 3.5 Touch-Display You also need to edit the „/boot/cmdline.txt“-File. Enter the following command: sudo nano /boot/cmdline.txt Append to the already existing first line the following command: fbcon=map:10 This file can also be saved by pressing „Ctrl+X“. Next, the „/usr/share/X11/xorg.conf.d/99-calibration.conf“-File needs to be reconfigured. Enter the command: sudo nano /usr/share/X11/xorg.conf.d/99-calibration.
3 3.2 / 3.5 Touch-Display Choose your display size and enter the three commands. Commands for the 3.2“ LCD cd /tmp wget anleitung.joy-it.net/upload/joy-IT-Display-Driver-32b-overlay.dtb sudo cp joy-IT-Display-Driver-32b-overlay.dtb /boot/overlays/joy-IT-Display-Driver32b-overlay.dtbo Commands for the 3.5“ LCD cd /tmp wget anleitung.joy-it.net/upload/joy-IT-Display_Driver-35a-overlay.dtb sudo cp joy-IT-Display_Driver-35a-overlay.dtb /boot/overlays/joy-IT-Display_Driver35a-overlay.dtbo 3.
3 3.2 / 3.5 Touch-Display Afterwars, you will see 4 values which needs to be entered as new calibration-data to the „99-calibration.conf“ at: “Option "Calibration" "160 3723 3896 181" The first value is assigned to „MinX“, the second to „MaxX“, the third to „MinY“ and the fourth to „MaxY“. Restart your Raspberry Pi, after saving your changes, to load your new calibration-profile. 5.
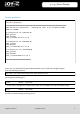
3 3.2 / 3.5 Touch-Display For 4:3 resolutions: hdmi_ignore_edid=0xa5000080 hdmi_force_hotplug=1 ########################################################################### #### Resolution-configuration - needed group needs to be uncommented #### ##### 4:3 ###### ## Configuration for 320x240 (native resolution of the 3.
3 3.2 / 3.
3 6. 3.2 / 3.5 Touch-Display Support We also support you after your purchase. If there are any questions left or if you encounter any problems please feel free to contact us by mail, phone or by our ticket-supportsystem on our website. Mail: service@joy-it.net Ticket-System: http://support.joy-it.net Phone: +49 (0)2845 98469 – 66 (11- 18 Uhr) Please visit our website for more informations: www.joy-it.net Ausgabe 13.10.