
User manual


Export 01.09.2017 Copyright by Joy-IT 3
3
Dear customer,
Thank you for purchasing our producht
Please nd our instrucons below.
1. Display-Setup
1.1 Building the display
First, take the display, the base and the base-socket of the display.
Place the metal-rectangle of the base-socket into the matching lead of the display-case (near the USB
label).
Fix the base-socket by ghtening the round xing-plate, right in front of the metal-rectangle.
Now place the base-socket into the base and screw it with the shipped screws.
1.2 Mounting a Raspberry Pi
If you want to use the display with a Raspberry Pi, you can use the designated mounng-plaorm.
Take the plaorm and mount your Raspberry Pi.
For the current Raspberry Pis, you need to use the screwing-holes with the number 6.
You can nd a list with the designated holes for all popular micro-controllers on the mounng-
plaorm.
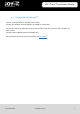
Aer mounng your Rasperry Pi, place the mounng-plaorm on the back of the display-case and
aach it by using the holes with the number 9 (Vesa).
The display should now look like in the following image.
JOY-iT 10.1“ Touchscreen-Display