User’s Manual Version 1.0 October 2010 EZswitch-0A-v1.
Disclaimer Information in this document is subject to change without notice. The manufacturer does not make any representations or warranties (implied or otherwise) regarding the accuracy and completeness of this document and shall in no event be liable for any loss of profit or any other commercial damage, including but not limited to special, incidental, consequential, or other damages.
Contents 1. INTRODUCTION ........................................................................................................................................1 2. SPECIFICATION ........................................................................................................................................2 3. SYSTEM REQUIREMENTS .....................................................................................................................3 4. INSTALLATION .............................
7.1.4. Currently Selected Channel Number..............................................................................16 7.1.5. Parent Channel Number ....................................................................................................17 7.1.6. Page Down / Up Indicator..................................................................................................17 7.1.7. Function Keys Menu...............................................................................................
11. TIERING WITH DOMINION KX II..........................................................................................................35 11.1. CONNECT EZSWITCH TO DOMINION KX II........................................................................................35 11.2. CONFIGURE DOMINION KX II ............................................................................................................35 11.3. REMOTE ACCESS TO AN EZSWITCH CHANNEL .................................................
iv
1. Introduction Thank you for purchasing EZswitch, an 8-port or 16-port keyboard/video/mouse (KVM) switch. The product enables you to control 8 or 16 computers or servers from one console with PS/2 or USB input devices and a regular monitor. Features Supports the PS/2 and USB keyboard and mouse Computer connection via PS/2 or USB interface Fully compliant with the USB 1.1/ 2.
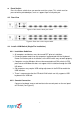
2.
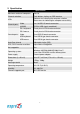
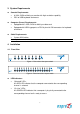
3. System Requirements Console Requirements: A VGA, SVGA or Multisync monitor with high resolution capability PS/2 or USB keyboard and mouse Computer (Server) Requirements: Equipped with a VGA, SVGA or Multisync video card Equipped with USB A type ports or PS/2 6-pin mini-DIN connectors for keyboard and mouse Cable Requirements: Custom KVM cables Note: To purchase these cables, contact your dealer or Raritan. 4. Installation 4.1.
Reset Switch: Press the Reset switch when you want to reset the system. This switch must be pressed with a pointed object, such as a paper clip or a ball-point pen. 4.2. Rear View Figure 3: Rear view of the 8-port switch Figure 4: Rear view of the 16-port switch 4.3. Install a KVM Switch (Single-Tier Installation) 4.3.1. Installation Guidelines All computers and devices must be turned OFF prior to installation.
Figure 5: Console connection 4.3.3. System Connection You need a custom combo cable to connect a computer to the EZswitch KVM switch. Note: If needed, contact your dealer or Raritan to purchase the custom KVM cables.
There are three different ways to connect a computer. See the instructions below: A. Plug the combo cable’s USB, PS/2 keyboard, PS/2 mouse and VGA connectors into a computer (see Figure 7). This method is highly recommended for computer connection. Figure 7: USB, PS/2 and VGA connections B. Plug only the combo cable’s PS/2 keyboard, PS/2 mouse and VGA connectors into a computer (see Figure 8).
C. Plug only the combo cable’s USB and VGA connectors into a computer (see Figure 9). Figure 9: USB and VGA connections 4.4. Cascade KVM Switches (Multi-Tier Installation) You can cascade either the 8-port or the 16-port EZswitch products up to 3 tiers, expanding the number of computers to 64, 256 or 4096 computers. No special configuration is required for the cascade. After completing the installation, the system automatically configures the Master and Slave KVM switches.
I. J. 2. Second-tier Slave KVM switches (connected to the Master KVM switch), if any 3. Third-tier Slave KVM switches (connected to the second-tier Slave KVM switches), if any 4. All computers connected to KVM switches Connect other devices such as a montior or new computers to the Master KVM switch before turning on the additional devices. Now you can hot swap or hot plug any devices into any KVM switches. Both of 8-port and 16-port KVM switches support hot plug and hot swap functions.
4.5. Firmware Upgrade Port The min-USB female connector on the rear of the EZswitch KVM switch is used for firmware upgrade. Contact your dealer or Raritan when you need to update the firmware. 4.6. Rack-Mount the KVM Switch Figure 11: Rack mounting This section describes how to attach mounting brackets to the KVM switch for rack-mounting it on a standard 19-inch rack. A. Screw the mounting brackets to the sides of the KVM switch (see Figure 11). B. Mount the KVM switch on a rack. 5.
6. Hot Key Operation 6.1. Trigger the OSD Menu Press twice and then press . The OSD main menu will be displayed on the screen. All of the KVM settings can be configured through the OSD interface. Some KVM functions can also be performed using the OSD. + + 6.2. Set the Leading Hot Key A hot key allows you to quickly perform a specific function. Its leading key is set to by default. You can change this key if needed.
Figure 12: Channel selection hot key … Examples: + + <1> + + + <2> + + + <16> + Tip: You can also select a computer in the OSD menu. See the section “7.2 Channel Selection Using the OSD.” 6.3.2. Channel Switching Using Arrow Keys To switch to the prior or next channel that is adjacent to the current channel, do this: first press twice, and then the or key.
B. Switch to the prior or next channel using the key: Press the or key twice, and the system will automatically switch to the prior or next channel. Enable/disable the channel switching function: + + + Switch to the prior channel: + Switch to the next channel: + 6.4.
Tip: You can also select a channel of a multi-tier KVM system using the OSD menu. See the section “7.2.2 Select a Second- or Third-Tier Channel.” 6.5. Disable or Enable the Buzzer To disable or enable the buzzer function, press twice, then and . The buzzer is enabled by default. + + + Tip: You can also enable/disable the buzzer by pressing in the OSD main menu. See the section “7.3.6 Sound.” . Figure 13: Hot key for buzzer 6.6.
Tip: You can also enable the Auto-Scan function in the OSD main menu. See the section “7.4 Auto-Scan Using the OSD.” Figure 14: Auto-Scan hot key ─┬── ┬ ──┬────── │ │ │ └────────── └─ └─────────────── Channel name Channel number Current mode Figure 15: Auto-Scan banner 6.6.2. Disable the Auto-Scan Function To quit the Auto-Scan mode, press any key on the keyboard. You can also quit the mode by pressing a push button on the KVM front panel to select the corresponding channel. 6.6.3.
6.7. Console Lock If the security mode has been enabled (by pressing in the OSD mode), you can lock the console by pressing twice, then and . The KVM switch will be locked until a user logs in successfully. + + + To unlock the console, follow the onscreen messages to press any key, and type the User Name and Password. After the successful login, the KVM switch and console devices are unlocked and you can resume normal operation.
computer. A highlight bar in pink shows which channel is being selected. A plus mark (+) to the left of the channel name means the channel port is connected to a second- or third-tier KVM switch. 7.1.3. Computer & KVM Switch Status Buzzer status of the KVM switch : Buzzer is turned on. : Buzzer is tuned off. Logged-in user name The system provides one administrator and 3 user names for security management. The current login name (if available) is displayed next to the buzzer status.
connected to the channel 2 of the first tier. 7.1.5. Parent Channel Number The number below the tier number is the channel number of the upper tier, where the tiered KVM switch is connected. For example, 8 means channel 8 of the upper-tier KVM switch. This number is available for the 2nd- and 3rd-tier channels, but unavailable for the1st tier. 7.1.6. Page Down / Up Indicator This indicator is available for the16-port KVM switch only.
┬ ────┬────── │ └ Channel name └──────────── Channel number Figure 17: Channel banner (single tier) 7.2.2. Select a Second- or Third-Tier Channel A plus mark (+) to the left of the channel name indicates a tiered KVM switch is connected to this channel port. Pressing lets you enter the next tier, and the screen displays a list of channels of the selected Slave KVM switch.
Figure 19: OSD Setup menu 7.3.1. Scan Mode Select: With this option selected, only the channels that are marked with S in the STA column in the OSD main menu will be scanned after entering the Auto-Scan mode. PC ON: This option will scan all channels where computers are connected and powered on. 7.3.2. Scan Time The default scan time interval is 5 seconds. The value is an integer multiple of 5 between 5 and 255. 7.3.3. Banner Time By default, a channel banner is displayed on the screen for 5 seconds.
Figure 20: Menu position setup Banner: Press the arrow keys to move the channel banner until it reaches the desired position. Then press to save the new position. Figure 21: Channel banner position setup 7.3.5. Hot Key The default hot key is . You can change the hot key and set it to or if necessary. Tip: To change the leading hot key, you must use the hot key combination: + + + , when NOT in the OSD mode.
7.4. Auto-Scan Using the OSD 7.4.1. Enable the Auto-Scan Function To activate the Auto-Scan function in the OSD mode, press . The Auto-Scan banner is displayed to indicate the currently-scanned channel. ─┬── ┬ ──┬────── │ │ │ └────────── └─ └─────────────── Channel name Channel number Current mode Figure 22: Auto-Scan banner Tip: You can also activate the Auto-Scan function by using the hot key combination: + + + , when NOT in the OSD mode.
7.4.3. Different Auto-Scan Modes There are two types of Auto-Scan modes: Scan all computers that are powered on. Scan only those computers which have been marked to be scanned. See the section “7.3.1 Scan Mode” to set the Auto-Scan mode. 7.4.4. Auto-Scan Time Interval The Auto-Scan time interval can be adjusted by pressing in the OSD main menu. See the section “7.3.2 Scan Time.” 7.5. Console Lock Using the OSD If the security mode has been enabled (see the section “7.
7.6. Rename a Channel Select the channel that you want to rename by pressing the Up/Down arrow keys and then in the OSD main menu. The Rename dialog appears for you to change the channel name. Press to save the new channel name or to cancel. Figure 25: Rename dialog 7.7. Security Setup 7.7.1. Security Mode Login Press in the OSD main menu to enter the security setup mode. The administrator login is required for entering the security mode.
Figure 27: Security setup menu 7.7.2. Security Mode To change the security mode settings, move the highlight bar to the Security Mode field, and press the or key to change the option. The following functions cannot be performed without enabling the security mode: Console Lock: Port Lock: User authorization settings 7.7.3.
Figure 28: Administrator password setup dialog 7.7.4. User Account Settings 3 built-in user accounts are permitted to access and administer the KVM switch: ABC, DEF, and GHI. To change the user name and set the password, move the highlight bar to one of the user names. Then press the or key. The user account setup dialog is shown on the screen. Type the new user name and press to accept it or to cancel.
permissions of a specific user, move the highlight bar to the channel, and press , <1>, <2> or <3> to set the channel access permissions for all or specific user accounts. Note: It is not necessary to set the permissions for the administrator since the administrator has full access permissions. Figure 30: User access permission setup 7.8. Port Lock 7.8.1. Lock a Channel Port Only the administrator can lock a channel port. Move the highlight bar to a channel, and press to lock it.
7.8.2. Select a Locked Channel If anyone selects the channel that has been locked by pressing either the front panel push button or a hot key combination, the OSD main menu appears.Press after the OSD main menu appears, and then type the admin user name and password to unlock the channel port when prompted. 7.8.3. Unlock a Channel Port Only the administrator’s user name and password can unlock a channel port.
8. Special Sun Key Emulation A Sun keyboard has 16 special function keys. EZswitch can emulate these function keys with a PS/2 or USB keyboard. See the table below for how to emulate these Sun keys. To activate the emulation function on a PS/2 and USB keyboard: A. Press and hold down the key, which is usually located between the and key. B. Press the second key listed in the following table. Do not release the key while pressing the second key.
9. Troubleshooting Symptom Keyboard and/or mouse not functional Master/Slave daisy chaining does not work Two OSD images appear in the multi-tier configuration Inappropriate OSD menu position Possible cause Recommended solution Keyboard and/or mouse require a reset Unplug and replug the keyboard and/or mouse. Loose cable connection to the computer Verify the cable is securely connected to the KVM switch and to the computer. The KVM switch requires a reset Power cycle all devices.
10. Firmware Upgrade You can update any of the following on a KVM switch through a firmware upgrade: USB Console: Update the USB keyboard/mouse compatibility. The firmware filename for the USB console is similar to OTG_182S_SCAN_Vx.xx.300. PS/2 Console: Update the PS/2 keyboard/mouse compatibility. The firmware filename for the PS/2 console is similar to CONSOLE_Vx.xx.28. OSD: Update the OSD functions. The firmware filename for updating the OSD is similar to OSD_Vx.xx.56.
Figure 33: KVM upgrade utility window F. Connect the mini-USB cable from the KVM switch’s firmware update port to the USB port on a computer running the firmware update utility. Figure 34: Mini-USB cable G. The utility automatically detects the KVM switch’s programmer.
Figure 35: KVM programmer detected message H. Select the item that you want to update by enabling the corresponding checkbox(es). For example, select the “USB Console” checkbox and click the Browse (…) button to select the firmware file. Figure 36: USB Console checkbox selected I. In the Open dialog, select the appropriate firmware file and click Open.
Figure 37: Open dialog J. Click the “Program” button to start the firmware update. Figure 38: Program button K. A status bar is displayed at the bottom of the dialog to indicate the update progress.
Figure 39: Update progress bar L. The firmware is updated successfully.
11. Tiering with Dominion KX II Dominion KX II is an enterprise-class, secure, digital KVM switch that provides access and control of servers from anywhere in the world via a web browser. With Dominion KX II, you can have the EZswitch system remotely accessed over a TCP/IP network through the use of a web browser. 11.1. Connect EZswitch to Dominion KX II A. Connect a Dominion Computer Interface Module (CIM) to the video and PS/2 or USB ports on the rear panel of the EZswitch KVM switch.
C. Click the name of the port where the EZswitch KVM switch is connected. The Port page opens. D. Select KVM Switch. Figure 42: KVM Switch radio button selected E. Ensure “Generic Analog KVM Switch” is selected in the KVM Switch Model field. F. In the KVM Switch Hot Key Sequence field, select the hot key applied to the EZswitch KVM switch for channel selection. EZswitch’s default hot key is “ScrolLock + ScrolLock + SlotNumber.” Figure 43: KVM Switch Model and KVM Switch Hot Key Sequence fields G.
11.3. Remote Access to an EZswitch Channel After properly configuring Dominion KX II, you can remotely access any computer connected to the EZswitch KVM switch via Dominion KX II. A. Launch the web browser, and type the IP address for Dominion KX II. B. The login page opens. Type a valid user name and password, and click Login. Figure 45: Login page C. The Port Access page opens. If not, click the Port Access tab. D. Click the name of the port where EZswitch is connected.
12. Keyboard and Mouse Compatibility A number of USB and PS/2 keyboards and mice are compatible with the EZswitch KVM switch. Note that it is likely that the USB or PS/2 keyboards and mice other than those listed in the tables may be also compatible with the product. 12.1.
Manufacture Model Type Ergotech ET-M6673 USB Ergotech ET-M6753 USB Ergotech ET-M6913C(MU6) USB Genius NetMouse PS/2 Genius NetScroll EYE PS/2 Model: GM-03001P Genius MINI TRACKER USB Model: GM-04007A/U Genius EasyMouse PS/2 PS/2 Genius P801 PS/2 Genius K3P400A PS/2 Genius MX-526 USB GOOD VISION H3003 PS/2 HAWK 12-OUM233 PS/2 HP 5188-2466 PS/2 HP M-SBJ96 PS/2 IBM M032BO(A) USB IBM MO09BO USB INTROPIC Multi-Media Optical Mouse USB Model: MS-AM-2612U INTROP
Manufacture Model Type Remark LASER-MOUSE ML101 USB LEMEL Browser Mouse PS/2 LEMEL LW3-P PS/2 LEMEL CHIC 730 PS/2 LEMEL 10WCM-B700 PS/2 Logitech C-UM34 USB Wireless Logitech Cordless Click optical mouse USB Wireless USB Wireless USB Wireless Model: M-RAA88 (C-BL4-MSE) Logitech Cordless Notebook Mouse Model: V200 Logitech Cordless Optical Mouse Model: M-RR95 (C-BG17-DUAL) Logitech Cordless Desktop EX100 USB Wireless Logitech Cordless Optical Mouse USB Wireless Model
Manufacture Model Type Remark Logitech M-BJ58 USB Logitech M-BP86 USB Logitech M-BQ85 USB Logitech M-BT96A USB Logitech C-UM34 USB Logitech M-RY81CC (C-BK16A-DUAL) USB Wireless Logitech M-RR67A ( BMS-07 ) USB Wireless Logitech S510 USB Wireless Logitech M-RAK898(C-BO33) USB Wireless Logitech LASER V400 USB Wireless Logitech MX Revolution USB Wireless Logitech MX 1100 USB Wireless Logitech VX Nano USB Wireless Logitech M705 USB Wireless Logitech M-BQ85
Manufacture Model Type Microsoft Basic Optical Mouse USB Microsoft Wheel Mouse Optical USB Microsoft Optical Mouse Blue USB Microsoft IntelliMouse Optical USB Microsoft Notebook Optical Mouse USB Microsoft Wireless IntelliMouse Explorer 2.0 USB Microsoft TrackBall Explorer 1.
Manufacture Model Type SONY VGP-UMS50 USB SUN MICROSYSTEMS Crossbow USB USB SVPA Mouse Clicker M01 PS/2 SYNNEX SCROLLING MOUSE PS/2 Remark P/N: 370-3632-01 Model: 0107 T.C.STAR TCM920 USB T.C.
Manufacture Model Type Atake KJ-118 PS/2 BEAUTY NBK-2198-PS/2 PS/2 BENQ 6511-VA PS/2 BENQ A800 PS/2 BTC 5123 PS/2 BTC 5140 PS/2 BTC 5301 PS/2 BTC 5197 PS/2 BTC 5123W PS/2 BTC E5XKB5301 PS/2 Certified E5XKBM104M10UC PS/2 Chicony 9850 PS/2 COMPAQ 6133-006 PS/2 COMPAQ KU-9978 USB DELL SK-8110 PS/2 DELL SK-8115 USB DTROIS RUNNER 1000 USB EAGLE TOUCH SKB-2200 USB Elecom TK-LU2BSVB(10Keys) USB Esense 13-EWK240 USB Ergotech ET-K701 PS/2 EzKey EZ-60
Manufacture Model Type Remark IBM KB9939 PS/2 INNOVAT IT-3100 PS/2 I-ROCKS KR-6130 USB JI-HAW KW-3230 PS/2 KINYO KBW71 PS/2 KRONE 9810 USB LEMEL 5201-PS/2 PS/2 LEMEL KB-5106-P-PS/2 PS/2 Logitech Cordless Desktop EX100 USB Wireless USB Wireless USB Wireless USB Wireless USB Wireless PS/2 Wireless USB Wireless USB Wireless Wireless Model: Y-RH35 RT7R06 Logitech Cordless Keyboard Model: Y-RJ20 (BMS-09) Logitech Cordless Desktop EX100 Model: Y-RQ57 Logitech Co
Manufacture Model Type Logitech Y-BP62a USB Logitech Y-SM46 PS/2 Logitech Y-SS36 PS/2 Logitech Y-SX49 PS/2 MEMOREX MX-3300 USB Microsoft Wireless MultiMedia Keyboard 1.
Manufacture Model Type TC.STAR TCK220 USB TC.
48
Two-Year Limited Warranty Raritan, Inc. (hereinafter referred to as “Raritan”) warrants the Raritan product to be in good working order for a period of two (2) years from the date of purchase from Raritan or an authorized Raritan reseller. Should this product fail to be in good working order at any time during this two-year warranty period, please contact Raritan for technical service.
Governing Law Both you and Raritan consent to the application of the laws of the country in which you acquired the Product to govern, interpret, and enforce all of your and Raritan’s rights, duties, and obligations arising from, or relating in any manner to, the subject matter of this Agreement, without regard to conflict of law principles. TO ACTIVATE TECHNICAL SUPPORT AND SERVICE, REGISTER YOUR PRODUCT TODAY. Register online and receive Free Advanced Replacement with your Two Year Limited Warranty. www.
----------------------------------------------------------------------------------------------------------------------------------------------------------------------------------------- Guardian Support Services Standard – Two Year Limited Warranty Please record your purchase information for future reference.