
Owners manual
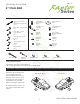
8b
M10 X 30MM BUTTON
HEAD BOLT
M10 LOCK
WASHER
M10 FLAT
WASHER
STEP BAR
RUBBER
GASKET
7
M10 FLAT WASHER
M10 LOCK WASHER
M12 FLAT WASHER
M12 LOCK WASHER
M12 HEX HEAD NUT
BRACKET
M10 X 30MM
HEX HEAD BOLT
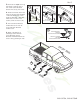
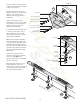
7. Line up each bracket to the
12 Bolt + M10 Nut Plate located
in the rocker panel.
Fasten the Bracket onto the
M12 Bolt using one (1) M12 Flat
Washer, one (1) M12 Lock
Washer and one (1) M12 Hex
Head Nut.
Fasten the Bracket to the
threaded nut using one (1) M10
Flat Washer, one (1) M10 Lock
Washer and one (1) M10 x
30MM Hex Head Bolt.
If threaded inserts already exist
in rocker panel holes, use (1)
M8 Flat Washer, one (1) M8
Lock Washer and one (1) M8 x
40MM Hex Head Bolt.
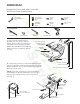
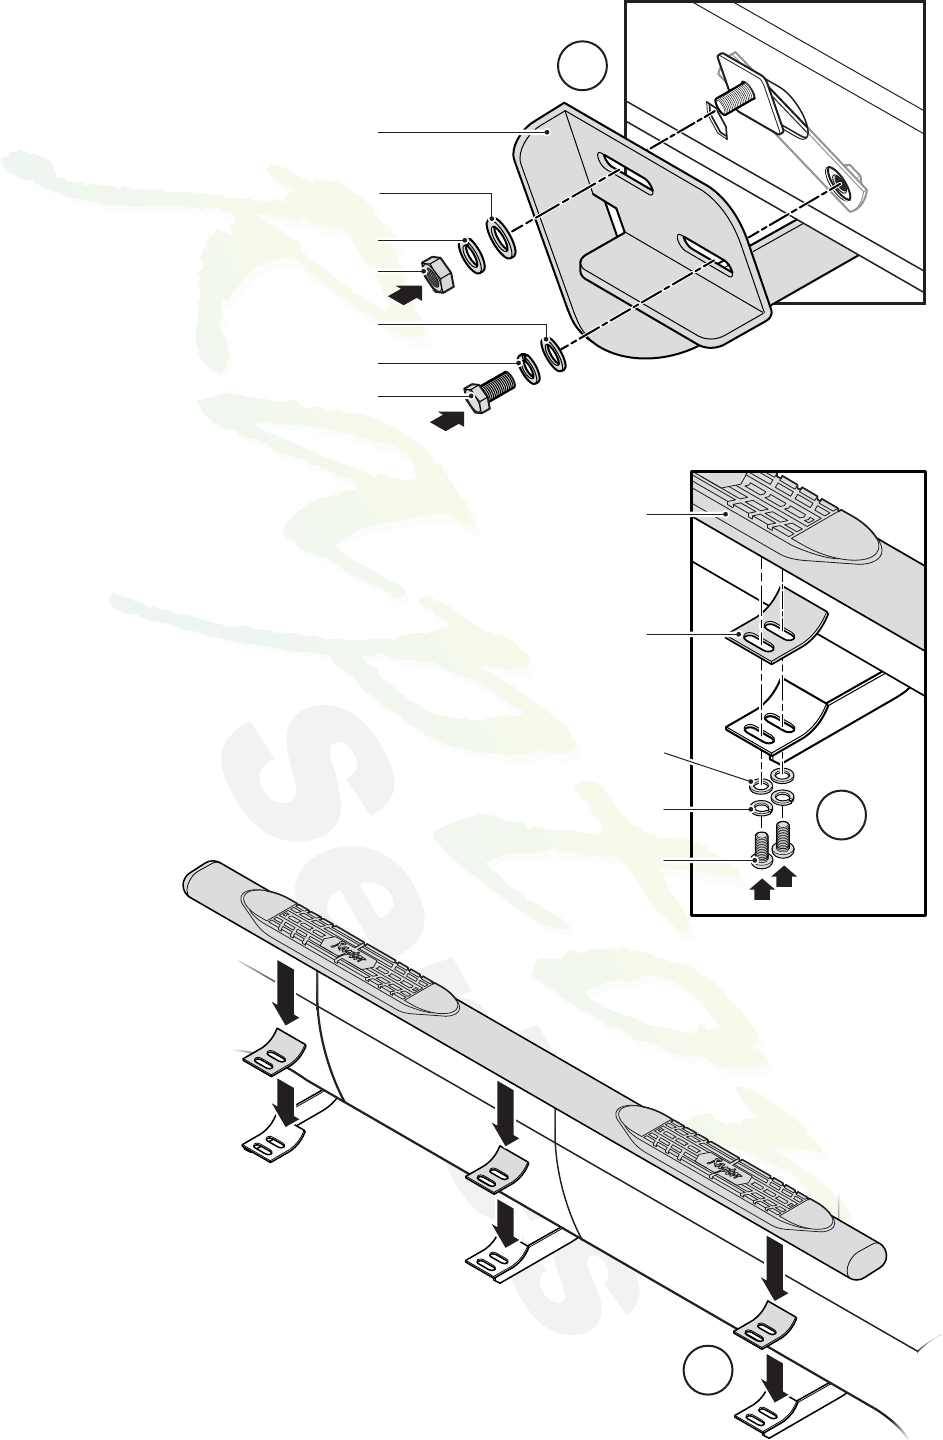
8. Place the Rubber Gaskets
onto each Bracket Cradle (8a.)
Then, place the Step Bar onto
the Brackets and fasten using
two (2) M10 Flat Washers, two
(2) M10 Lock Washers and two
(2) M10 x 30MM Button Head
Bolts (8b).
Tighten until the split lock
washer is flat against bracket
and snug. DO NOT over
tighten and strip the threaded
insert in the tube.
Repeat these steps for driver
side installation. When all
hardware is in place, everything
must be tightened. See Page 1
for Torque Specifications.
3
Rev 5
1202-0173M, 1202-0173MB
8a
Passenger Side