
User's Guide


Table Of Contents
- U110689 Cover
- U110689-03a [GB]
- 1. Before you start...
- 2. Cooker Overview
- 3. 2 Button - rotary clock
- 4. 6 Button clock
- 5. Cooking tips
- 6. Cooking Table
- 7. Cleaning Your Cooker
- 8. Troubleshooting
- 9. Installation
- Dear Installer
- Safety Requirements and Regulations
- Provision of Ventilation
- Location of Cooker
- Conversion
- Positioning the Cooker
- Moving the Cooker
- Lowering the Two Rear Rollers
- Completing the Move
- Fitting the Stability Bracket or Chain
- Repositioning the Cooker Following Connection
- Conversion to Another Gas
- Levelling
- Gas Connection
- Pressure Testing
- Electrical Connection
- Final Checks
- Final Fitting
- Customer Care
- 10. Conversion to LP Gas
- 11. Circuit Diagram
- 12. Technical Data
- BACK_RM 2018
13
D
A B
A B
ArtNo.311-0004 RShaw
2BC stoppingOven 1
H
A B
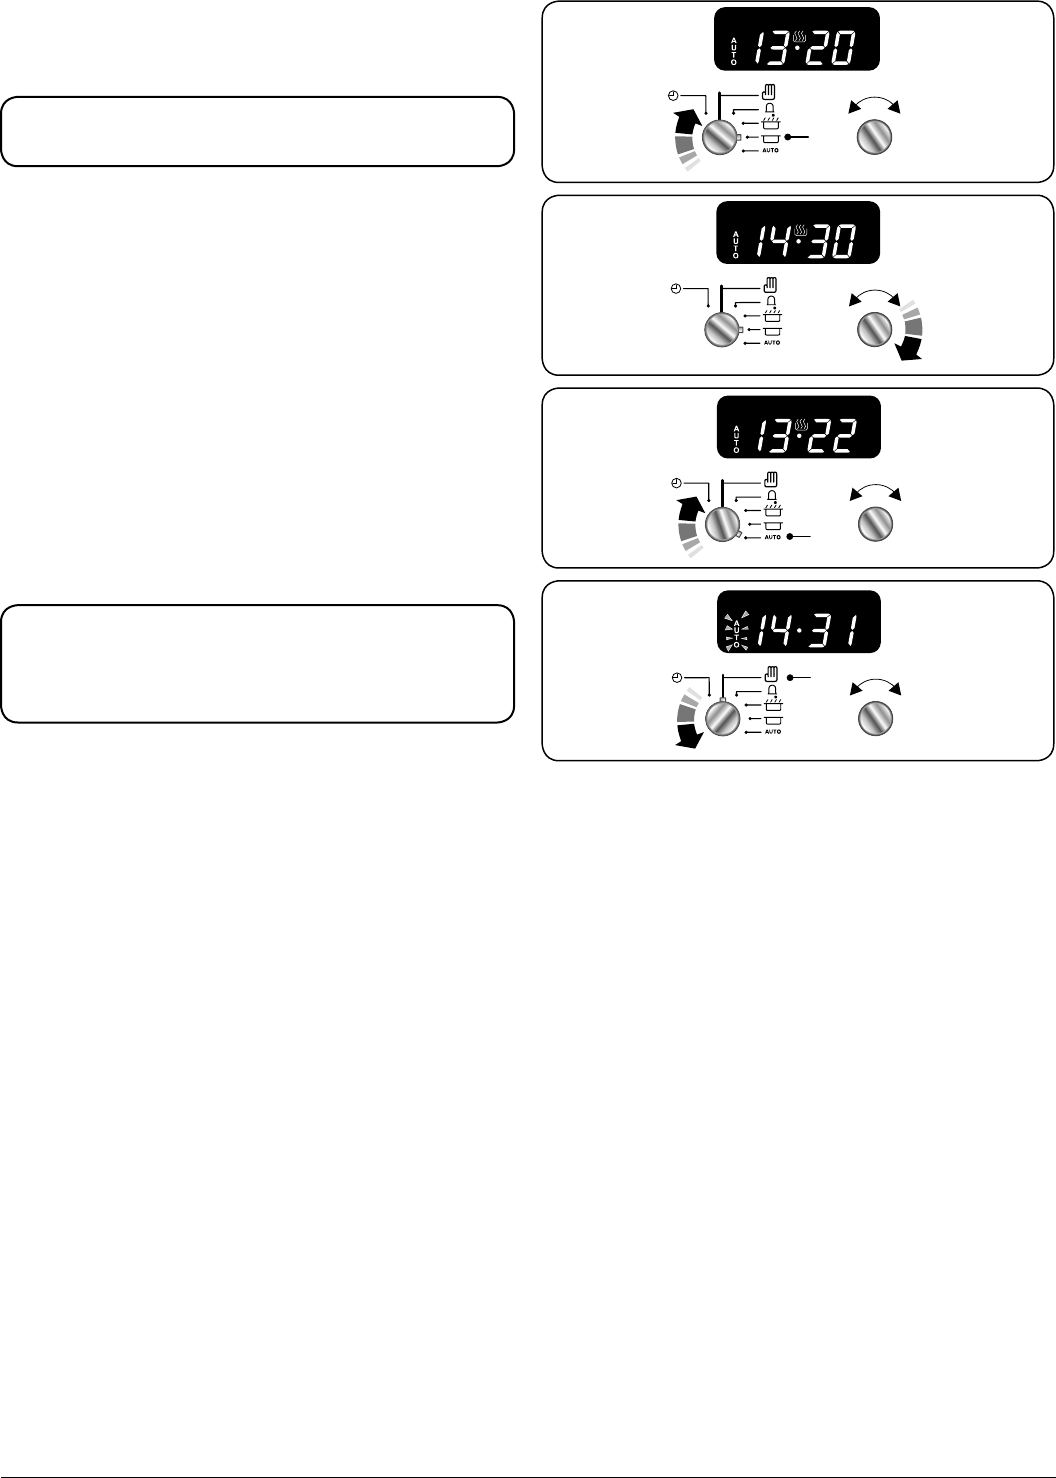
To stop the oven at a specific time of day
You have set the required temperature and function mode
and you would like the oven to automatically stop.
TOP TIP
Make a note of the current time so you do not forget.
1. Turn the Timer (A) knob to the Stop Time (G) setting.
‘AUTO’ will show in the display (Fig. 3.5).
2. Turn the Adjusting (B) knob to the amount of cooking
time required. The display will show the current time
plus the additional cooking time you have set (Fig. 3.6).
3. Turn the Timer (A) knob to the Auto (H) setting. The
display will show the current time, the cooking symbol
and the word ‘AUTO’ (Fig. 3.7).
4. Once the specied time has elapsed it will emit an alarm
and the oven will stop working. The cook pot symbol on
the display will disappear and the word ‘AUTO’ will ash
(Fig. 3.8).
5. When you return, turn the Timer (A) knob to the
Manual (D) setting to return to manual cooking (Fig.
3.8).
TOP TIP
You can check how much time you have left, to the
programmed stop time, by turning Timer (A) from Auto
(H) to Stop Time (G) and back to Auto (H).
G
A B
Fig. 3.5
Fig. 3.6
Fig. 3.7
Fig. 3.8