
User's Guide


Table Of Contents
- U110689 Cover
- U110689-03a [GB]
- 1. Before you start...
- 2. Cooker Overview
- 3. 2 Button - rotary clock
- 4. 6 Button clock
- 5. Cooking tips
- 6. Cooking Table
- 7. Cleaning Your Cooker
- 8. Troubleshooting
- 9. Installation
- Dear Installer
- Safety Requirements and Regulations
- Provision of Ventilation
- Location of Cooker
- Conversion
- Positioning the Cooker
- Moving the Cooker
- Lowering the Two Rear Rollers
- Completing the Move
- Fitting the Stability Bracket or Chain
- Repositioning the Cooker Following Connection
- Conversion to Another Gas
- Levelling
- Gas Connection
- Pressure Testing
- Electrical Connection
- Final Checks
- Final Fitting
- Customer Care
- 10. Conversion to LP Gas
- 11. Circuit Diagram
- 12. Technical Data
- BACK_RM 2018
11
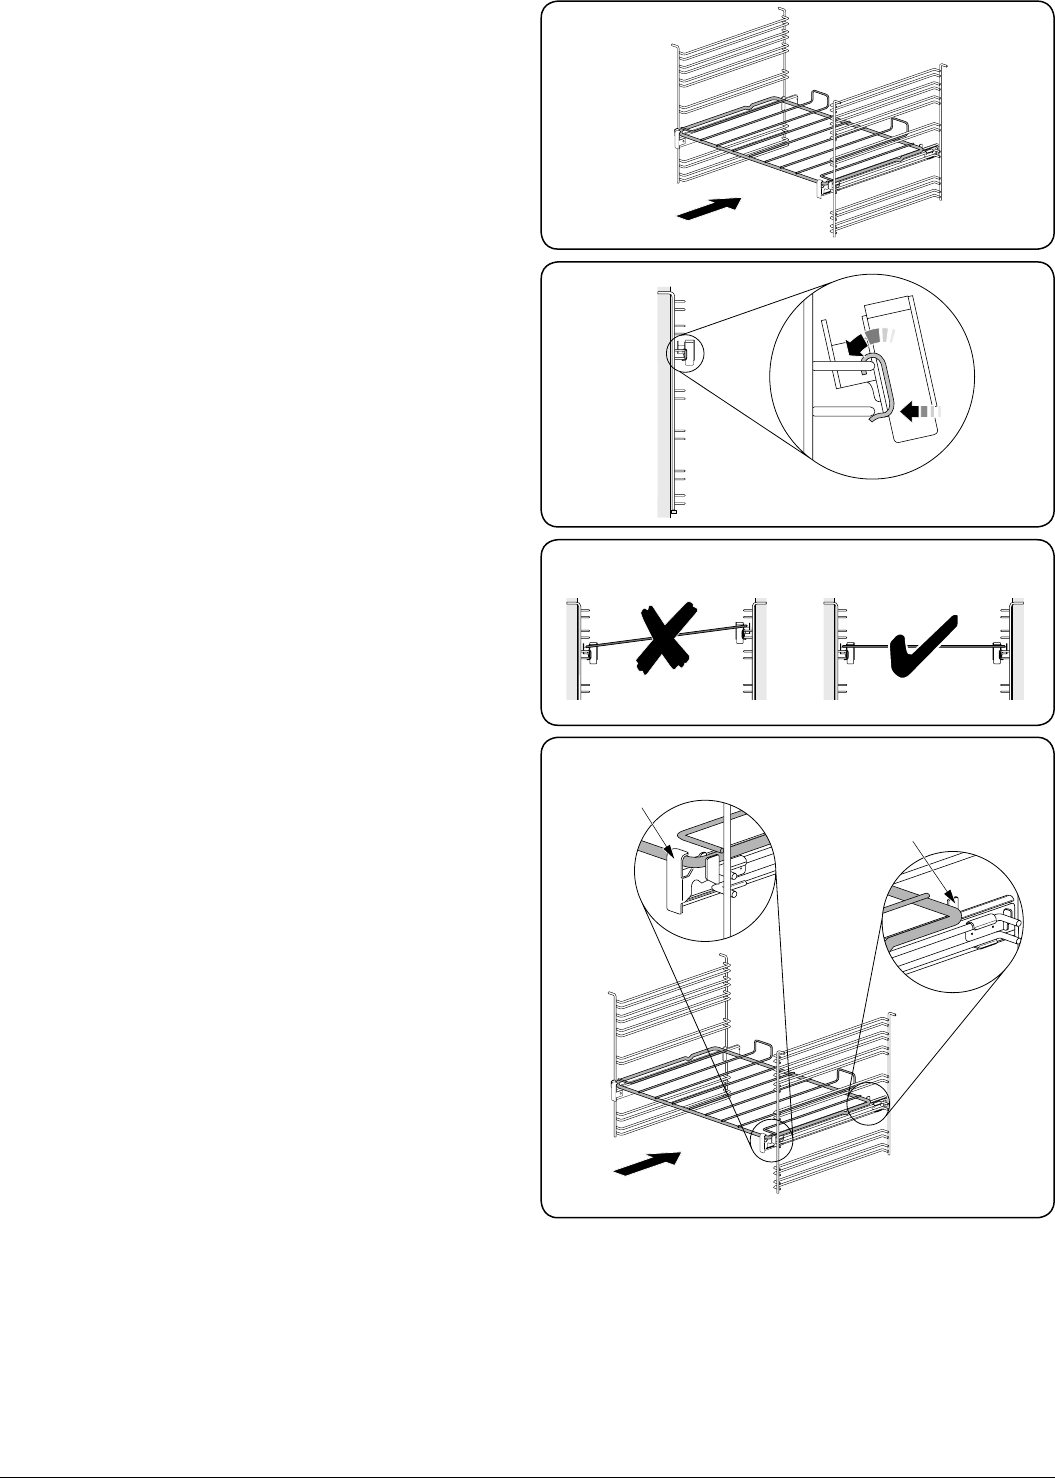
Glide-out Oven Shelf (optional)
A glide-out oven shelf is available for either oven (Fig. 2.32).
Note: The Handyrack must be removed before tting the
glide-out shelf.
The rungs on the shelf supports are in pairs. The glide-out
shelf runners can be tted to any pair except the top.
To t the glide-out shelf runners
Hook the rear of the runner over the top rung of a pair of shelf
supports. Then hook the front of the runner onto the same
rung. Push to clip under the bottom rung (Fig. 2.33).
The front of the shelf runners can be identied by the bracket
(Fig. 2.35).
Ensure that the shelf runners are tted in the same position on
each side (Fig. 2.34).
To t the glide-out shelf
Check the shelf runners are secure before tting the glide-out
shelf.
Hook the front of the glide-out oven shelf onto the runners
as shown (Fig. 2.35). The rear of the shelf should rest on the
runners, in front of the rear stop (Fig. 2.35).
Ensure that the shelf sits at once in position.
DO NOT put the glide-out shelf runners in a
dishwasher
1
2
FRONT
FRONT
Rear stop
Front
bracket
Fig. 2.32
Fig. 2.33
Fig. 2.34
Fig. 2.35