Version 1.0.
Version 1.0.0 Contents Contents ................................................................................................................................................. ii Introduction.................................................................................................................................................... 7 About ICY BOX Mediaserver .................................................................................................................. 7 Store ..................
Version 1.0.0 Starting the ICY BOX Application ............................................................................................................... 19 Using ICY BOX Agent .................................................................................................................... 19 Using a browser ............................................................................................................................. 19 From the desktop ...............................................
Version 1.0.0 Running a slideshow ...................................................................................................................... 37 Playing songs ................................................................................................................................. 37 Files section .......................................................................................................................................... 38 Filtering files ....................................
Version 1.0.0 Viewing details ............................................................................................................................... 58 Opening a folder ............................................................................................................................. 58 Scheduling a folder for backup ...................................................................................................... 58 Scheduling a folder for removal ...................................
Version 1.0.0 FTPS [Premium Feature] ...................................................................................................................... 81 ICY BOX Mediaserver Pictures Wizard ................................................................................................ 81 Appendixes ................................................................................................................................................. 82 Specifications..........................................
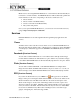
Introduction About ICY BOX Mediaserver The ICY BOX Mediaserver is a secure Mediaserver that let you store, manage, share and enjoy your digital media. You can collect and store content including personal photos, music, videos and documents. ICY BOX Mediaserver can automatically back up your precious data, saving it from loss. It is easy to drag and drop digital media to ICY BOX Mediaserver, catalog it into folders, and share it by creating albums.
Print You can connect a USB printer to the ICY BOX Mediaserver, and then share the printer with all the computers on your home network. File types Recommended Recommended file types are JPEG for images, MP3 for audio, and MPEG-4 (H.264) for video. Internal The ICY BOX Mediaserver Application uses an internal player to provide high performance for the following file types. Media Class Supported Formats Image Audio Video JPEG, GIF, PNG MP3 MPEG-4 (H.
Mobile devices accessing ICY BOX Mediaserver over the Internet will automatically be re-directed to a mobile interface. ICY BOX Mediaserver will automatically optimize the mobile interface for the device. Depending on the device, mobile users can: Browse albums Browse folders in the Media Library Create a new folder in the Media Library Enjoy music and pictures Once you set up the ICY BOX Mediaserver, you can access it from a mobile device by going to http://www.myicybox.com/mobile.
Verifying requirements Broadband Internet Make sure your home network is running properly and provides a broadband connection to the Internet. You must be able to access the Internet from your computer. Router Your router directs local data traffic through your home network, and passes Internet data through a firewall. The firewall protects your computer from malicious data on the Internet, but allows safe data through ports.
PC Windows XP SP2 or Windows Vista 500 MHz Pentium III or greater 512 MB RAM or greater CD or DVD ROM drive Web browser (Internet Explorer 7.0 or later, Firefox 2.0 or later) Flash Player 10 Mac OS 10.4 or 10.5 G3 or later, or Intel Core processor 512 MB RAM or greater CD or DVD ROM drive Web browser (Firefox 2.0 or later, or Safari 3.
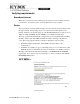
PC 1. Connect a USB cable from the printer to the ICY BOX Mediaserver. 2. Using Explorer, browse to ICY BOX Mediaserver. If prompted, enter your User Name and Password. 3. Double-click ICY BOX Mediaserver. The following message appears. 4. Click OK. The Add Printer Wizard starts. 5. Select the Manufacturer and Printer, and then click OK. Mac 1. Connect a USB cable from the printer to the ICY BOX Mediaserver. 2. Go to System Preferences > Printer & Fax.
3. Click to add a printer. icybox ICY_BOX 4. Click Windows, and then select workgroup and ICY BOX. „icybox“. 5. Select Registered User, enter your User Name and Password, and then click Connect.
icybox ICY_BOX 6. Select the printer model in Print Using, and then click Add. The first time you print, you will be prompted for your user name and password. Enter your User Name and Password, select Remember this password in my keychain, and then click Connect. Next time you print, you will not be prompted for your password.
ICY BOX Agent ICY BOX Agent allows you to start the other desktop applications. The ICY BOX Agent icon resides in your system tray (PC) or dock (Mac). It normally appears when you start your computer. ICY BOX Agent icon Right-click the ICY BOX Agent icon to display the menu. On a PC only, the menu displays your login status, and has commands for logging in and logging out. On a PC or Mac, the menu has commands for exploring the ICY BOX Mediaserver folders and opening the ICY BOX Application.
Switch user If someone is logged into ICY BOX Mediaserver, the Switch user command logs out the current user, and allows you to log in. This is available on a PC only. Log in/Log out The Log in command allows you to select your ICY BOX Mediaserver, and then enter your User name and Password. If you log in and then start one of the desktop applications, you will have access to the ICY BOX Mediaserver. If you select Remember Me, you won't have to re-enter your password next time you log in.
Open ICY BOX Mediaserver application The Open ICY BOX application command starts the ICY BOX Application. This application opens your browser, prompts you to log in (if necessary), and displays the Landing Page of the ICY BOX Mediaserver Application. You can then access your folders and albums within the media library, view albums, and set preferences. This command is available if the ICY BOX Mediaserver is located locally on the home network, or remotely across the Internet.
About The About command displays the version number of ICY BOX Mediaserver Agent. Exit ICY BOX Agent The Exit ICY BOX Agent command closes ICY BOX Agent, and removes the icon from the system tray.
ICY BOX Application The ICY BOX Application runs in your browser. It allows you to access your folders and albums within the media library, view albums, and set preferences. Because the ICY BOX Application uses a web-based interface, it works the same with different computers and browsers. The ICY BOX Application is available if the ICY BOX Mediaserver is located locally on the home network, or remotely across the Internet.
Logging in After you start the ICY BOX Application, you must log in (unless you logged in previously). icybox001 Sign In 1. If necessary, enter Your Home Server Name. 2. If necessary, enter Your User name and Your Password. 3. Optionally select Remember me, so you don't have to re-enter your password next time you log in. 4. Click Sign In.
Landing page After you start the ICY BOX Mediaserver Application and log in, the Landing page appears. It allows you to select Albums, Media Library, Backup my ICY BOX and Preferences. You can set a background image for the Landing page. See "Use as Landing page background" on page 45. You can also clear the background image. See "Clear Landing Page Background" on page 62. Main menu The Main menu appears at the top of the Albums page, Media Library page, Backup my ICY BOX page and Preferences page.
Media Library page The Media Library page allows you to organize your files using folders, and share files using albums. The Media Library page has the Media Sources section, Albums section, Files section and Details section. Displaying the Media Library page From the Landing page, click Media Library. From one of the other pages, click Home in the Main menu, and then select Media Library.
Media Sources section The Media Sources section shows the FamilyLibrary folders (if your account can access them), your MyLibrary folders, and your MyComputers folders. Note that while the subfolders within FamilyLibrary and MyLibrary are intended for specific file types, you can actually put any file into any folder. FamilyLibrary The FamilyLibrary folder contains the FamilyDocuments, FamilyMusic, FamilyPhotos and FamilyVideos subfolders.
Expanding and collapsing a folder Expanding a folder shows its subfolders. To expand a folder, click the right arrow ( ) beside the folder name. Collapsing a folder hides its subfolders. This is useful if many folders are open, and you want to reduce clutter on the screen. To collapse a folder, click the down arrow ( ) beside the folder name. Displaying the menu The ICY BOX Mediaserver Application has a menu with commands for working with folders. To display the menu, move the mouse over a folder.
Folders (see page 77) or FTP (see page 80). To select the destination for the upload, select the folder, display the menu, and then select Upload. Alternatively, you can select the folder, and then click the Upload icon ( ). The Upload window appears. You can now choose Manual Upload or Drag and Drop. Manual Upload lets you select individual files, and is the default method. Drag and Drop lets you drag multiple files and entire folders from Explorer/Finder.
Viewing details Viewing details shows information about the selected folder, and allows you to edit it. To view details, select the folder, display the menu, and then select View Details. Alternatively, select the folder, and then click the Show Details icon ( ). The details appear in the Details section, which is displayed beside the Files section. Folder details include the name of the folder, and the number of files and folders it contains.
Renaming a folder Renaming a folder changes its name. To rename a folder, select the folder, display the menu, and then select Rename. When prompted, enter the new name, and then click Rename. Note that if you rename a folder, and an album contains a reference to a file within the folder, the item will no longer be available from the album. Adding files to an album An album allows you to group related pictures, music, videos and documents from multiple folders.
Creating a new shared album You can add the contents of a folder to a new album. The album can be shared with family and media players on the home network, and with friends and the public on the Internet. Images in an album can be shared through RSS, Facebook or Flickr. To create the album, select the folder, display the menu, and then select Share Selected Items. By default, the album has the same name as the selected folder. Optionally enter the Name of the album, and optionally enter a Description.
Sharing with family Sharing an album with family makes it available to the other ICY BOX Mediaserver users, unless their account blocks access. See "Let user access family folder” on page 71. The album will appear in their Albums page. To share the album with family, select Share with other family accounts. Sharing with friends Sharing an album with friends makes it available to selected contacts. To share the album with your friends, select Share with friends.
To email your friends, you must first set up your contacts, as described below. Then you can either select Send email to invitees, or click Send Invitations. Setting up contacts Setting up contacts is setting up your address book, and setting up the contact list for the current album. Your address book contains the names and email addresses of your friends. Each user has their own address book. You only have to set up the address book once, though you can add and remove contacts later as required.
Setting up the contact list To add a friend to the contact list, select the friend in the Address Book list, and then click Add >>. To remove a friend from the contact list, select the friend in the Allowed Access list, and then click << Remove. Note that if you email an invitation to a friend, and then remove them from the contact list, they will no longer have access to the album.
Sharing with media players Sharing files with media players allows media players on your home network to detect and access content within the album. The media player must support the UPnP-AV, DLNA or Windows Media Connect standard. Media players include gaming consoles (Xbox 360 and PS3), digital photo frames, iTunes clients, IP televisions, networked sound systems (Sonos), digital video players, and many more. To share the album with media players on your home network, select Share with media players.
To complete the photo album, log in to Facebook, and then navigate to the photo album. You will see a message similar to "This album contains photos uploaded from another application. Select photos to approve or reject." Select the photos, and then click Approve Selected Photos. Once you have approved the photos, you can edit, organize and share them normally. ICY BOX: ICY BOX Mediaserver will only upload images from the album: not documents, music or videos.
Select the default photo stream or an existing set, or create a new set by entering its name and optional description, and then click Submit. ICY BOX Mediaserver will upload the images to the photo stream or set. Default Photostrem ICY BOX2 ICY BOX1 ICY BOX Mediaserver will only upload images from the album: not documents, music or videos. The images will be uploaded with their captions, but not their tags. If you add more images to the album, ICY BOX Mediaserver will automatically upload them.
To run a slideshow, select the folder, display the menu, and then select Slideshow. The browser automatically shows each image with its caption. See "Running a slideshow" on page 50. Playing songs Playing songs plays the music within the folder. Songs within subfolders are not played, nor are images, videos and documents. To play songs, select the folder, display the menu, and then select Autoplay. The browser automatically plays each song, and shows the album art and name of the current song.
Albums section The Albums section shows the albums you have created, and allows you to edit them. To view your family's albums (i.e. shared albums created by the other users), select Albums in the Home menu. Selecting an album Selecting an album highlights the album name, and displays its files in the Files section. To select an album, click the album name. Displaying the menu The ICY BOX Mediaserver Application has a menu with commands for working with albums.
Adding an album To add an album, click the New Album icon ( ). Enter the Name of the album and an optional Description. Select the theme, and set the sharing options. You can then drag and drop folders and/or files from folders to the album. For more information, see pages 27 to 28. Deleting an album Deleting an album removes access to its files, but the files remain within the folders. If you shared the album on Facebook or Flickr, the images will remain on these services.
Files section The Files section shows the subfolders and files within the selected folder, or the files within the selected album. Filtering files Filtering the files specifies which file types will appear. To filter the files, select All Files, Images, Music or Videos in the Media Filter list. The Files section will only display files of the selected type. Setting the view Setting the view controls how the Files section will display the files within the currently selected folder or album.
List List view uses a table to display the files. For each file, List view shows the file name, whether the file has tags, caption, date, file type and size. Moving the mouse over a file in List view shows an arrow, which allows you to display the menu. Shuffle Shuffle view displays a larger image for each file. It also shows the file name and caption. You can flip through the files by clicking the image to the left or right of the current file. The menu is not available in Shuffle view.
CoolIris [Premium Feature] CoolIris provides an innovative user interface to display the images within the folder or album. Documents, music and videos do not appear. The menu is not available in CoolIris view. After selecting the CoolIris view, click Get CoolIris to install the CoolIris plugin. This will allow you to take full advantage of the functionality.
For example, the following illustration shows the results after searching for flower. The first file has flower as a tag; the tag appears in the Details section. The second file has flower in the caption. The third file has flower within the file name. See "Adding a caption" on page 42, and "Adding tags" on page 43. Uploading a file To upload a file, select the destination folder, and then upload the file. See "Uploading files" on page 24.
Displaying the menu The ICY BOX Mediaserver Application has a menu with commands for working with files. You can display the menu in Thumbnail view or List view. The menu is not available in Shuffle view or CoolIris view. To display the menu, move the mouse over a file. In List view, an arrow ( ) will appear beside the name. In Thumbnail view, the Options arrow ( ) will appear on the image. Click the arrow to display the menu.
To add a caption to a file, start by selecting its folder. Select the file, display the menu, and then select View Details. Enter the caption in the Caption box of the Details section. Alternatively, in Thumbnail view, you can select the file, click the Click to add caption message, and then enter the caption. In List view, you can select the file, and then enter the caption into the Caption column. Adding tags Adding tags stores additional information about the file.
Removing a file Removing a file deletes it from the album, but leaves the file in the original folder. You can remove multiple files at once. To remove a file, start by selecting its album. Select the file, display the menu, and then select Remove. Moving a file Moving a file puts it in a different folder. You can move multiple files at once. To move a file, start by selecting its folder, and then drag and drop it to another folder. You can also select the file, display the menu, and then select Cut.
To add a file to an album, start by selecting its folder, and then drag and drop the file to the album. You can also select the file, display the menu, and then select Add to Album > New, Add to Album > [Album Name], or Share Selected Items. For more information, see page 27. Note that if you select multiple files, and then select Add to Album > New or Share Selected Items, the album will not have a default name.
If you play the slideshow, it will display the other images within the selected folder or album. See "Running a slideshow" on page 50. Rotate clockwise Rotating an image clockwise turns it to the right. If the image is used in an album, it will be rotated there as well. To rotate an image, start by selecting its folder. Select the image, display the menu, and then select Rotate Clockwise. Rotate counterclockwise Rotating an image counterclockwise turns it to the left.
Albums page An album is a group of related pictures, music, videos and documents. The album has a theme, which sets the mood by displaying background graphics. The album can be unshared for your own enjoyment, or shared with family, friends or everyone. The Albums page allows you to view your albums, albums shared with family, and albums shared with everyone. If your account blocks access, you won't see albums shared with family. See "Let user access family folder” on page 71.
Viewing an album Viewing an album shows its images, videos, music and documents. This is the same view that family, friends and the public see if they access your shared album. To view an album, double-click it. Filtering files Filtering the files specifies which file types will appear. To filter the files, select All Files, Images, Music or Videos in the Media Filter list. The album will only display files of the selected type. Setting the view Setting the view controls how the album will display files.
CoolIris [Premium Feature] CoolIris provides an innovative user interface to display the images within the album. Documents, music and videos do not appear. See "Cooliris” on pages 40 and 50. Accessing a file Double-clicking a file opens or downloads it, as follows: An image is displayed within a paused slideshow. A video is played. A song is played, followed by other songs within the album. A document is opened or downloaded, depending on your browser settings.
Starting CoolIris Starting CoolIris displays the album's images with the innovative CoolIris user interface. Music, videos and documents are not shown. You can start CoolIris using the Albums page, or after displaying an album. To start CoolIris using the Albums page, select the album, and then click CoolIris. To start CoolIris after displaying an album, select CoolIris in the Views list. Running a slideshow Running a slideshow displays the images within the album, one at a time, along with their captions.
Playing songs Playing songs plays the music within the album. Images, videos and documents are not played. To play songs after displaying an album, click Play All. You can also play a song by double-clicking it. All the songs in the album will autoplay, starting with the selected one. Clicking the Amazon.com icon ( albums you can purchase. ) starts an additional browser window with similar The toolbar, illustrated below, allows you control the playback.
the desired file. Depending on your browser settings, you can open the file, download it to a specific directory, or download it to the default directory. You can also download a document by double-clicking it.
Backup My ICY BOX page The Backup My ICY BOX page allows you to back up the files and folders on the ICY BOX Mediaserver to a USB drive, and to restore files back to the device. The USB drive uses the same directory structure as the device to organize the files. Connecting a USB drive If you are backing up your ICY BOX Mediaserver to a USB drive, you must connect the drive to the ICY BOX Mediaserver. The drive will be flagged as a backup device, and cannot be used for external storage.
If the drive needs to to be formatted, the following screen will appear, prompting to verify your selection. Click Yes. The following screen appears once the ICY BOX Application has prepared the USB drive. Displaying the Backup My ICY BOX page From the Home page, click Backup My ICY BOX. From one of the other pages, click Go To in the Main menu, and then select Backup My ICY BOX. The Backup My ICY BOX page has the Media Sources, Space Availability, Files and Backup Details sections.
Media Sources section The Media Sources section shows the FamilyLibrary folders (if your account can access them) and your MyLibrary folders. If you select a folder within the Media Sources section, the Files section shows its subfolders. You can back up any of the subfolders within FamilyLibrary or MyLibrary. You can also back up individual files within these folders. Space Availability section The Space Availability section shows the amount of space used and available in the ICY BOX Mediaserver.
Icon Current status None Action at next backup Override? None or some of the files will be backed up. Yes, you can override this setting for individual files within the folder. All the files within the folder and its subfolders will be backed up. No, you cannot override this setting for individual files. The files will not be backed up or deleted from the USB drive. Yes, you can override this setting for individual files within the folder.
Backup Details section The Backup Details section shows information about the selected folder or file. Name - The filename of the folder or file. Last modified - When the contents of the folder or file last changed. If blank, the file is backed up, but has been deleted from the folder. Status - The backup status of the folder or file. The following status messages are available: o Folder exists on backup service - The folder has been created.
Folder in the Media Sources section Folder in the Files section File in the Files section Open Open Show Details View Details View Details Restore Restore Schedule for Backup Schedule for Backup Schedule for Removal Schedule for Removal NOTE: The Restore command is only available if your ICY BOX Mediaserver account is bound to your service provider account. The folder status must be Folder exists on backup service. The file status must be Backed up successfully.
To schedule a folder for removal, select the folder in the Files section, display the menu, and then select Schedule for Removal. De-scheduling a folder De-scheduling a folder means it will no longer be backed up or deleted. You can then schedule subfolders and files within the folder for backup or removal. Restoring a folder Restoring a folder copies all its files and subfolders from the USB drive to the ICY BOX Mediaserver.
Restoring a file Restoring a file copies it from the USB drive to the ICY BOX Mediaserver. The Restore command is only available if your ICY BOX Mediaserver account is bound to your service provider account. The file status must be Backed up successfully. If a file has been deleted from the ICY BOX Mediaserver, but the status is Backed up successfully, the filename is shown in red italics. This means you can restore the file.
Preferences page The administrator can set up user, server and administration preferences. Where noted, some preferences are available to all users. Other preferences require administrator permission. Displaying the Preferences page From the Landing page, click Preferences. From one of the other pages, click Home in the Main menu, and then select Preferences. Using the Preferences page The Preferences page lists the sets of parameters. To expand or collapse the set, click the top level name.
User All users can set their user preferences. Language The Language list sets the language for the ICY BOX Mediaserver Application user interface. The selection of languages depends on your region. The default language is from your computer's configuration. Clear Landing Page Background Clicking the Clear Landing Page Background button removes the image from your Landing page.
Share new albums with media players by default The Share new albums with media players by default list controls whether new albums will be shared with media players on your home network by default. You can override the setting when you create or edit an album. The media player must support the UPnP-AV (Universal Plug and Play - Audio Visual), DLNA (Digital Living Network Alliance) or Windows Media Connect standard.
Change password All users can change their password. ATTENTION: If you change your password, you will have to update all backup and sharing connections with your new password. Password Enter your new password in the Password box. Confirm Password Re-enter your new password in the Confirm Password box. Windows networking The administrator can control access through ICY BOX Mediaserver folders to private MyComputers and MyLibrary. Note that this setting does not control access to FamilyLibrary folders.
Workgroup name The Workgroup name box sets the name of the workgroup. The workgroup gives the computers on your home network access to the ICY BOX Mediaserver through Explorer/Finder, and to the USB printer optionally connected to the ICY BOX Mediaserver. Registration The administrator can change the name of the ICY BOX Mediaserver. The service provider will automatically ensure the device name is unique, and will notify you if you need to try a different name.
Network services The administrator can control FTP access to the ICY BOX Mediaserver. For better security, disable FTP access unless you specifically require it. If FTP is enabled, you can use it to upload and download files in the MyLibrary folders. If your account provides access, you can also use FTP for files in the FamilyLibrary folders. See "Let user access family folder” on page 72.
LAN connection The administrator can set IP address information for ICY BOX Mediaserver. Obtain IP address automatically The Obtain IP address automatically list controls whether the ICY BOX Mediaserver obtains a dynamic IP address from the router. Yes - The ICY BOX Mediaserver automatically obtains a dynamic IP address from the router using DHCP. In most cases, use this setting. device No - The ICY BOX Mediaserver will use the static IP address entered into the Server IP address box.
DNS server 2 The DNS server 2 box sets the secondary domain name server. This is obtained automatically from your router's DHCP configuration, and is provided by your ISP. Server IP address The Server IP address box sets the static IP address for the ICY BOX Mediaserver. Obtain the static IP address from your ISP (Internet service provider), and use it to replace the dynamic IP address that appears in the box by default.
Date and time The administrator can set the date and time for the ICY BOX Mediaserver. Set date and time from the Internet The Set date and time from the Internet list controls where the ICY BOX Mediaserver obtains the date and time. Choices are: Yes - The ICY BOX Mediaserver obtains the date and time from NTP (network time protocol) servers. In most cases, use this setting. Selecting Yes enables the Internet Time Servers box.
Time The Time control sets the current time. Set the time using the up and down arrows after clicking the hour and minute. The Time control appears if Set date and time from the Internet is set to No. Country The Country list allows you to select your country. City The City list allows you to select a city within your time zone. Add new user The administrator can add new users. This way each user in your family can have their own MyLibrary folders.
Confirm Password Re-enter the password in the Confirm Password box. Create as Administrator Selecting the Create as Administrator check box gives the user administrator permissions. The default setting denies administrator permissions. A user with administrator permissions has access to all the preferences. A user without administrator permissions only has access to the User, Diskspace and Change Password preferences.
Display Name The optional Display Name box sets the name that will appear in the Main menu of the ICY BOX Mediaserver Application. The display name will also appear in the Albums page before the user's albums. If used, it must be at least three characters. Password The Password box sets the user's password. It must be at least six characters, and one of the characters must be a number. If you're editing your own administrator account, you must re-enter the password, even if you're not changing it.
Software updates The administrator can check for firmware updates to the ICY BOX Mediaserver. To check for firmware updates, click the Check Now button. If there are no updates, Your ICY BOX Mediaserver is up-to-date appears. RAID The administrator can check the status of the RAID array, and can eject the hard drives. The ICY BOX Mediaserver can operate with one or two drives (if 2nd HDD is connected via eSATA).
The second drive is a different size from the original drive. If the second drive is smaller, it cannot be added to the RAID array. If the second drive is larger, it can be added to the RAID array, but the additional space will be wasted. In these cases, the following message will appear. Click OK, and then navigate to Preferences > RAID. Adding a used drive If the drive isn't blank, the ICY BOX Mediaserver Application will display the following message. Click Yes to delete the data.
to change from In RAID to Unused. You can then physically remove the drive from the ICY BOX Mediaserver. CAUTION: Removing a hard drive that is powered up and In RAID may cause data loss or corruption. USB You can use an external device that uses a USB port to upload or download content to and from your ICY BOX. 1. Plug the USB device into the front USB port of your ICY BOX. 2. From the MediaLibrary, you will see the device and any folders and files within the device. 3.
1. To use this feature, go to Preferences > Administration > Computers Backup. 2. Check the box to enable the feature. 3. Enter a password that will be used with Windows Backup or Time Machine. 4. Click the Submit button if this is a new password or the Reset button if you are changing your password. 5. To erase all existing backups, click the Wipe button.
ICY BOX Mediaserver Folders ICY BOX Mediaserver Folders lets you use Microsoft Explorer or Mac Finder to work with content in your ICY BOX Mediaserver. This way you can manage your files in a familiar environment, and can upload files greater than 2 GB. This application prompts you to log in (if necessary), opens Windows Explorer or Mac Finder, and then shows your FamilyLibrary, MyLibrary and MyComputers folders within a network drive.
Available folders FamilyLibrary The FamilyLibrary folder contains the FamilyDocuments, FamilyMusic, FamilyPhotos and FamilyVideos subfolders. Your family shares these folders, so they are accessible to all users. Note that all users can access the FamilyLibrary folders through Explorer/Finder, even if access is blocked or Windows networking is disabled. See "Let user access family folder" on page 72, and "Windows networking" on page 64.
Other iTunes Computers can use iTunes to access music stored in the iTunes library on the ICY BOX Mediaserver. These iTunes clients must be connected to the same home network as the ICY BOX Mediaserver. They cannot access the iTunes library remotely across the Internet. Adding songs to the iTunes library The ICY BOX Mediaserver can stream music from the iTunes library to the iTunes clients on your home network. Adding songs to the iTunes library makes them available to the iTunes clients.
Playing songs with an iTunes client Music files stored on the ICY BOX Mediaserver appear in the SHARED > ICY BOX Mediaserver: iTunes folder. You can play these songs within iTunes, but you cannot add them to a playlist. Pictures, videos and documents stored on the ICY BOX Mediaserver are not available within iTunes. Up to five iTunes clients on your home network (i.e.
When logging in, the user name and password are case-sensitive. FTPS [Premium Feature] FTPS is similar to FTP, but provides additional security. To use FTPS, configure your FTP client to use FTPS instead of FTP. ICY BOX Mediaserver Pictures Wizard The ICY BOX Mediaserver Pictures Wizard uploads images directly to the ICY BOX Mediaserver. It starts when you attach a digital camera to your PC. It also starts if you insert a memory card into your PC.
Appendixes Specifications Basic Services Manage your media with a fast and easy to use browser interface View select shared content while away from home Send a slideshow to friends or into a facebook account Backup Mac and PC systems to a safe location Play content on a TV (through a DLNA-connected device like media player, Xbox360 or PlayStation). Additional Services ICY BOX Premium Services add an array of additional accessibility options! For a $19.
Copyrights and Trademarks Copyrights All rights reserved. No part of this manual may be reproduced, or transmitted in any form or by any means, whether by electronically or mechanically, without the express written permission from the copyright holder. Copyrighted materials, such as software, music files, or movies, are protected by local law, and may not be illegally copied or used without permission from the copyright owner.
GNU GENERAL PUBLIC LICENSE Version 2, June 1991 Copyright(C) 1989, 1991 Free Software Foundation, Inc. 51 Franklin Street, Fifth Floor, Boston, MA 02110-1301, USA Everyone is permitted to copy and distribute verbatim copies of this license document, but changing it is not allowed Preamble The licenses for most software are designed to take away your freedom to share and change it.
Activities other than copying, distribution and modification are not covered by this License; they are outside its scope. The act of running the Program is not restricted, and the output from the Program is covered only if its contents constitute a work based on the Program (independent of having been made by running the Program). Whether that is true depends on what the Program does. 1.
b) Accompany it with a written offer, valid for at least three years, to give any third party, for a charge no more than your cost of physically performing source distribution, a complete machine-readable copy of the corresponding source code, to be distributed under the terms of Sections 1 and 2 above on a medium customarily used for software interchange; or, c) Accompany it with the information you received as to the offer to distribute corresponding source code.
If any portion of this section is held invalid or unenforceable under any particular circumstance, the balance of the section is intended to apply and the section as a whole is intended to apply in other circumstances.
12.