
User's Manual
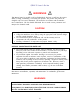

Table Of Contents
- 1. Standard Contents
- 2. General Information
- 3. User Interface
- 4. Wireless Control And Submenus
- 5. Battery
- 6. Turning The QRAE 3 On And Off
- 7. Modes Of Operation
- 8. Programming
- 8.
- 8.3.2.1. Multi Bump
- 8.3.2.2. Multi Zero
- 8.3.2.3. Multi Span
- 8.3.2.4. Single Bump
- 8.3.2.5. Single Zero
- 8.3.2.6. Single Span
- 8.3.2.7. Set LEL Cal. Gas
- 8.3.2.8. Set Span Value
- 8.3.3. Measurement
- 8.3.4. Datalog
- This operation erases all data stored in the datalog.
- Note: Once the datalog is cleared, the data cannot be recovered.
- Data Selection allows you to select which types of data are stored and made available when you download your datalog to a computer via ProRAE Studio II (version 1.7.0 or higher) software.
- You can choose any or all of four types of data (you must choose at least one):
- Minimum
- Average
- Maximum
- Real Time
- The instrument offers two options for starting the datalogging process:
- Auto Automatically collects datalog information every time the instrument is sampling until the datalog memory is full.
- Manual Datalogging occurs only when you manually initiate it (see below for details).
- When the instrument is set to Manual Datalog, you can turn datalogging on and off by repeatedly pressing [MODE] and stepping through the screens from the main display until you reach the screen that says “Start Datalog?”
- When you reach the screen that says “Start Datalog?” press [Y/+] to start it. You see “Datalog Started,” confirming that datalogging is now on.
- If datalogging is running, it says, “Stop Datalog?” Press [Y/+] to stop datalogging. Otherwise, press [MODE] to advance to the next screen.
- Date Month (MM) and Day (DD) have two digits each, while the year (YYYY) uses four digits.
- The display’s contrast can be increased or decreased from its default setting. You may not need to ever change the default setting, but sometimes you can optimize the display to suit extreme temperature and ambient brightness/darkness conditions.
- If the QRAE 3 is equipped with a pump, the pump can operate at two speeds, high and low. Running at low speed is quieter, extends pump lifespan, and conserves a small amount of power. There is almost no difference in sampling accuracy. Note: High spee...
- Choose and enter an 8-digit Site ID to uniquely identify the particular site where the instrument is to be used. The first four digits can be an alphabet letter or number, while the last four digits can only be numbers. This Site ID is included in the...
- Note: Advance through the alphabet and numbers (0 through 9) by one with each press of the [Y/+] key. To scroll quickly, hold down the [Y/+] key for as long as you want it to scroll rapidly. Save your changes by highlighting “OK” and pressing [Y/+].
- Enter an 8-digit alphanumeric User ID to uniquely identify a user. This User ID is included in the datalog report.
- Note: Advance through the alphabet and numbers (0 through 9) by one with each press of the [Y/+] key. To scroll quickly, hold down the [Y/+] key for as long as you want it to scroll rapidly. Save your changes by highlighting “OK” and pressing [Y/+].
- 9. Policy Enforcement
- 10. Calibration And Testing
- 10.1. Manual Alarms Test
- 10.2. Bump Testing And Calibration
- 10.3. Zero Calibration
- This operation sets the zero point of the sensor calibration curve for clean air. It should be performed before other calibrations.
- Note: If you use a zero air cylinder, you must use the QRAE 3 Calibration Adapter (and a T calibration tube if the instrument has a pump). Using a calibration adapter is not necessary for calibration in fresh air.
- 10.3.1. Zero Calibration
- 10.3.2. Single-Sensor Zero Calibration
- 10.4. Span Calibration
- 11. Datalog Transfer, Monitor Configuration, and Firmware Upgrades Via Computer
- 12. Maintenance
- 13. Alarms Overview
- In addition, the QRAE 3 alarms if one of the following conditions occurs: battery voltage low, pump blocked, etc.
- When the low battery alarm occurs, there may be approximately 10 minutes of operating time remaining. In this case, it is recommended that you promptly change or charge the battery in a non-hazardous location.
- Testing Alarms
- 14. Troubleshooting
- 15. Diagnostic Mode
- 16. Specifications
- 17. Controlled Part of the Manual for PGM-25XX/D
- Caution:
- Refer to RAE Systems Technical Note TN-114 for LEL sensor cross-sensitivities.
- Refer to RAE Systems Technical Note TN-144 for LEL sensor poisoning. Turning the PGM-25XX/D On
- Turning the PGM-25XX/D Off
- Alarm Signals
- The instrument is equipped with audible, visible, and vibration alarms. During its normal operation, the PGM-25XX/D compares gas concentrations to the programmed alarm limits for Low, High, TWA and STEL alarms. If the concentration exceeds any of the ...
- When a low-battery alarm occurs, there may be approximately 20 to 30 minutes of operating time remaining. However, it is recommended that you promptly change or charge the battery in a non-hazardous location.
- Testing Alarms
- Turning the PGM-25XX/D Off
- Programming Menu
- Zero Calibration
- Battery Replacement
- 18. Technical Support
- 19. RAE Systems Contacts
QRAE 3 User’s Guide
3
CAUTION
This device complies with Part 15 of the FCC Rules / Industry Canada license-exemp t
RSS standard(s). Operation is subject to the following two conditions: (1) this device may
not cause harmful interference, and (2) this device must accept any interference received,
including interference that may cause undesired operation.
Le présent appareil est conforme aux CNR d'Industrie Canada applicables aux
appareils radio exempts de licence. L'exploitation est autorisée aux deux conditions
suivantes : (1) l'appareil ne doit pas produire de brouillage, et (2) l'utilisateur de
l'appareil doit accepter tout brouillage radioélectrique subi, même si le brouillage est
susceptible d'en compromettre le fonctionnement.
Changes or modifications not expressly approved by the party responsible for compliance
could void the user's authority to operate the equipment.
This equipment has been tested and found to comply with the limits for a Class B digital
device, pursuant to part 15 of the FCC Rules. These limits are designed to provide
reasonable protection against harmful interference in a residential installation. This
equipment generates uses and can radiate radio frequency energy and, if not installed and
used in accordance with the instructions, may cause harmful interference to radio
communications. However, there is no guarantee that interference will not occur in a
particular installation. If this equipment does cause harmful interference to radio or
television reception, which can be determined by turning the equipment off and on, the
user is encouraged to try to correct the interference by one or more of the following
measures:
• Reorient or relocate the receiving antenna.
• Increase the separation between the equipment and receiver.
• Connect the equipment into an outlet on a circuit different from that to which the
receiver is connected.
• Consult the dealer or an experienced radio/TV technician for help.
Under Industry Canada regulations, this radio transmitter may only operate using an
antenna of a type and maximum (or lesser) gain approved for the transmitter by Industry
Canada. To reduce potential radio interference to other users, the antenna type and its
gain should be so chosen that the equivalent isotropically radiated power
(e.i.r.p.) is not more than that necessary for successful communication.
Conformément à la réglementation d'Industrie Canada, le présent émetteur radio peut
fonctionner avec une antenne d'un type et d'un gain maximal (ou inférieur) approuvé
pour l'émetteur par Industrie Canada. Dans le but de réduire les risques de
brouillage radioélectrique à l'intention des autres utilisateurs, il faut choisir le type
d'antenne et son gain de sorte que la puissance isotrope rayonnée équivalente
(p.i.r.e.) ne dépasse pas l'intensité nécessaire à l'établissement d'une communication
satisfaisante.