
User's Manual Part 1
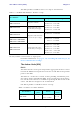
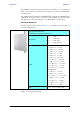

Table Of Contents
- Table of Contents
- List of Figures
- List of Tables
- Chapter 1
- Chapter 2
- Chapter 3
- Chapter 4
- Link Installation: The RADWIN Manager
- Installing theRADWIN Manager Application
- Starting the RADWIN Manager
- Login Errors
- Continuing without an IP Address
- Installing the Link: First steps
- Installing the Link: Overview
- Installing the Link: Step 1, Start the Wizard
- Installing the Link: Step 2, System Parameters
- Installing the Link: Step 3, Channel Settings
- Installing the Link: Step 4, Tx Power and Antenna Settings
- Installing the Link: Step 5, Services
- Installing the Link: Step 6, Installation Summary and Exit
- Link Installation: The RADWIN Manager
- Chapter 5
- Configuring the Link
- Link Configuration: Getting Started
- Configuring the Link: Overview
- Configuring the Link: Step 1, Start the Wizard
- Configuring the Link: Step 2, System Parameters
- Configuring the Link: Step 3, Channel Settings
- Configuring the Link: Step 4, Tx Power and Antenna Settings
- Configuring the Link: Step 5, Services
- Configuring the Link: Step 6, Configuration Summary and Exit
- Configuring the Link

Accessories Chapter 1
RADWIN 1000/2000/5000 User ManualVersion 2.6.50p 1-13
Figure 1-13: RADWIN Manager screen
Accessories
RADWIN provides a variety of accessories to support the RADWIN 1000/
2000/5000 system:
•PoE devices
•AC Power Adaptor
• External Lightning Protection Unit
• Cables to connect the various system elements
Documentation set supplied with RADWIN 1000/2000/
5000
The technical documentation supplied with a RADWIN 1000/2000/5000
includes the following items:
• A Quick Start Guide for experienced installers
• A full User Manual - the document which you are reading