
Installation Guide
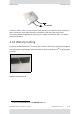

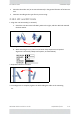
Table Of Contents
- Table of Contents
- Chapter 1: Introduction
- Chapter 2: Installation Steps
- 2.1 Prepare Laptop
- 2.2 Connect Laptop to Radio Unit
- 2.3 Update Connectivity Parameters of Radio Unit
- 2.4 Check items to be installed
- 2.5 Prepare Tools
- 2.6 Install Standard Mounting Kit
- 2.7 Install Mounting Kit for the SU PRO/AIR EMB
- 2.8 Mounting a Unit with the Standard Mounting Kit
- 2.9 Ground Radio Unit
- 2.10 Mounting the SU PRO/AIR EMB
- 2.11 Mounting the SU PRO/AIR INT
- 2.12 Mounting the Lightning Protection Units
- 2.13 Connect External Antenna (if applicable)
- 2.14 Waterproofing
- 2.15 Connect Radio (External Connections)
- 2.16 Check Connectivity to Radio
- 2.17 Activate Base Station
- 2.18 Align Subscriber Unit
- Chapter 3: Safety Practices and Provisions
- Appendix A: Wiring Specifications
- Appendix B: About Antennas
- Appendix C: Regional Notice: French Canadian
- Appendix A: Terminology
- Appendix E: Revision History
- Appendix F: Certified Antennas
- RADWIN Worldwide Offices

RADWIN5000InstallationGuide DQ0266610/A.01 2‐46
AlignSubscriberUnit InstallationSteps
• Fromalaptopinthefield:ConnectthelaptopandpowertothePoE,andconnect
thePoEtothebasestation(“IDU”forLFFandSFFunits,“PoEIn”forJETandDUO
units).
• FromtheNOC:KeepthePoEconnectedtotheLAN,andthePoEconnectedtothe
basestation.
• YoucanusetheSFPconnectionoftheJETDUOorJETAIR/PRO(labeled“LAN”)for
communicationsandmanagementpurposesonly.Butifyoudoso,youwi ll still
needtoconnectpowertothe“PoEIn”port.
2. ForLFF,SFF,andJETbasestations:
a. LogontotheRADWINManagerapplicationas“Installer”
b. EnterIPaddressofBaseStation(HBS),passwordwireless
c. FrommainwindowoftheRADWINManagerapplication,clickActivate.
d. Followwizardinstructionstoactivateradio.
3. ForJETDUOandJETAIR/PRObasestations:
a. EnteritsIPaddressinawebbrowser(defaultvalue:10.0.0.120).
b. Enterusernameadminandpasswordnetwireless.
c. FortheJETDUO,youmustactivateeachcarrierseparately.Forthefirstcarrier,click
ActivateunderCarrier1orCarrier2,whicheverisappropriateforyourdeployment
(therightpanelshowswhichcarrieruseswhichfrequencyband)
d. Forasingle‐carrierproduct(JETAIR/PROandJETPRO),clickthefar‐rightthree‐
buttonicon,andignoreinstructionsforthesecondcarrier:
e. Ent ertheSectorID,SectorNameandLocation.
f. ClickNext.
g. Theoperatingchannelandchannelbandwidthwillappear.Werecommendyouuse
thedefault values,butdependingonthespecificversionoftheproduct,thesecan
bechanged.NotethatfortheJETPRO,youchosethe operatingchannelfromthe
pull‐downmenu.
Ifitisavailableforyourproduct,werecommendyouselectAutomaticChannel
Selection.ClickNext.
h. Checktheparametervaluesinthiswindow,andchangeanythatneedtobe
changed.Onceyouaresurethevaluesarecorrect,clickActivate.
i. Repeattheaboveforthe othercarrier.
2.18AlignSubscriberUnit
• Makesurethesubscri berunit’sbasestationisactivated(checkwiththeNOC).